I spotted some gorgeous blue and white dip dye throw pillow covers on Etsy a while back and KNEW I had to have them. Unfortunately, they were out of stock in the size that I wanted. I figured I would try and DIY them.
SIDE NOTE: Here is a link to the original site and they do have a waitlist if you’re not into DIY or have some time to wait on them.
I wanted euro sized pillows and I already had some 26″ x 26″ fillers so I went with these pillow covers in the 24″ x 24″ size. See more info on my throw pillows rules and why I over stuff in this post. If we’re being honest, I actually ordered some different pillows to start with. Only, I was a dummy and didn’t check the fabric content. They were polyester but I didn’t figure it out until I had already left them in the dye for a couple hours… no returning those. I could’ve kicked myself.
A quick lesson in fabric content. Polyester is a synthetic fiber. Cotton is natural. Natural fabrics dye beautifully. You can dye them with kool-aid and fruit juice and red wine and all the things. They soak up color like a sponge. Synthetic fiber fabrics are the opposite. Think of it like doll hair that basically wont’ get wet because it might as well be plastic. So the first few images area actually me using the synthetic ones, but don’t worry. I followed the exact same protocol with the cotton ones and they worked like a DREAM!
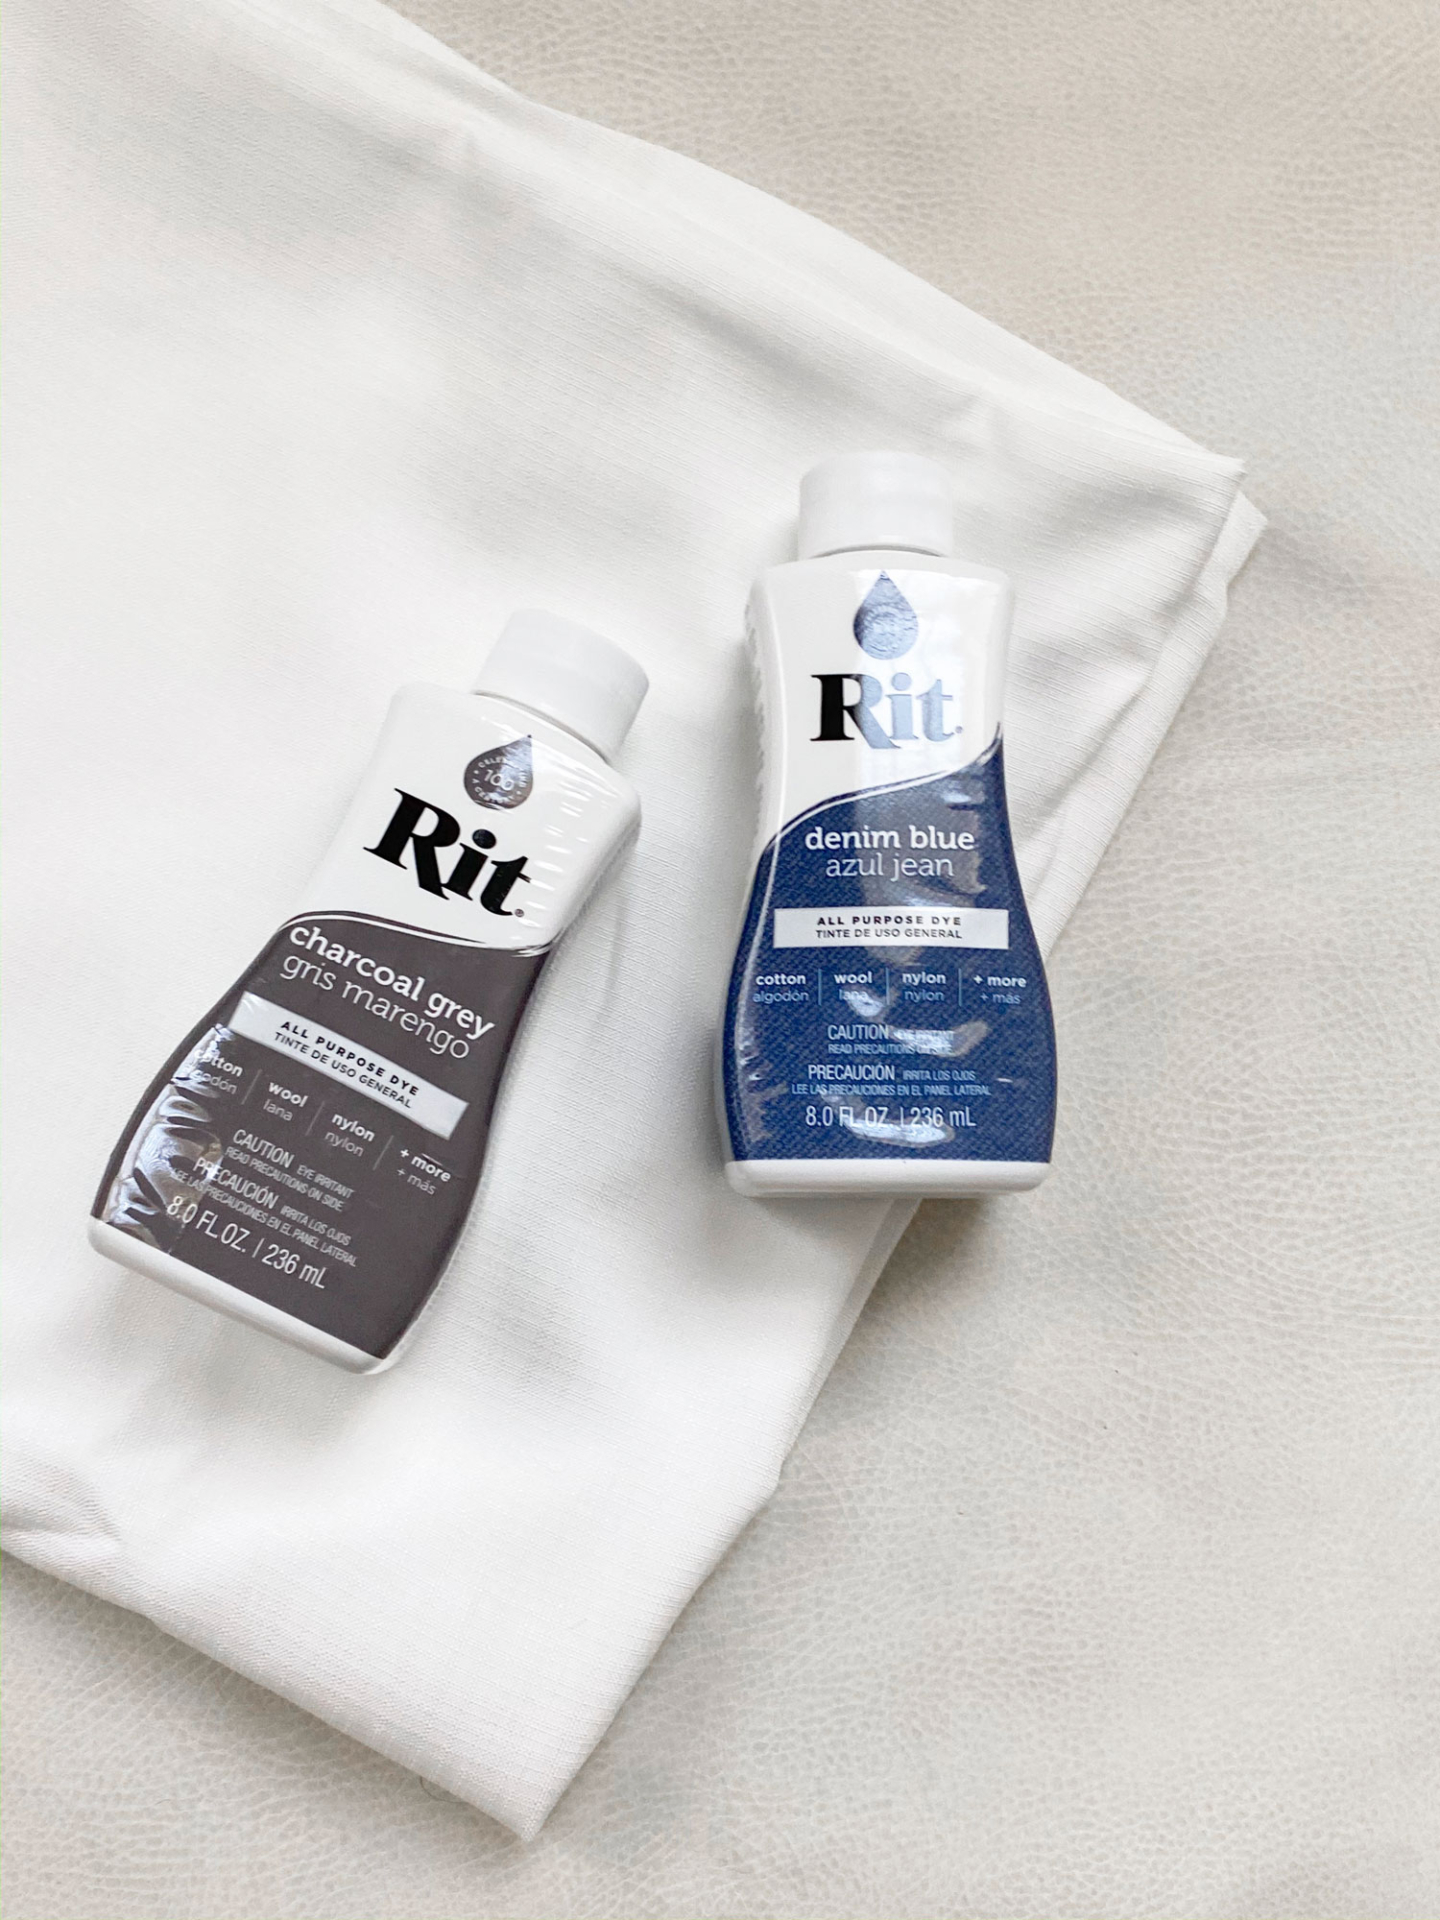
Other than the pillow shams, you’ll also need some fabric dye. I used Rit Dye which you can get for $3 at Walmart in most colors. They do have some specialty colors that you may need to order online. But Walmart is the place where I found it the cheapest for sure. For this one, I used the Denim Blue and Charcoal Gray colors.
You’ll also need some sort of plastic bin or bucket or something that holds water. I used an old plastic storage container that I got from the dollar store, I think. In a weird turn of events, I also needed a pony tail and a long piece of ribbon… HAHA! You’ll see why in a bit.
Step 1:

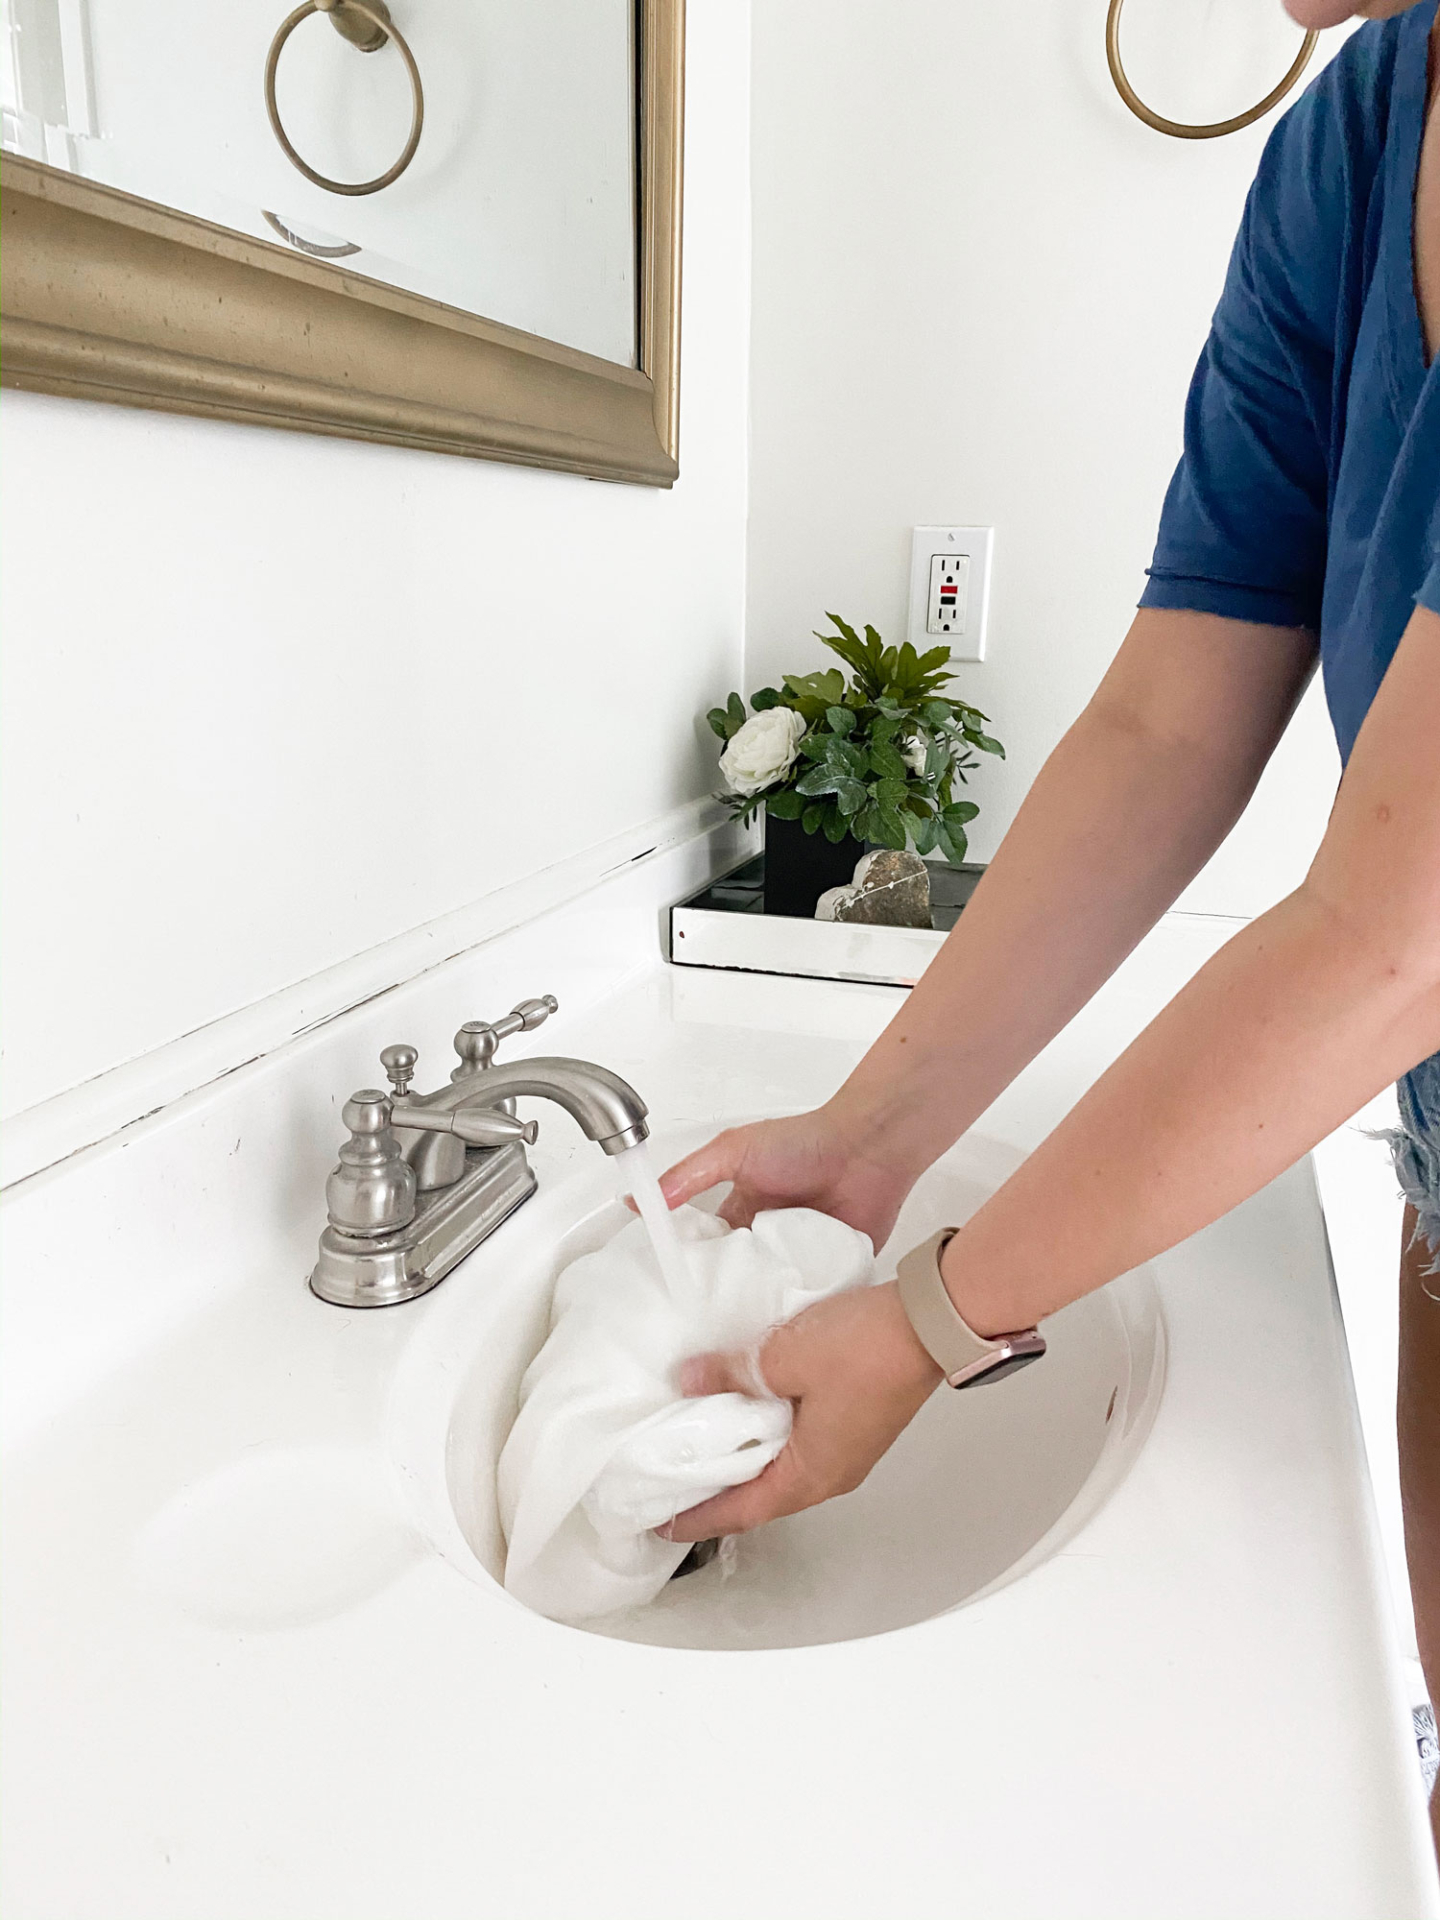
Assemble your supplies. Add some hot water to your plastic bin. I’m honestly terrible with measuring things out. All I can tell you is that I filled up the bin halfway. It took about 2 or 3 pitchers (you’re welcome for the accuracy).
I added 2 table spoons of the denim blue color and 1 of the charcoal gray to my water and mixed it up. Definitely do a test before you go all in. I had a scrap of white cotton laying around so I dipped it for a few minutes just to make sure the color was headed in the right direction.
Step 2:
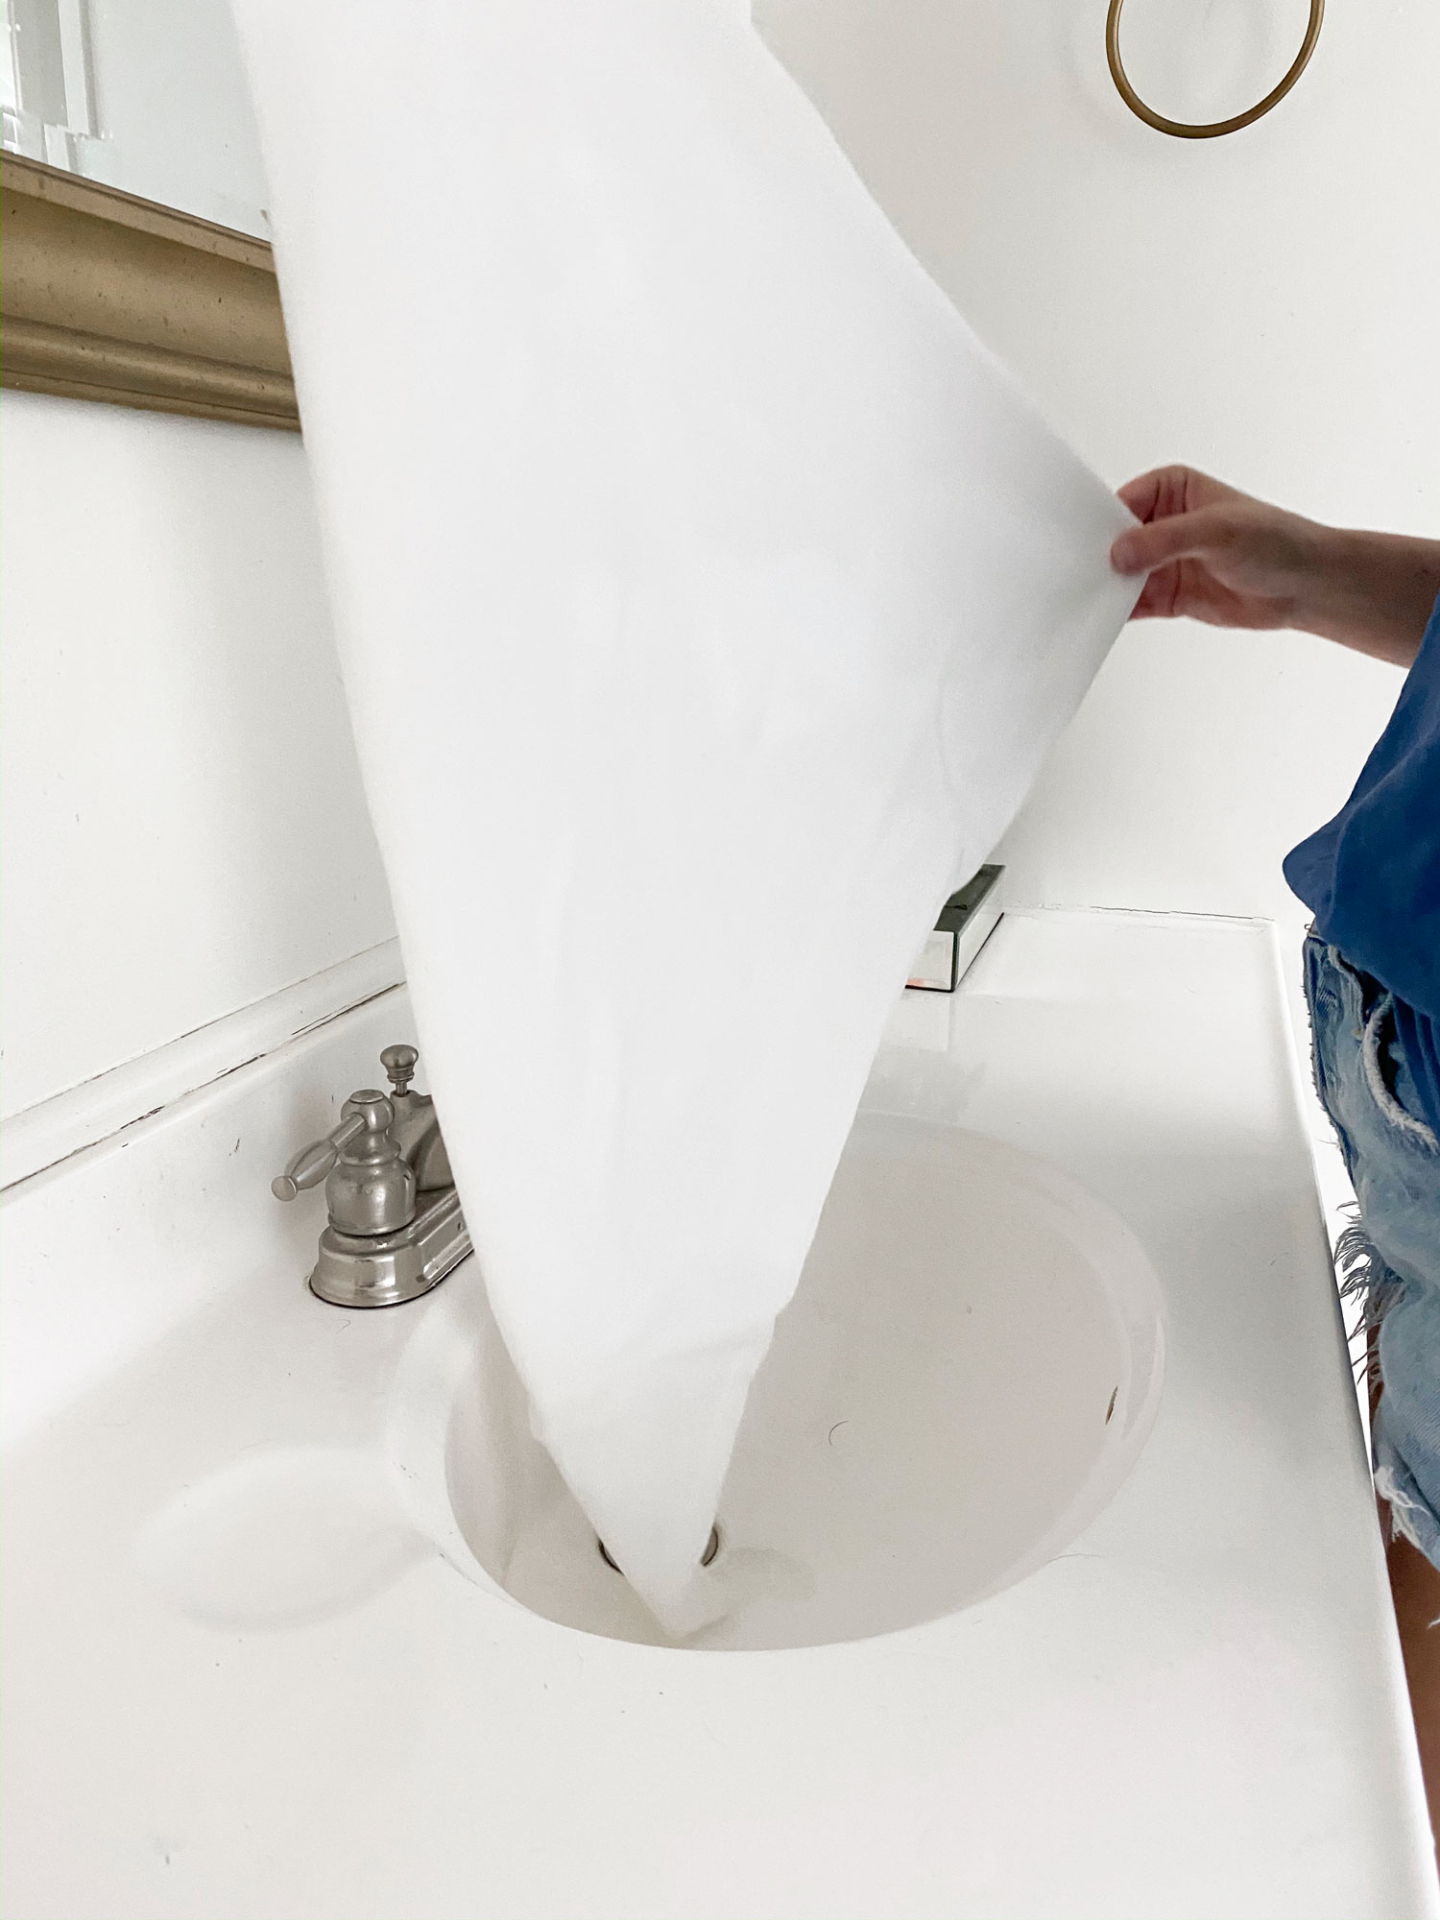
Soak your pillow shams really good with water and ring them out. You want them wet but not dripping. Then I folded mine over diagonally. Be mindful of where the zippers are. I just made sure that all of my zippers where going to be on the bottom and going into the dye. The zippers are black and so I figured even if I ended up turning them around, the blue would hide the black zipper better than the white.
Step 3:
This is the step where I had a bit of trial and error. So do as I say and not as I did the first time around. I learned my lesson and was able to fix this one the cotton shams.
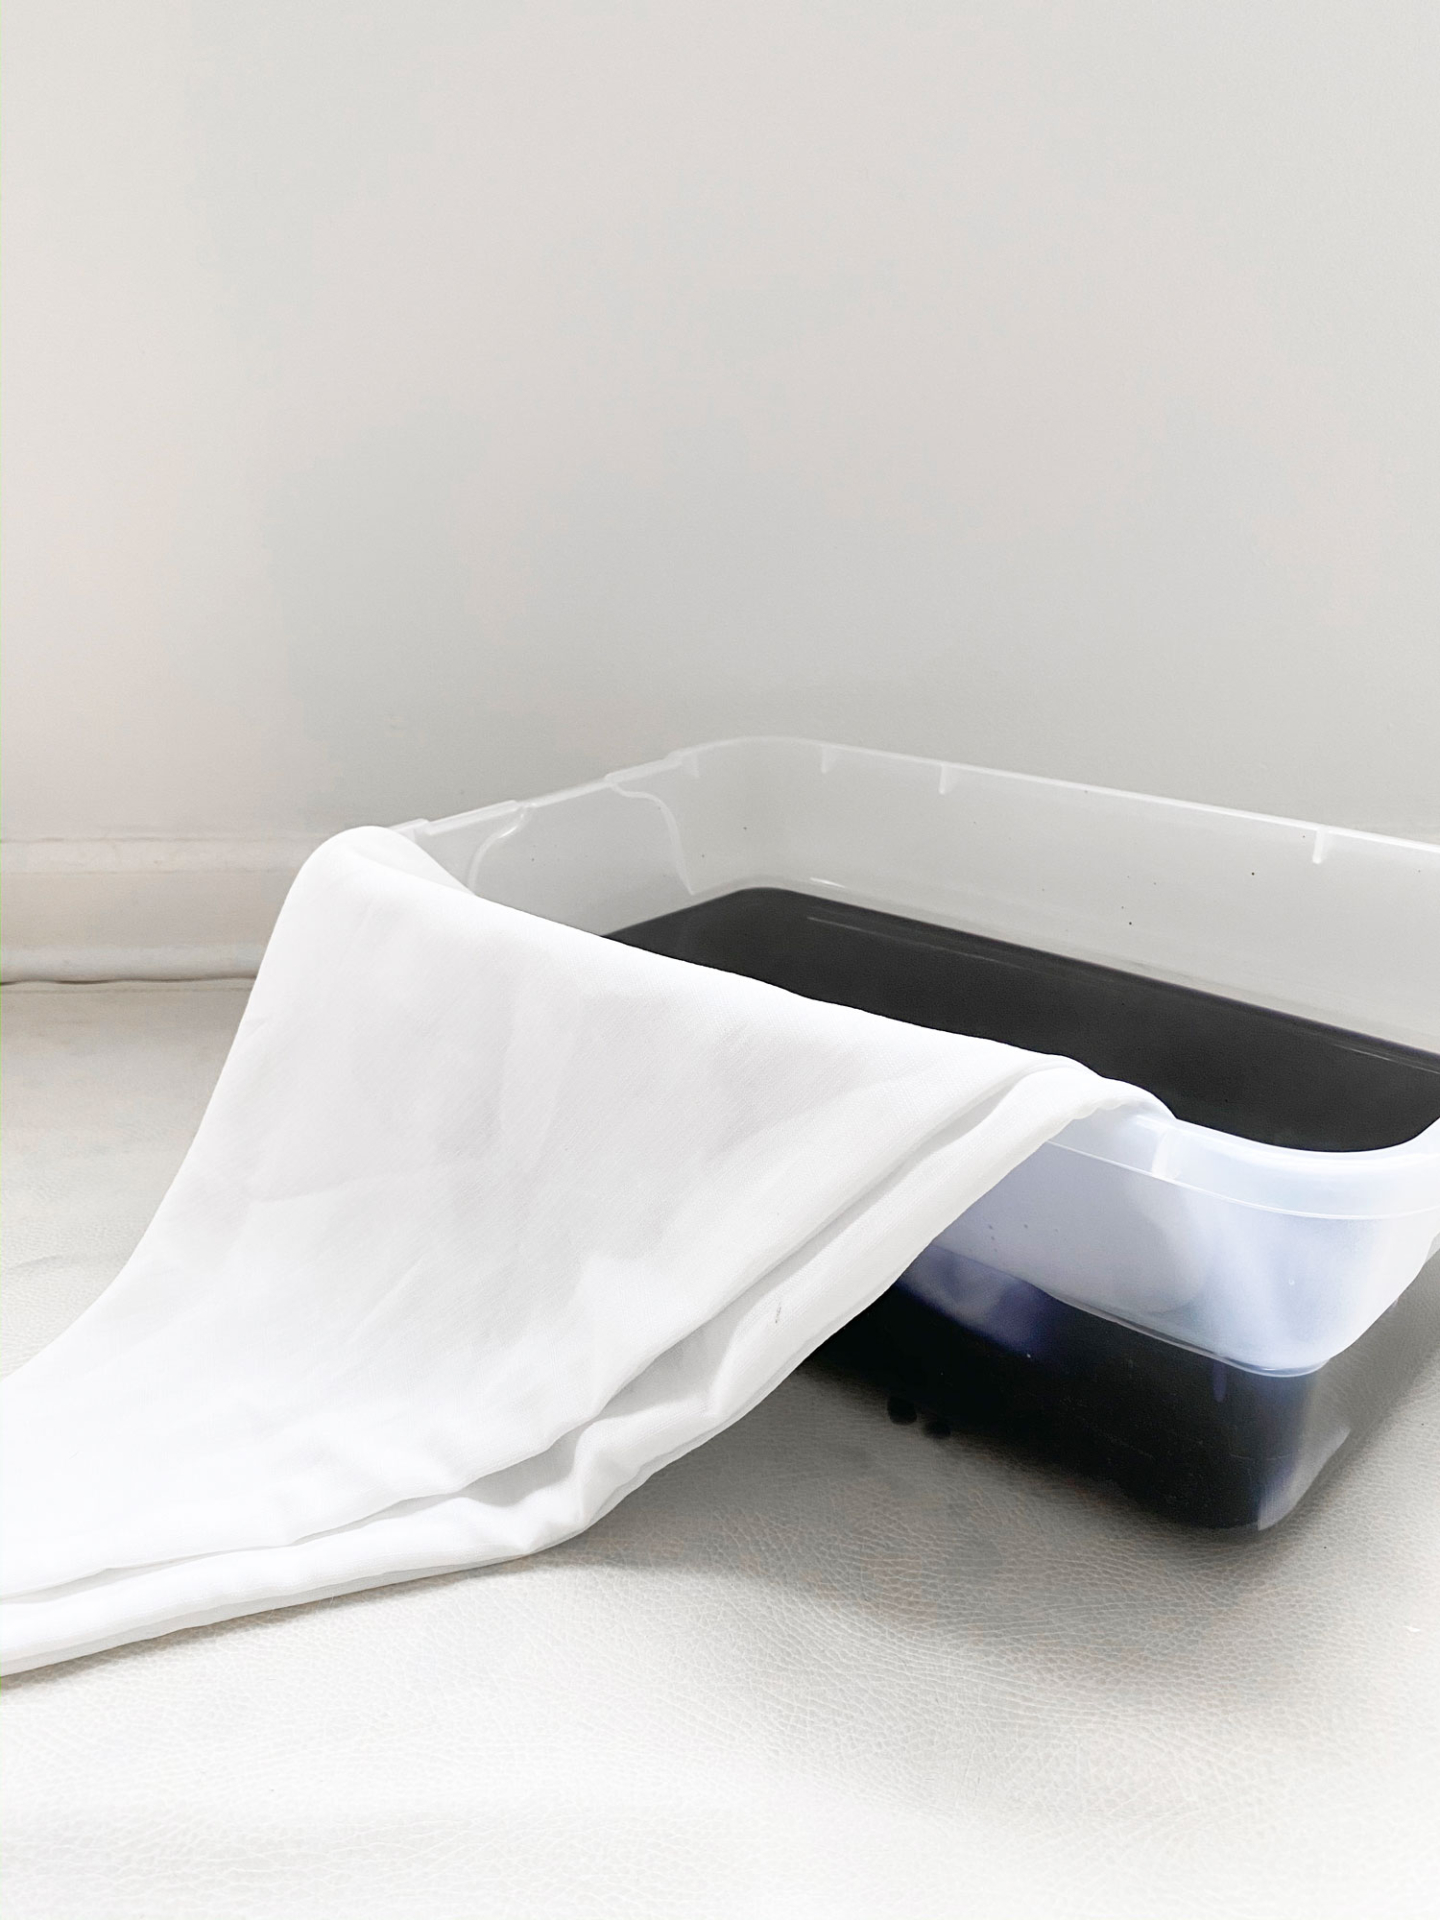
First, I lowered it into the dye so that half of the diagonally folded sham was submerged. I left side I wanted to stay white out and draped it over the side. See photo below for why this was a mistake.
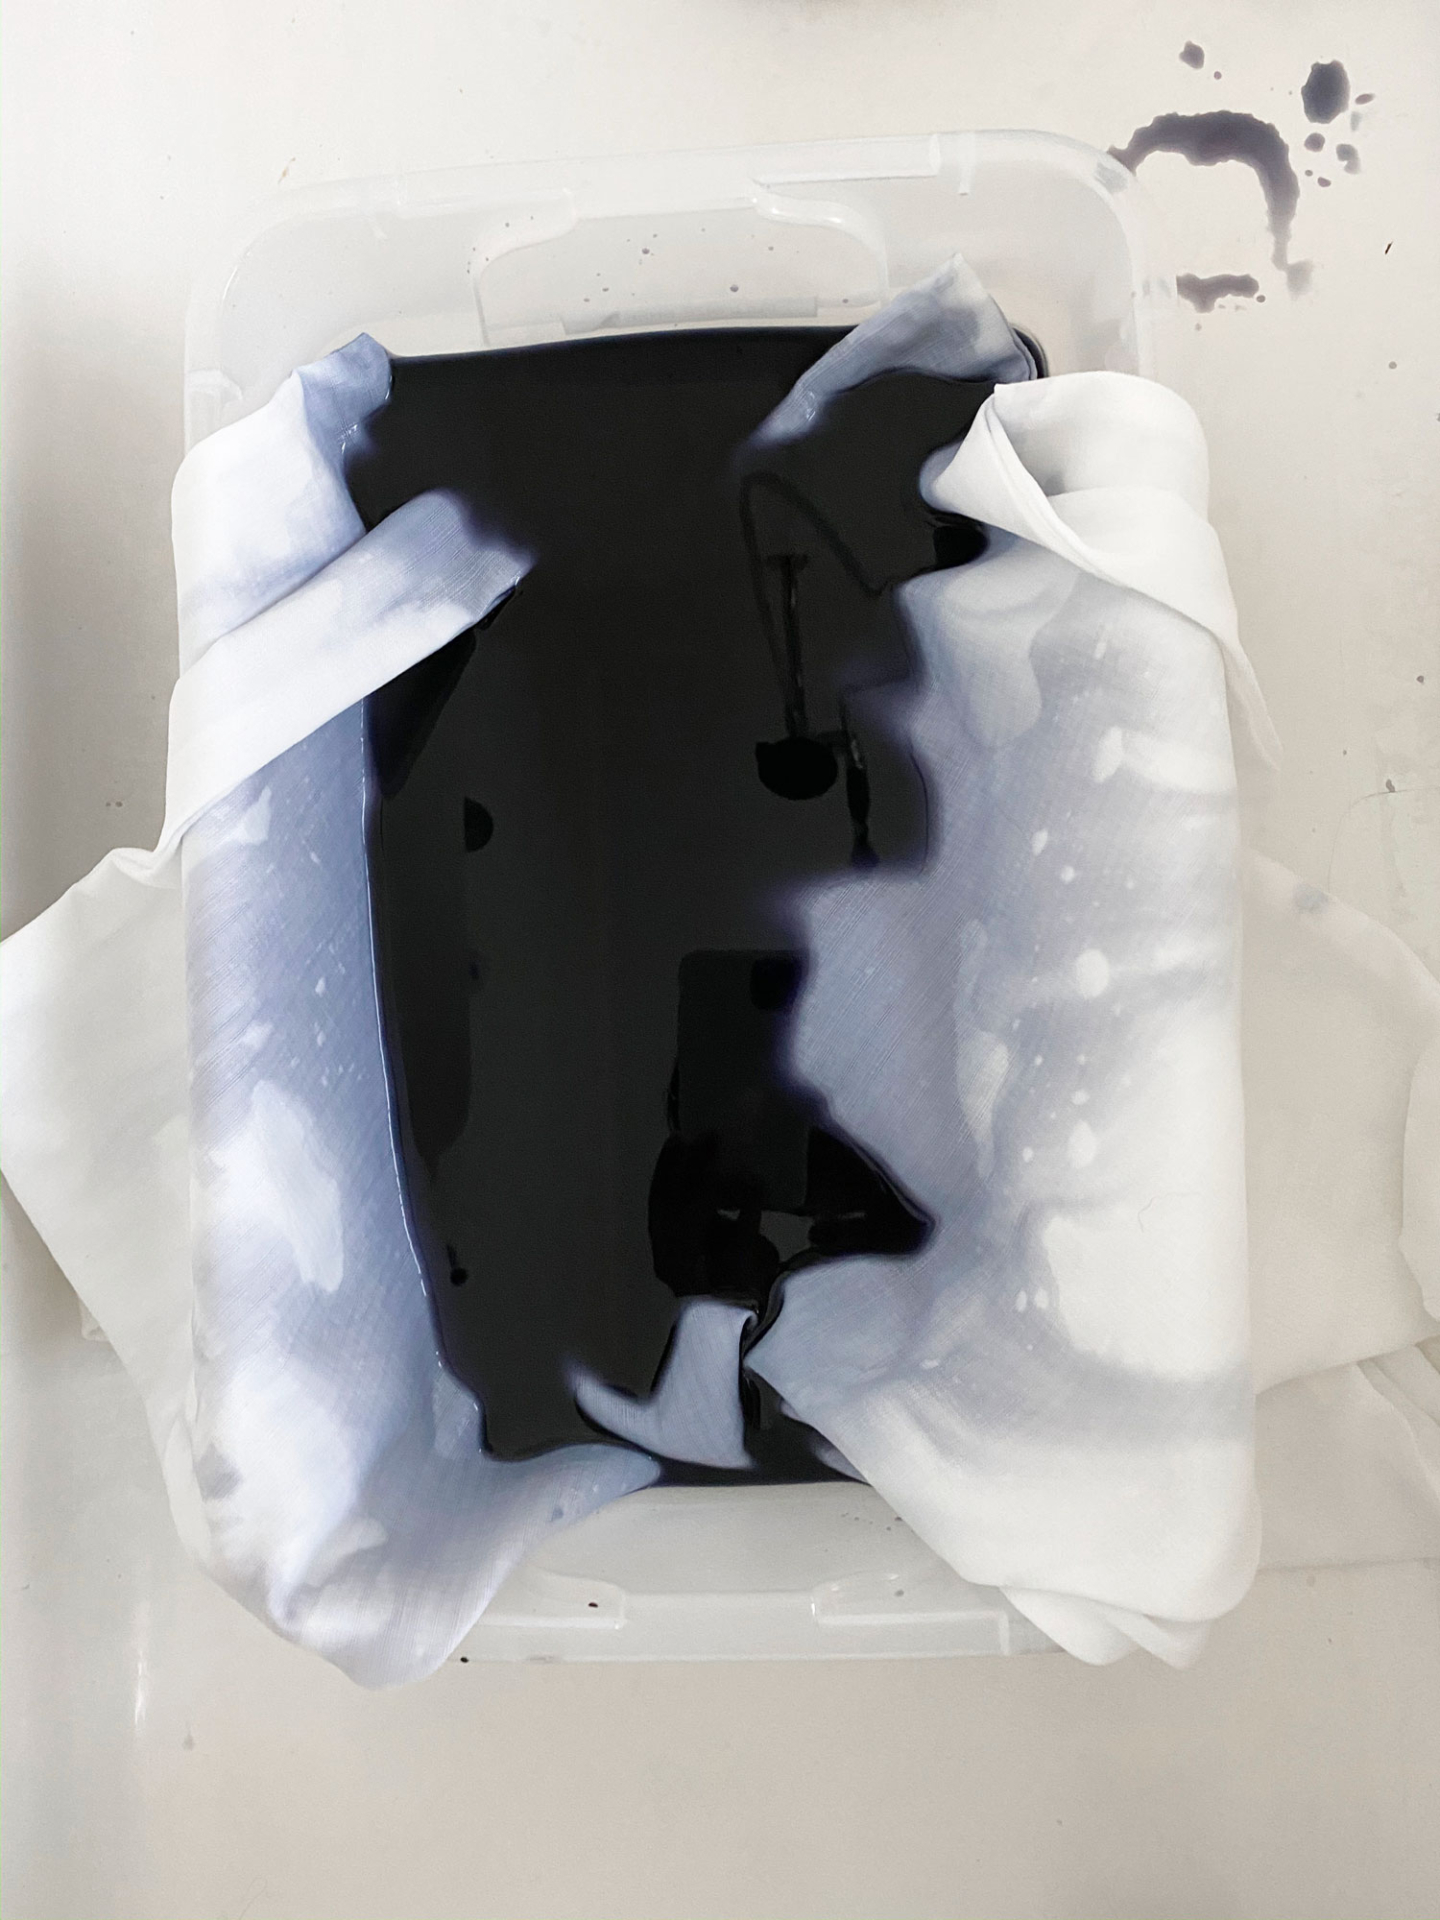
As you can see, the dye started to travel up my shams and down the other side. I knew that some bleeding would happen. I didn’t necessarily want my line to be perfectly defined, but this was too much, so I pulled them out, rinsed them and came up with the contraption you see below.
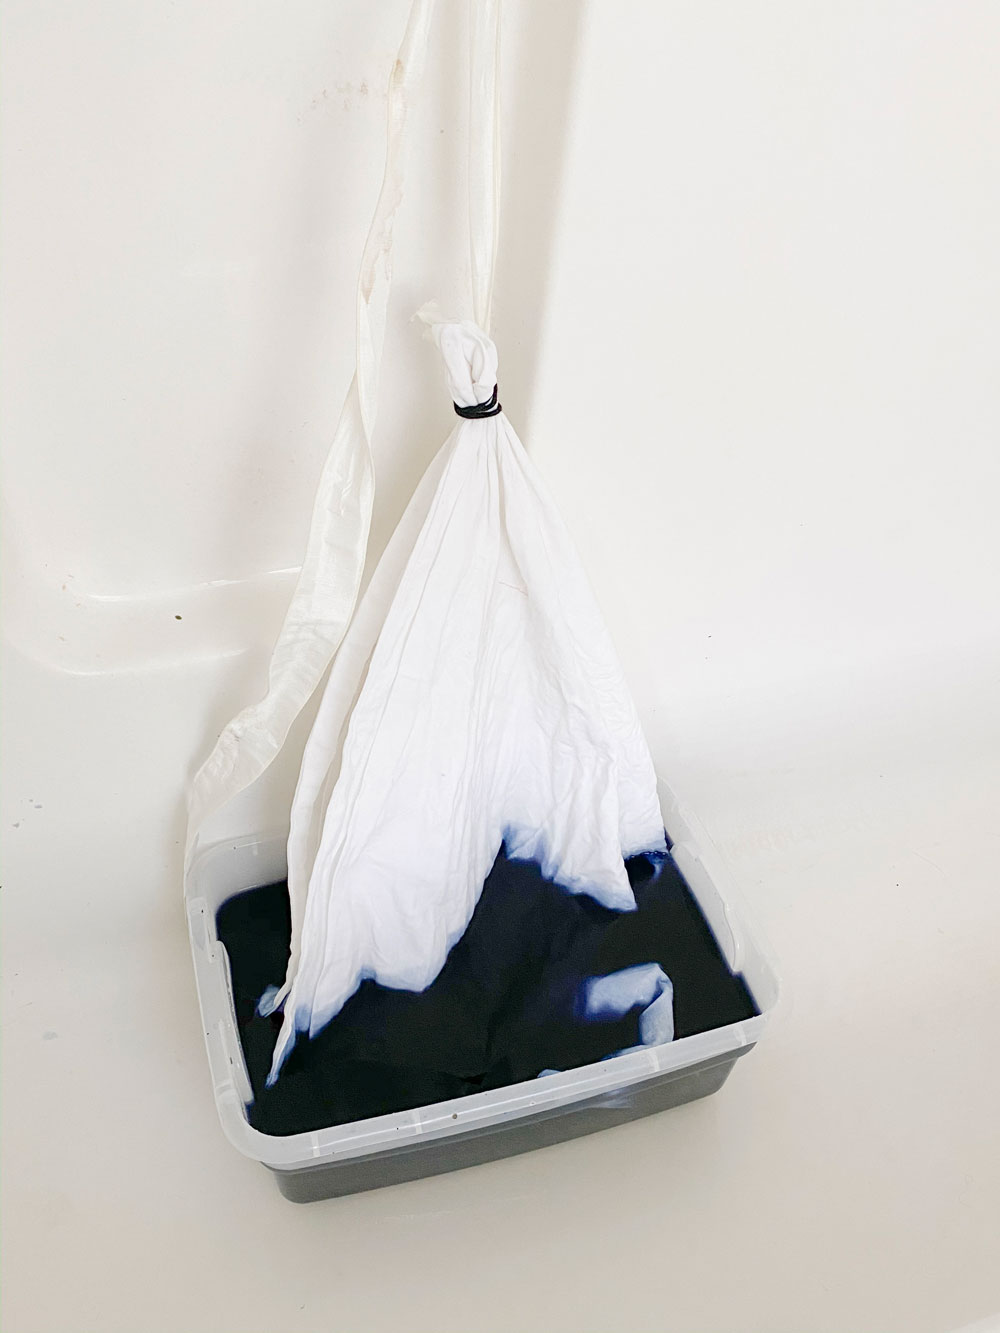
This is a photo of the cotton shams after having done it right and hung them up from the start. I used a ponytail and an old piece of ribbon. Very profesh. I tied the other end of the ribbon to the bar in my shower. The great thing about this was that I was able to easily raise and lower the shams as needed. I left them to soak for about and hour.
Then I removed them, rinsed them with cold water really well. Rinse until the water no longer runs blue. Then I popped the in the dryer on low heat with an old towel (to soak up any remaining dye).
Step 4:

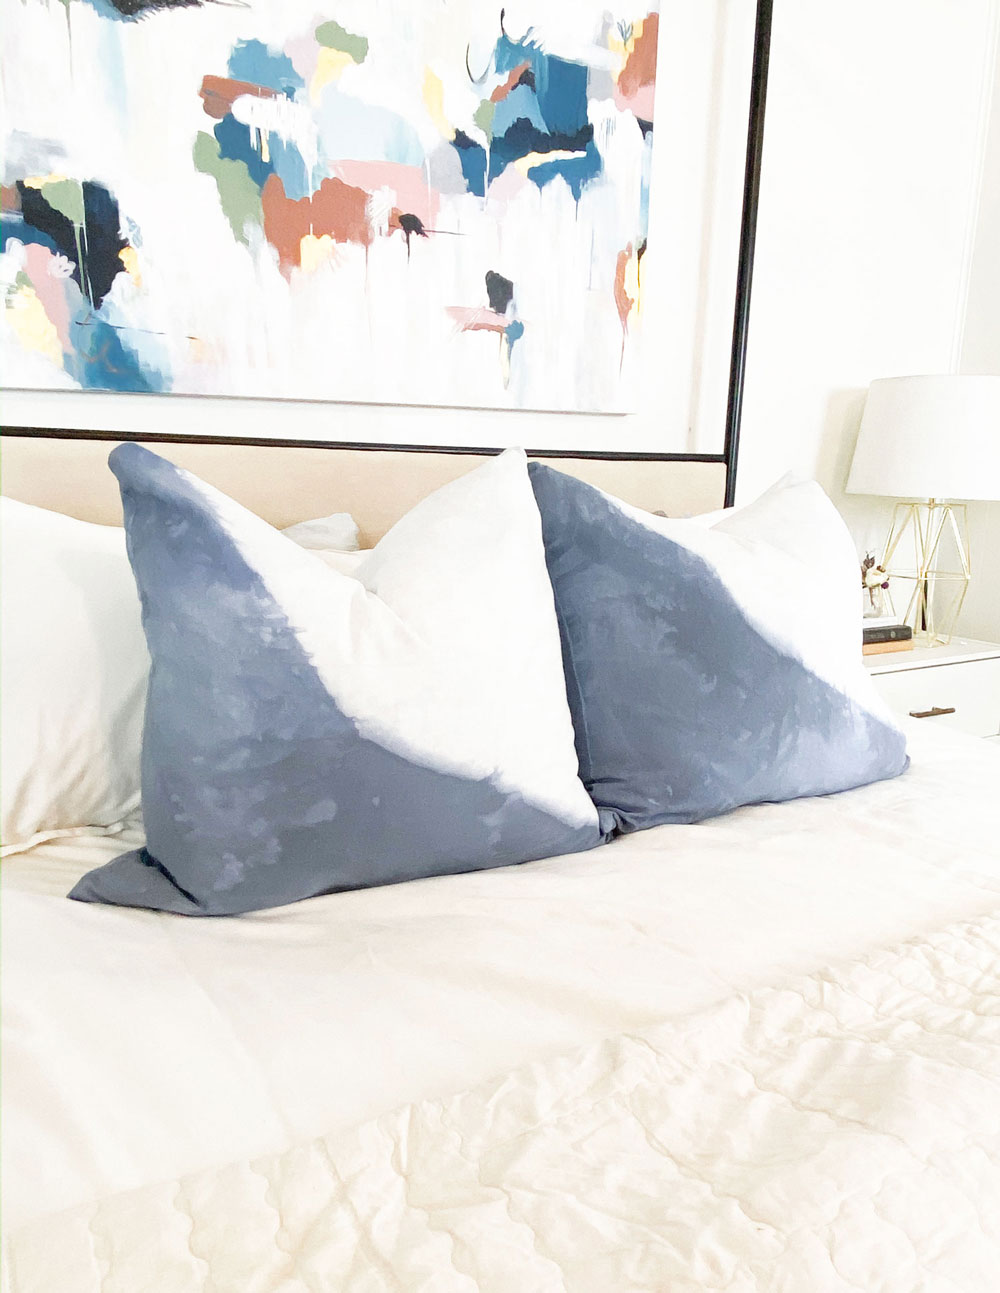
And that’s it! I stuffed them and put them straight on my bed. No problems with dye transfer so far. I also don’t plan on washing them unless there is a big spill or something. Since they’re just decorative on my bed, they don’t get a lot of use. But I’ll update you guys on how they hold up!
You’ve GOT to let me know if you try these!
I also filmed a few tiktok videos of my process, so you can watch those below as soon as I upload them (in the next few days) or you can follow me on Tiktok and see them there!
@kassyrandazzo Quick fix and they came out soooo good!! I’m even impressed with myself! 💁🏻♀️##part2 ##diy ##LegendaryChallenge ##homedecoronabudget ##homedecor
♬ Take Your Man – Mahogany LOX
@kassyrandazzo Quick fix and they came out soooo good!! I’m even impressed with myself! 💁🏻♀️##part2 ##diy ##LegendaryChallenge ##homedecoronabudget ##homedecor
♬ Take Your Man – Mahogany LOX