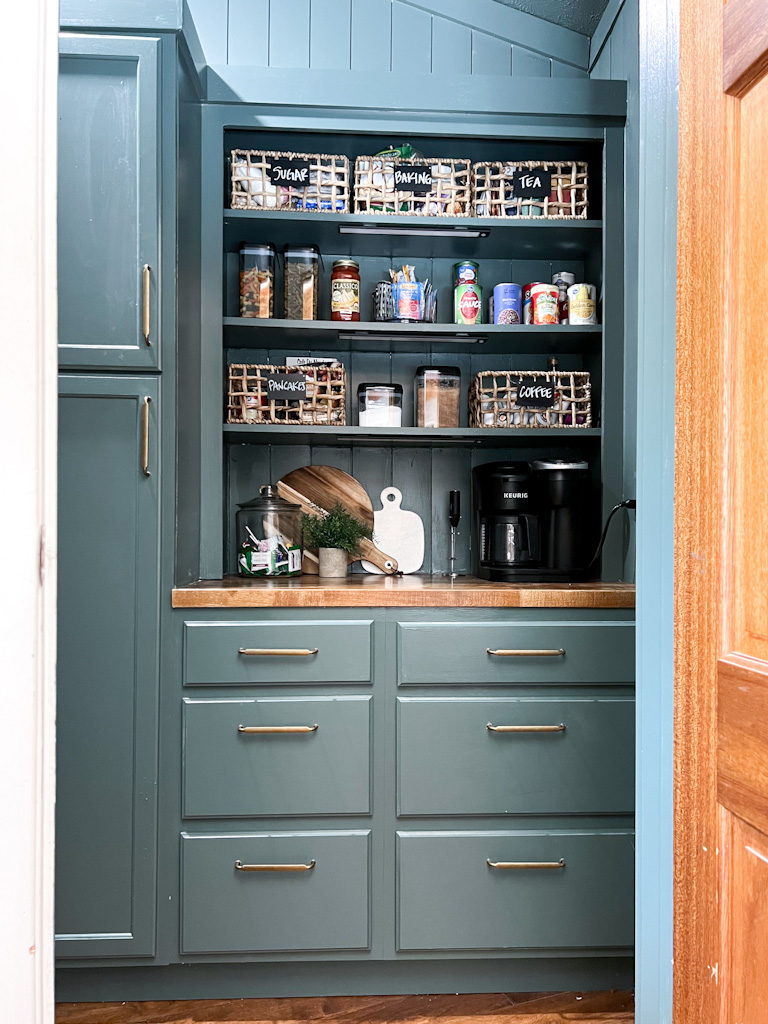
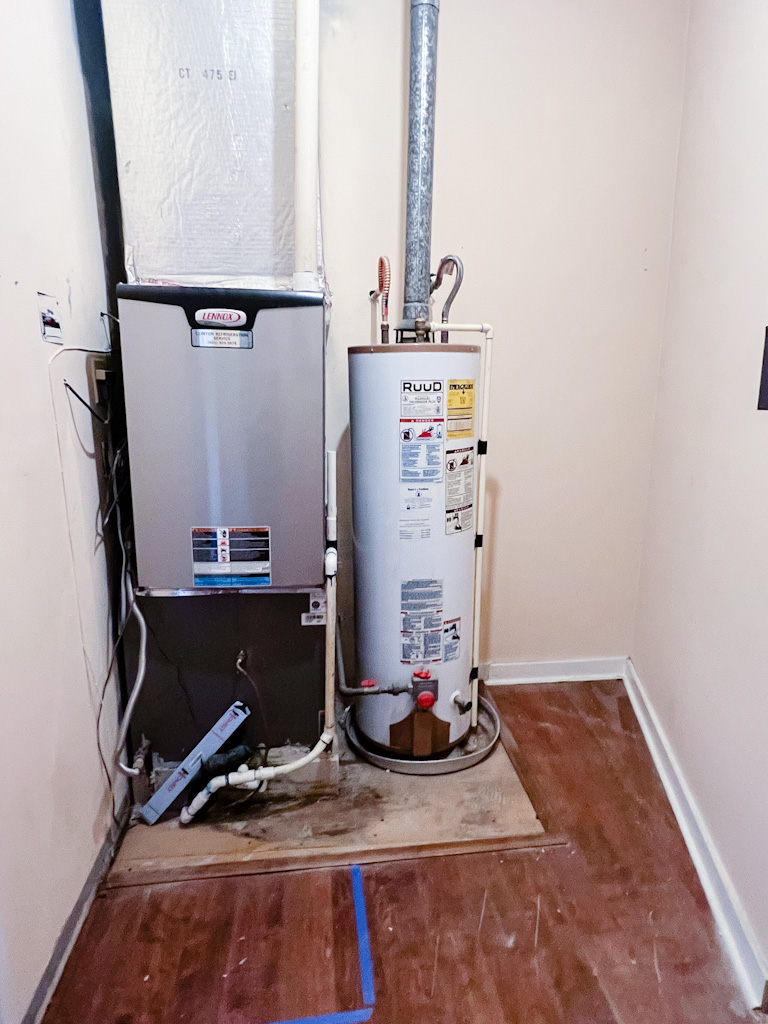
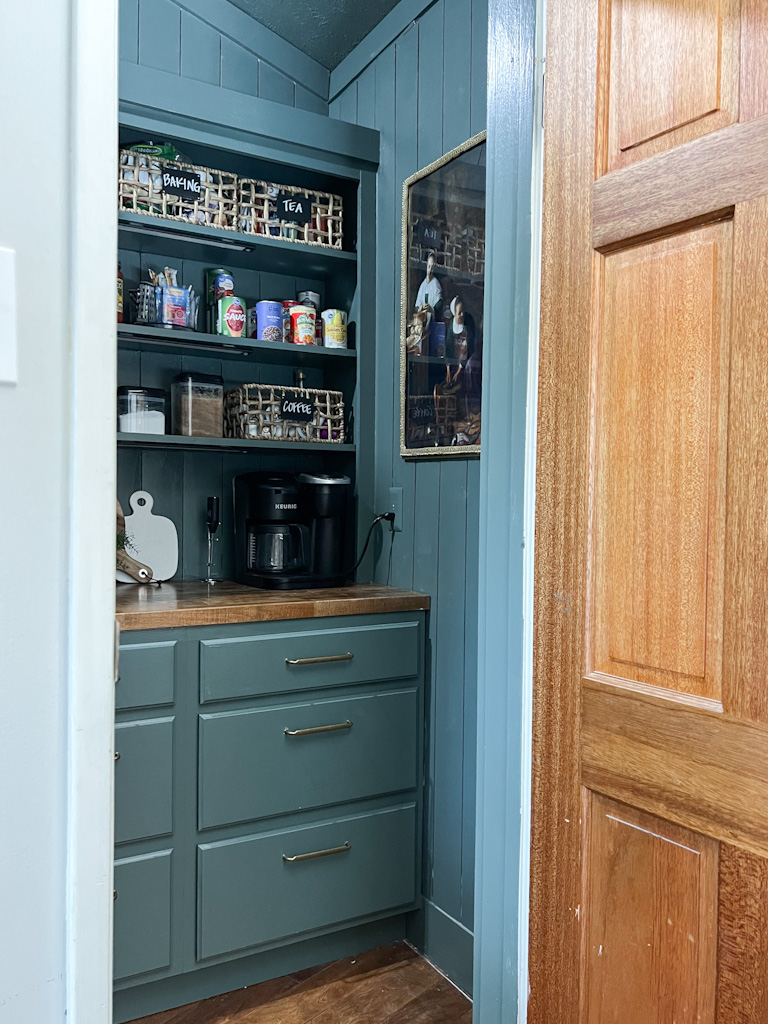
Here she is! My pretty new pantry. If you haven’t read about the process of designing this space, you might want to read this post. It will help explain my though process behind the whole design. When we moved in, I knew that they current laundry space would NEVER suffice. And since moving the laundry wasn’t a great option, expanding it was my best bet. That meant I have to move the current pantry. Luckily, this open closet across the hall was the Perfect DIY Pantry location.
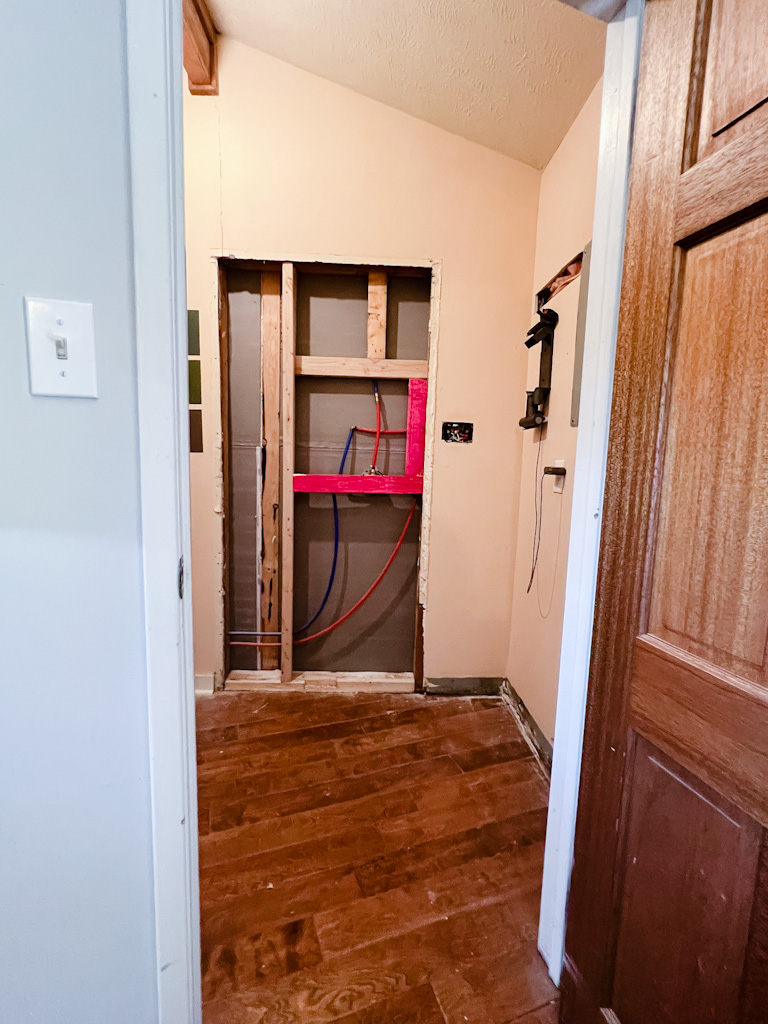
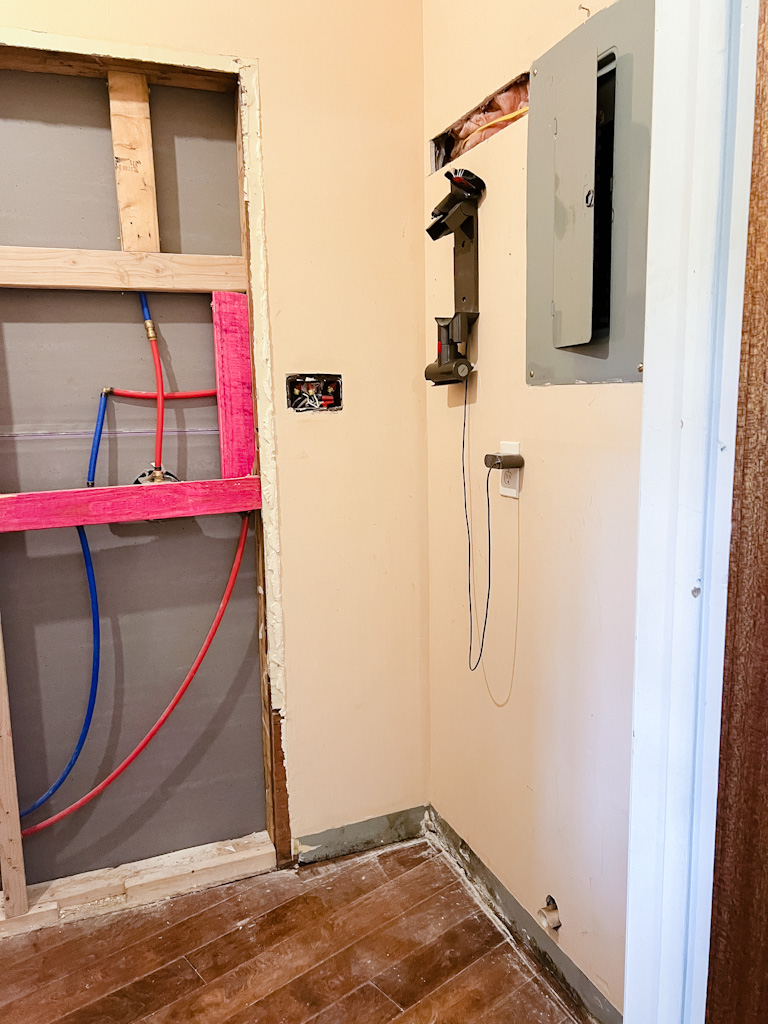
Here is a before photo in case you don’t remember where we started!
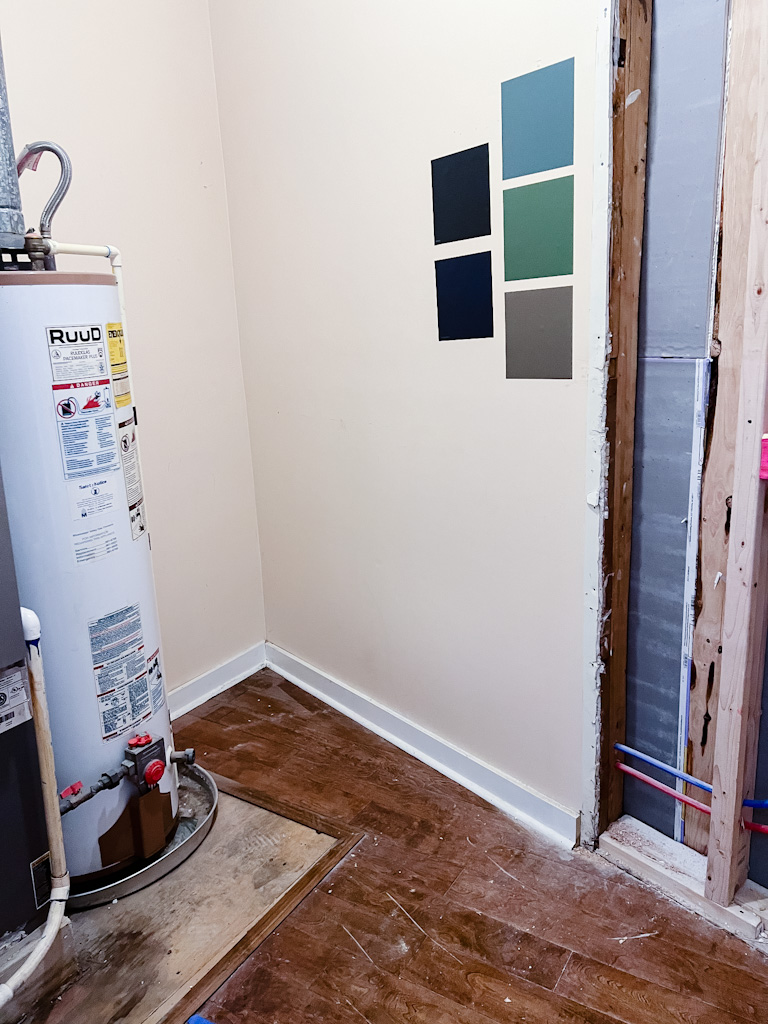
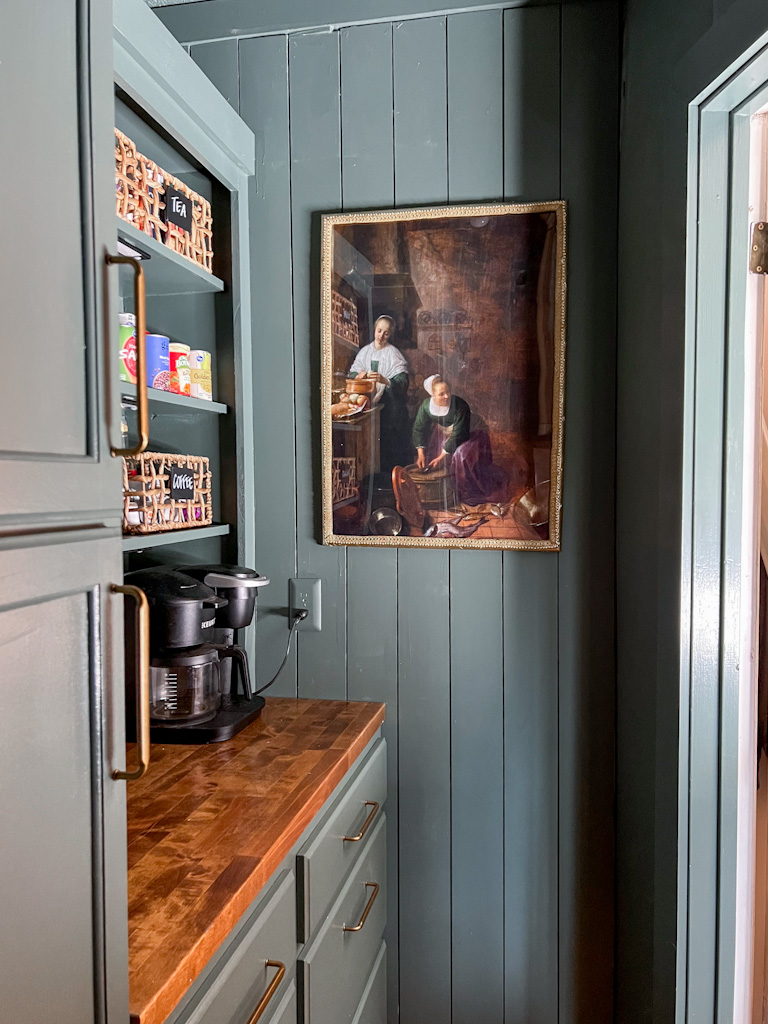
But with some help from Clare Paint in the shade ‘Current Mood’, some pre-fab cabinets from Home Depot and a lot of hard work, my pantry was born. I tried 5 different shades from Clare Paint (you can see in the above photo) but current mood was speaking to me. It has the same chameleon vibe as Pigeon, the color in my closet. You can click here to see that room! And I couldn’t be more excited for the way it turned out. It feels like the perfect “Pocket of Color” in my house!
If you want a look at the in depth process for creating this space, check out the ‘pantry’ highlight on my Instagram.

Paint Color | Cabinet Hardware | Butcher Block | Stain Color | Pre Fab Cabinets
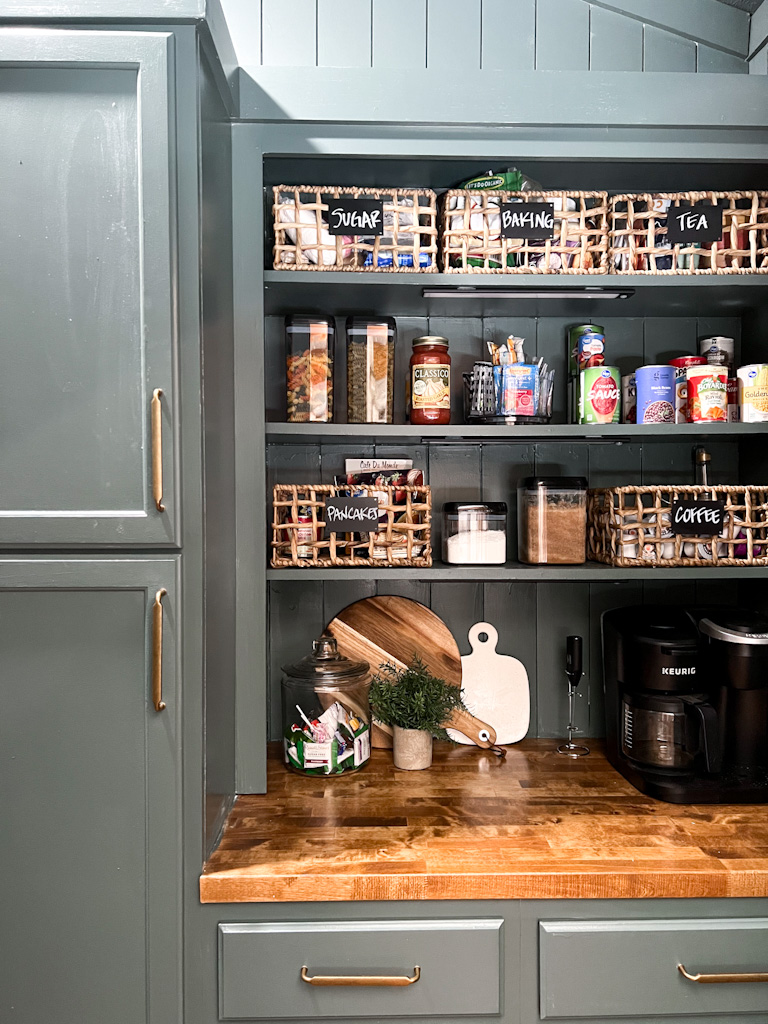
For the cabinetry in this space, I chose to use pre-fab stock cabinets from Home Depot. I used the two of the 3 drawer options and one pantry tower. I built the hutch above the drawers using plywood and stained and sealed a piece of butcher block for the counter top. I used 2 coats of ‘Dark Walnut’ by Varathane and 4 coats of Varathane’s Water Based Polyurethane. Sanding lightly between each coat of sealer is the KEY to a smooth, flawless finish.
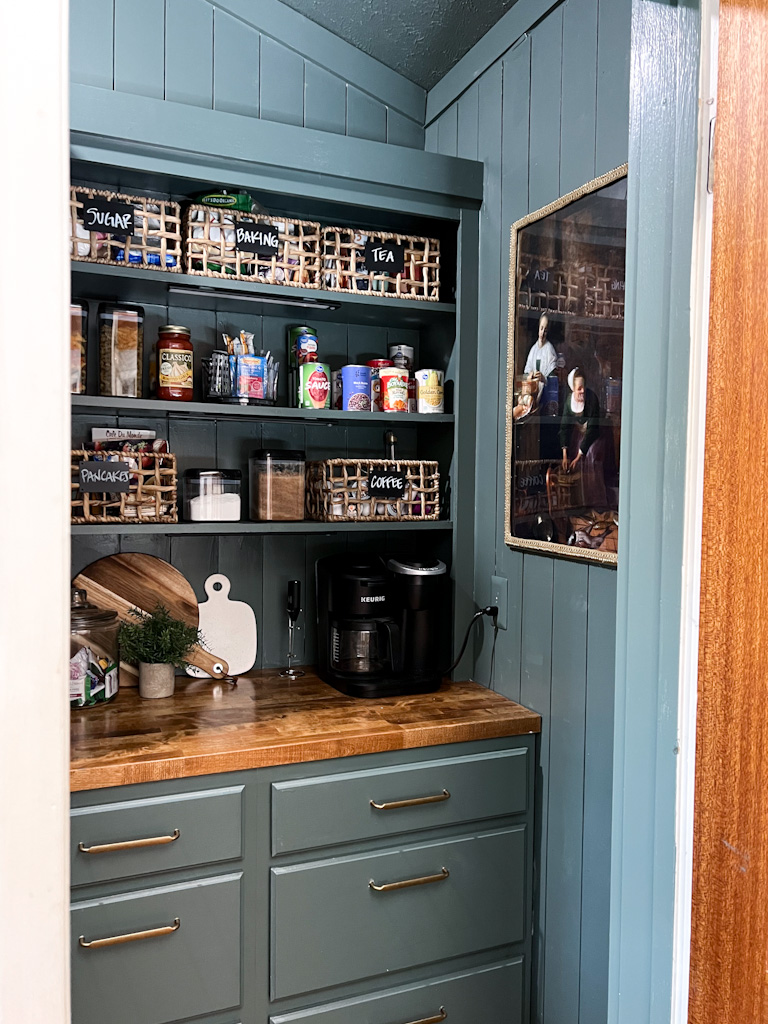
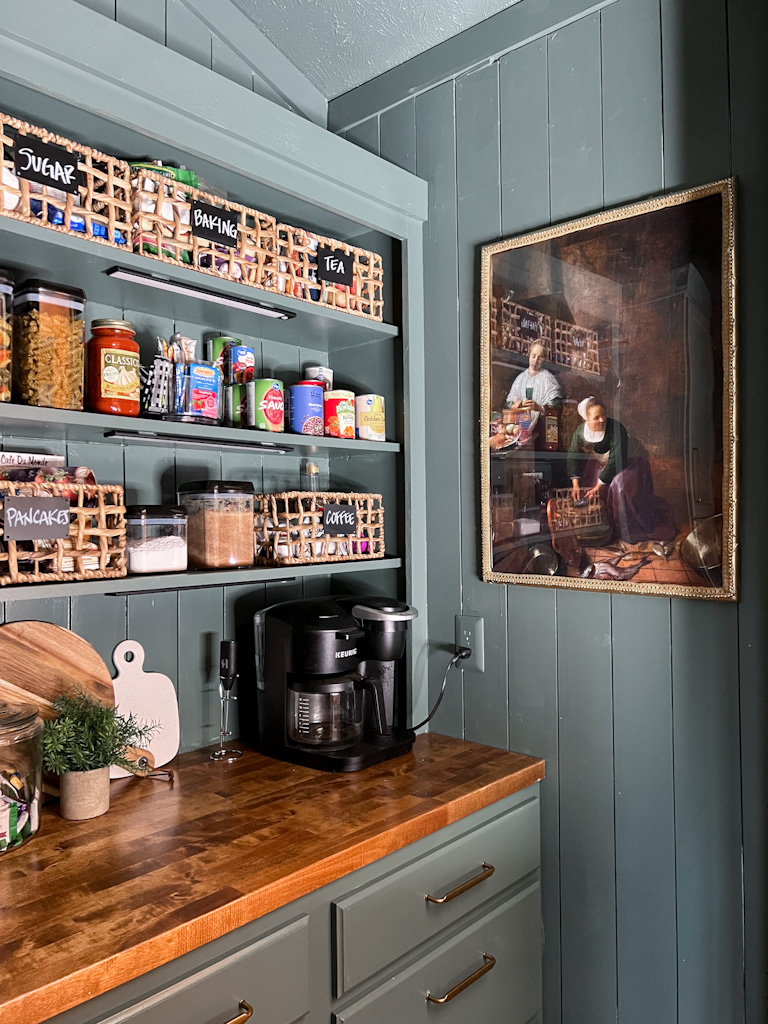
Baskets | Air Tight Containers | Drink Mix Caddy | Candy Jar | Drawer Organizers
Everyone’s pantry organization is going to look different because everyone keeps different things based on their family’s preferences. I knew I wanted lots of closed drawer storage to keep things like kid’s snacks and chip bags. That way our shelving looks a bit more organized. I found these baskets that I LOVE. I ended up removing the little chalkboards and moving them to the longer side so that they would fit nicely on my shelf. Airtight containers are a much and the ones I used get so many great reviews. And with a husband who is addicted to drink mixes, a little makeup caddy did the trick to keep those organized.
And the fact that we were able to get our coffee maker off of the kitchen counter was a HUGE win for me. It freed up lots of space and now we have a devoted coffee spot where everything is accessible!
Motion Sensor Under Cabinet Lights | Semi-Flush Mount Fixture | Motion Sensor Bulb
Probably one of the best things I did was grab these motion sensor under cabinet lights. They are rechargeable and attach using adhesive magnets. When they need a charge, just pull them off the magnets, charge, and put them back up. It’s really too easy. They sense the motion when I walk through the door and light up the shelves for easy viewing, especially since this space doesn’t get any natural light.
I also replaced the old semi-flush mount fixture with a more modern one and put a motion sensor bulb in that one as well. This is a game changer. I don’t have to fiddle with the switch when I come in an out. It automatically senses motion when the door opens and the light is already on by time you walk inside! WE LOVE THIS FEATURE!