The front porch makeover is well underway. What started as an idea to jazz up the floor of my porch ended up being a full on glow up. I’ve got a ways to go, but we’re making some progress.
If you missed the stenciling post, click here to see my full tutorial and a before and after.
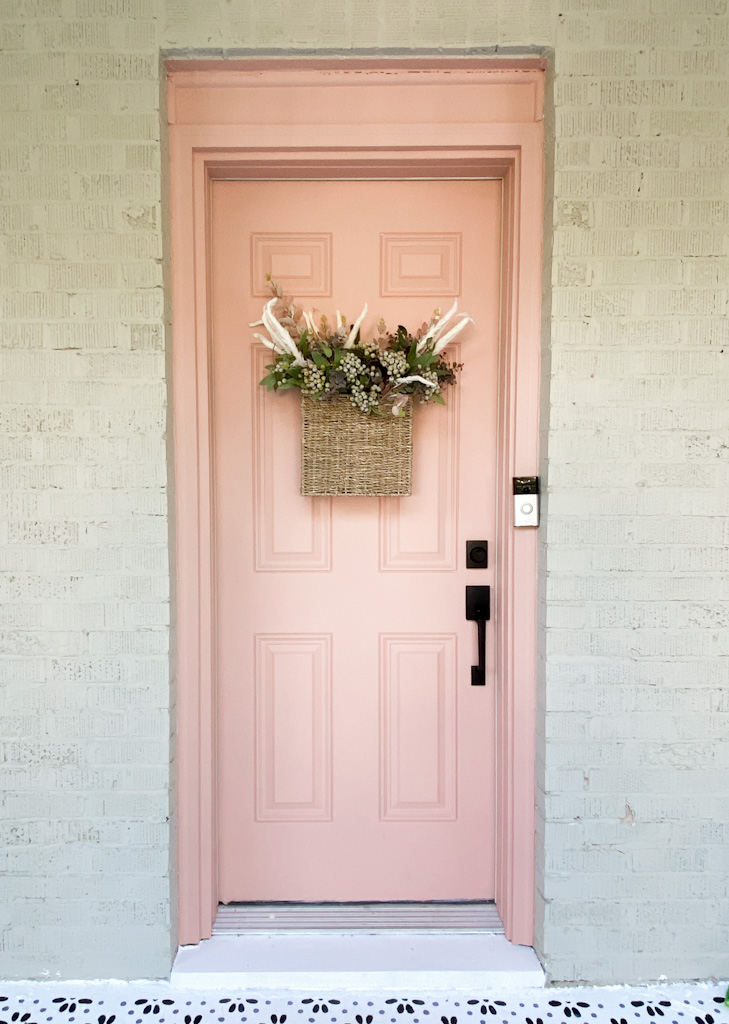
Next up, I painted my door. It’s still pink. Keith and I decided that pink was ‘our thing’! Ya know? So we wanted to keep it, but I chose a slightly browner, peachier tone this time. It’s the color Shiny Kettle by Behr in a flat finish and I LOVE it.
I also switched out the hardware for a sleek black set and added a lantern style light. It’s made all the difference. Next up, adding something to the front door. I could’ve just put back my old wreath but a new look deserved a new wreath.
I saw a front door with a basket on it a while back on Pinterest and decided to try and recreate the look for my house. There is something kind of vintage about the basket that I love while still feeling fresh and different. So here is what I did.
Shop All of the Florals & Basket Here
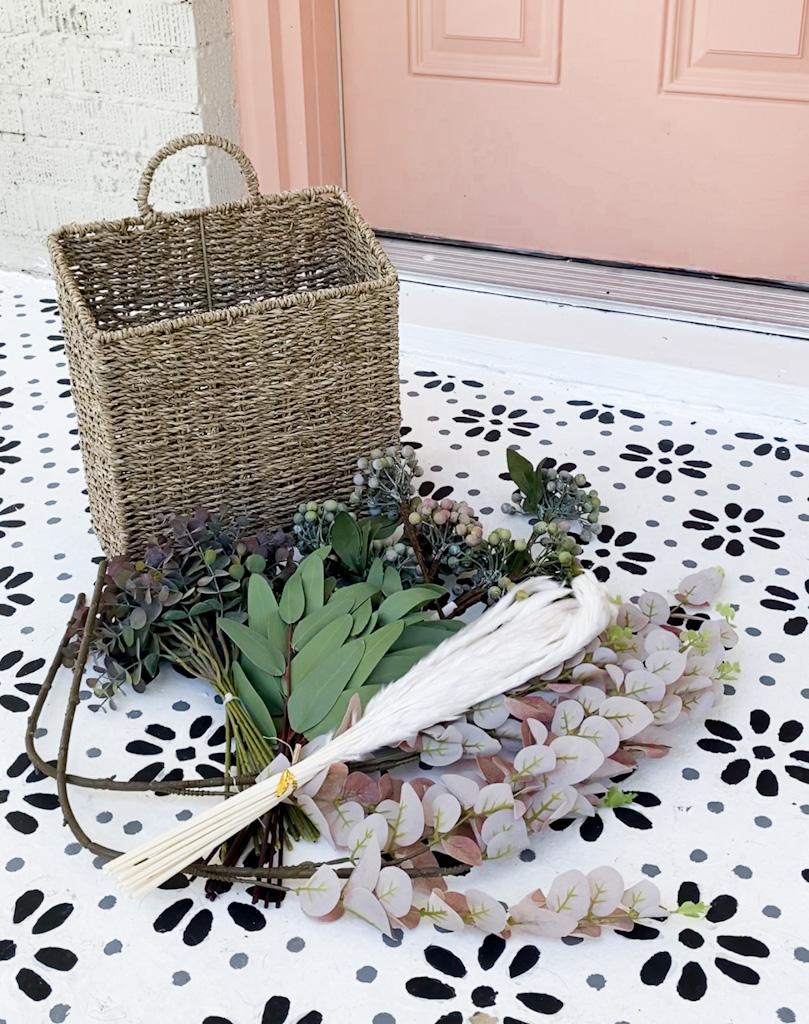
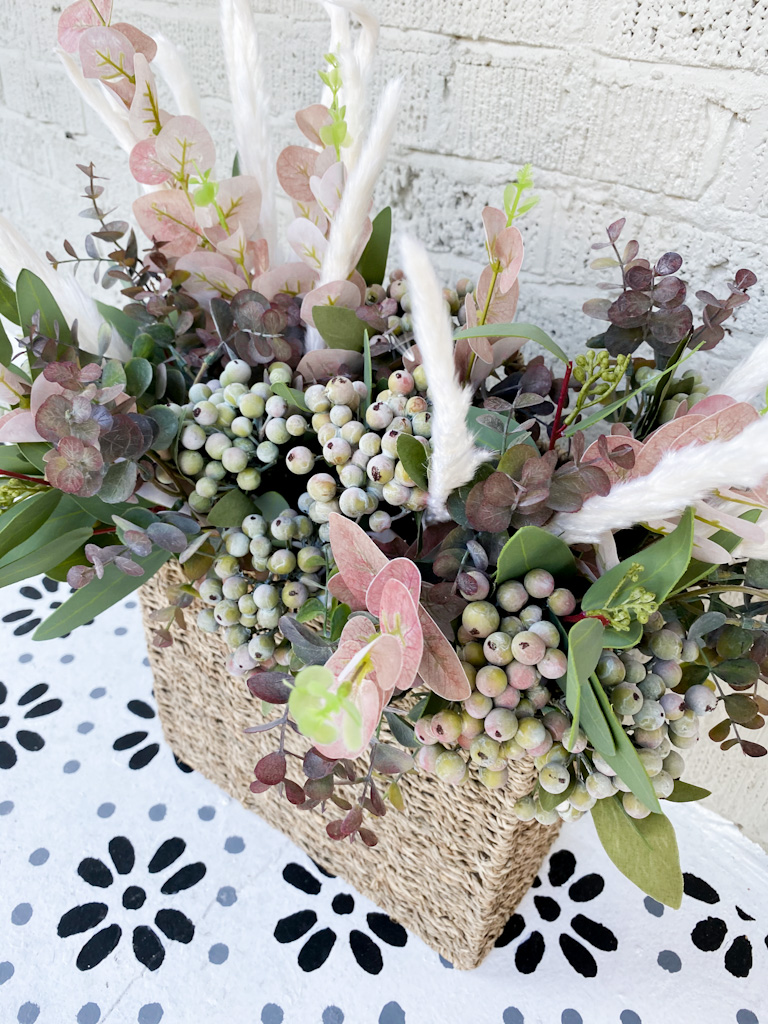
I grabbed this magazine basket from Amazon . I loved the structure of it and the size is perfect for a front door. I chose a variety of different fax stems. Eucalyptus and olive are great starting greenery fillers. This time around, I was going for a fall look but you can use those leaves year round and just add in your seasonal bits.
I also grabbed some berries because I love how berries look in arrangements. Some pampas grass because it’s all the dang rage right now. and these pinkish leaves that give it a fall look without being too orangy – not my vibe.
The purple, green, and white tones mixed with the pink in my door give me exactly the fall look I was going for.
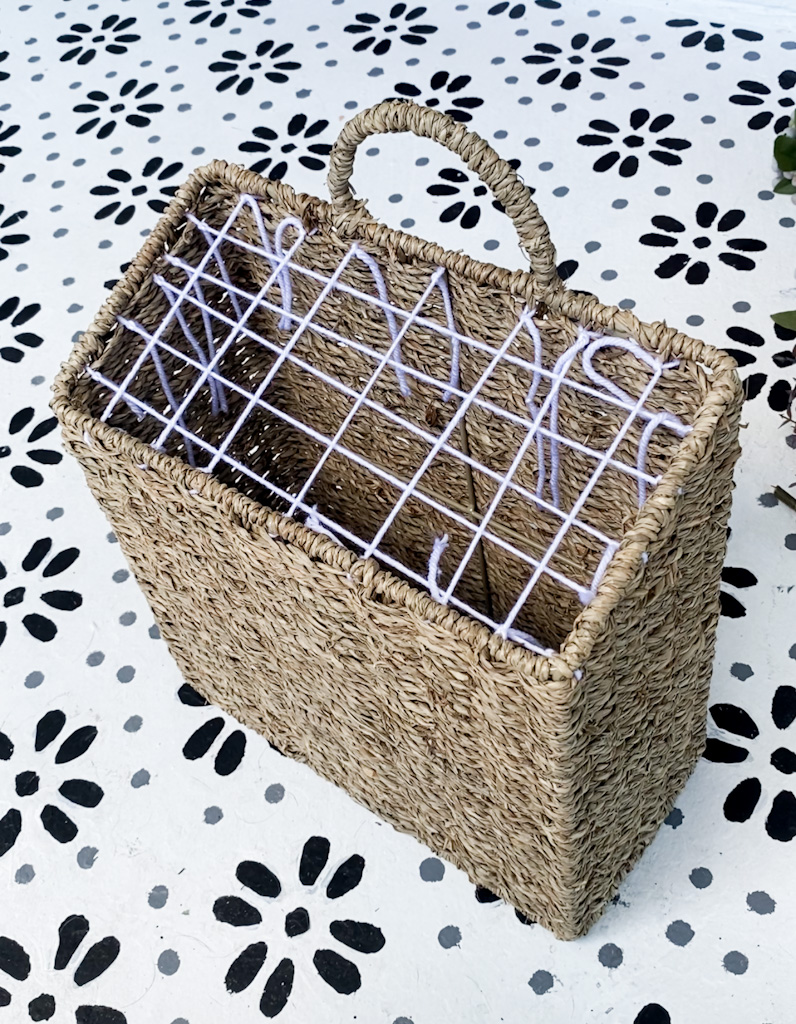
I typically use the tape method when making arrangements in my house. It helps to keep the stems from clumping together and give your arrangements a much fuller look. But I knew tape wouldn’t last in the MS humidity, so I used yarn. I took a bobby pin, tied to the end of the yarn, and threaded it trough and tied it up tight to create this grid. Any string or twine would work.
Because the floral stems I ordered were shorter, I needed a bit of structure on the bottom as well. I grabbed the shipping plastic that the items came in and stuffed it in the bottom of the basket. It’s kind of like recycling! And I knew the plastic would hold up in the humidity.
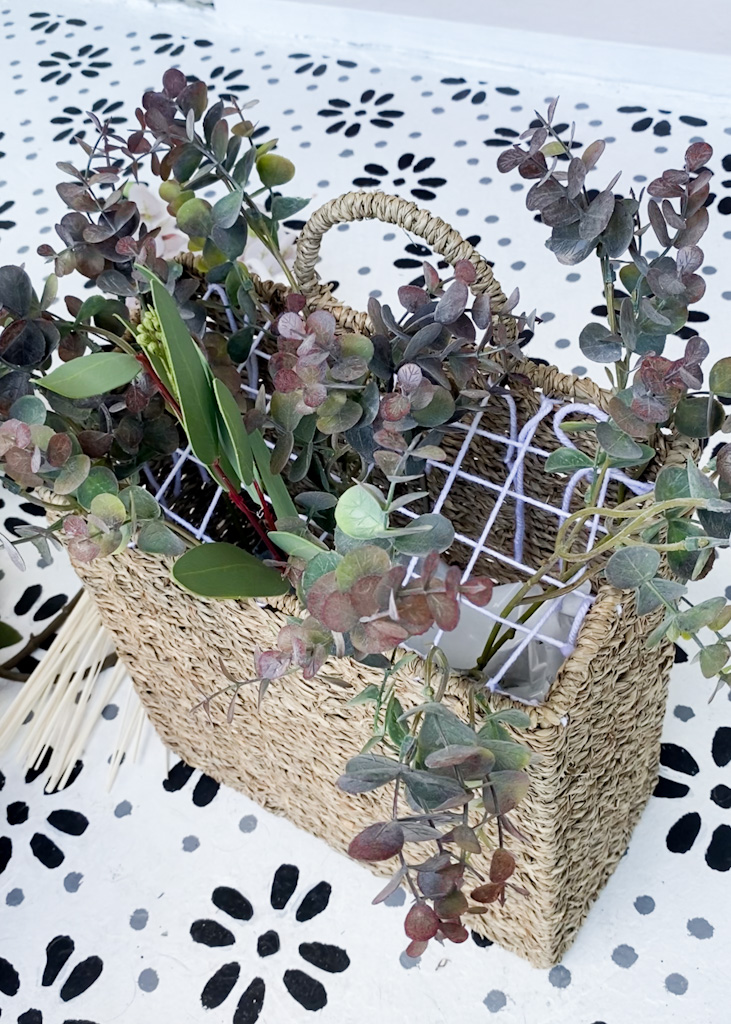
I started with the fillers. The eucalyptus and olive leaves. I was pretty random about this. But you can always come back and move things. I didn’t realize how much the grid helps in arrangements until I started this one. The fillers alone looks super sparse, but when I started adding everything else, it really started to fill up fast.
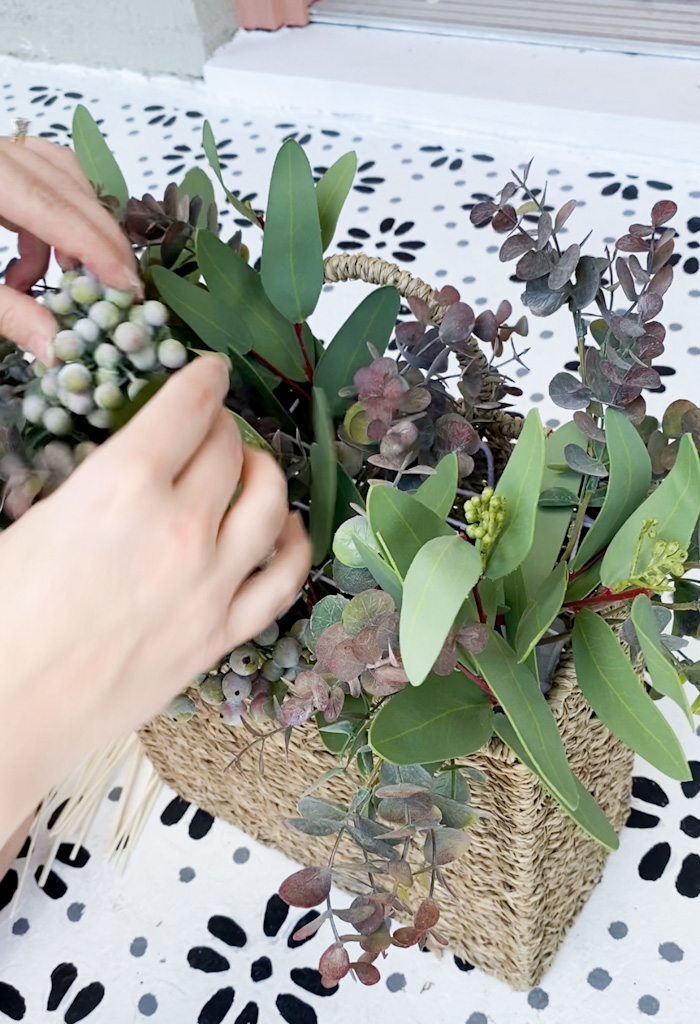
The berries came next and then the pampas grass and pink leaves. The pink ones, I ended up cutting down a bit since they were a lot longer than the other stems. It also allowed me to use smaller pieces all throughout the arrangement.
It turned out even better than I imagined. I LOVE LOVE LOVE it. And can’t wait to do another one for Christmas!
I used this black command hook to hang it and I’m thrilled with the results. I love that it’s just a bit different from a usual wreath but still sleek and beautiful!

What do you guys think? Like, Love, Want some more of?