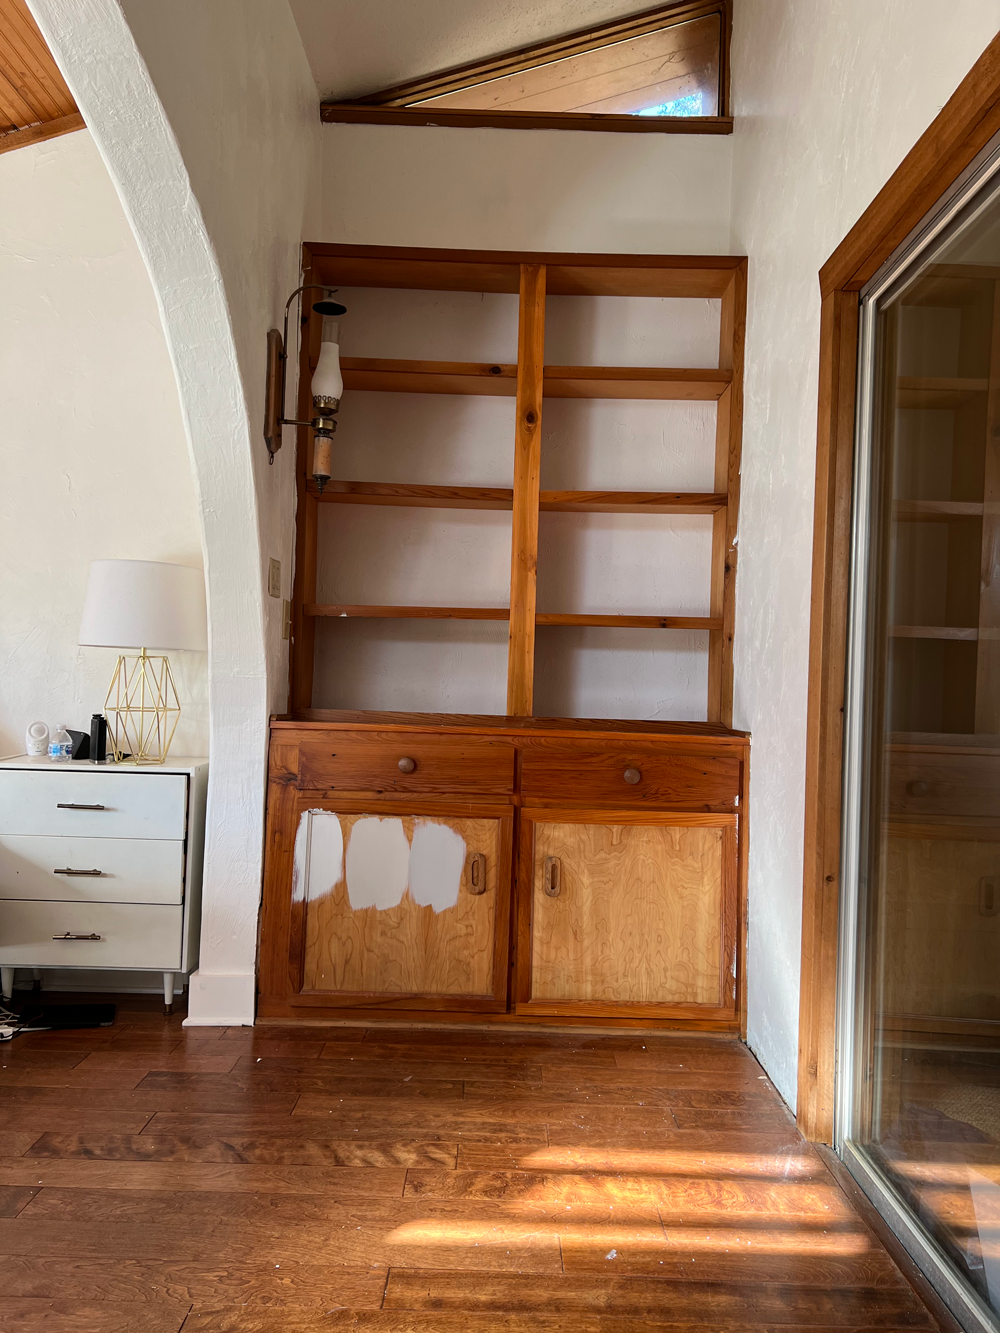
I knew this project would be one of my first as soon as I walked into this room. It needed a softer hand so badly. The hard lines of the wood built ins against the white walls were too much. It dated the space so much. Not to mention, there were two different types of wood used on these built ins and they didn’t match when stained. Big no no for me. But luckily, it was an easy fix. Here is the before photo to jog your memory.
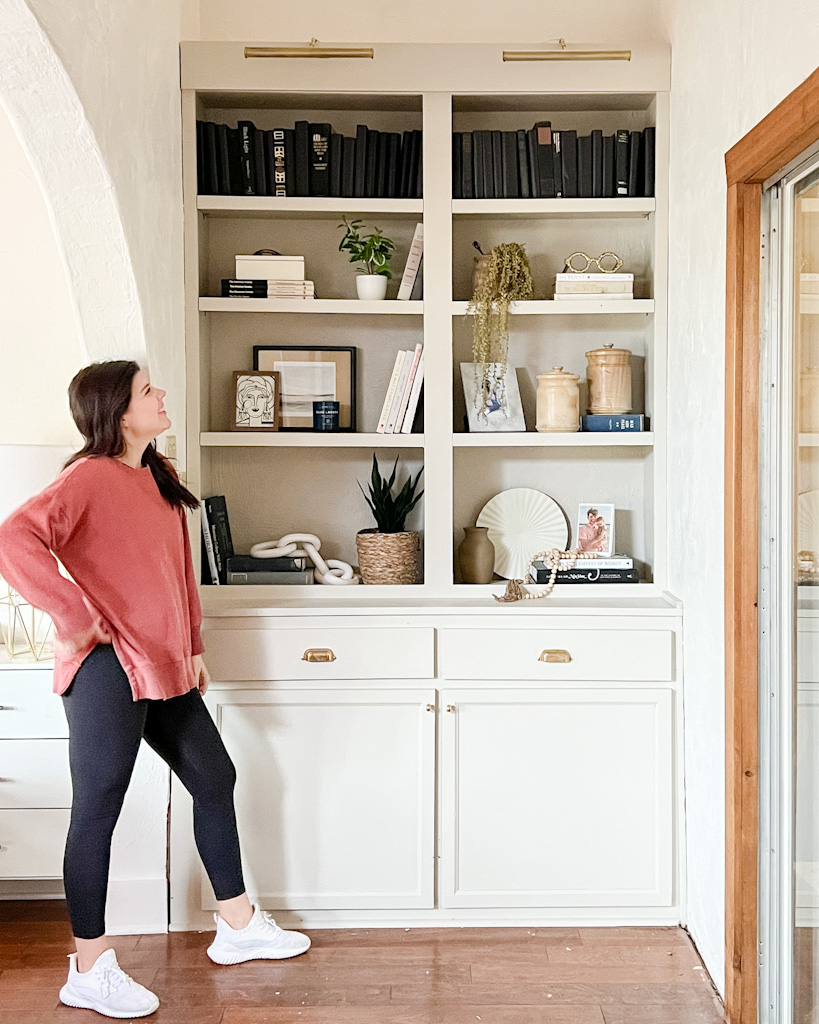
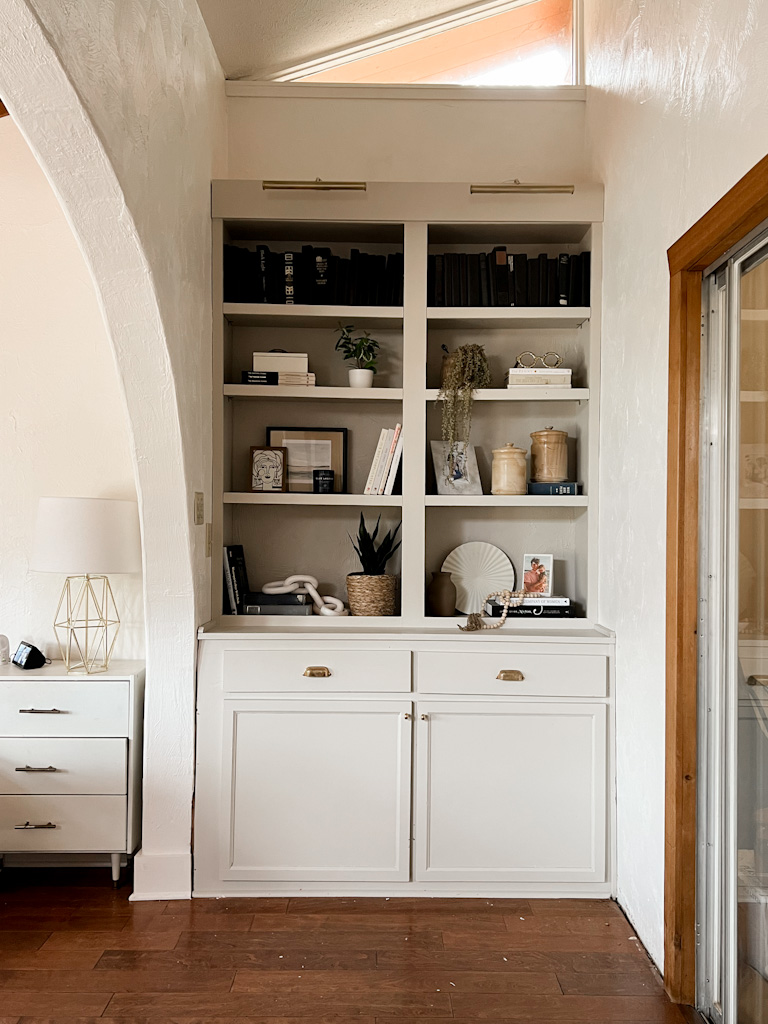
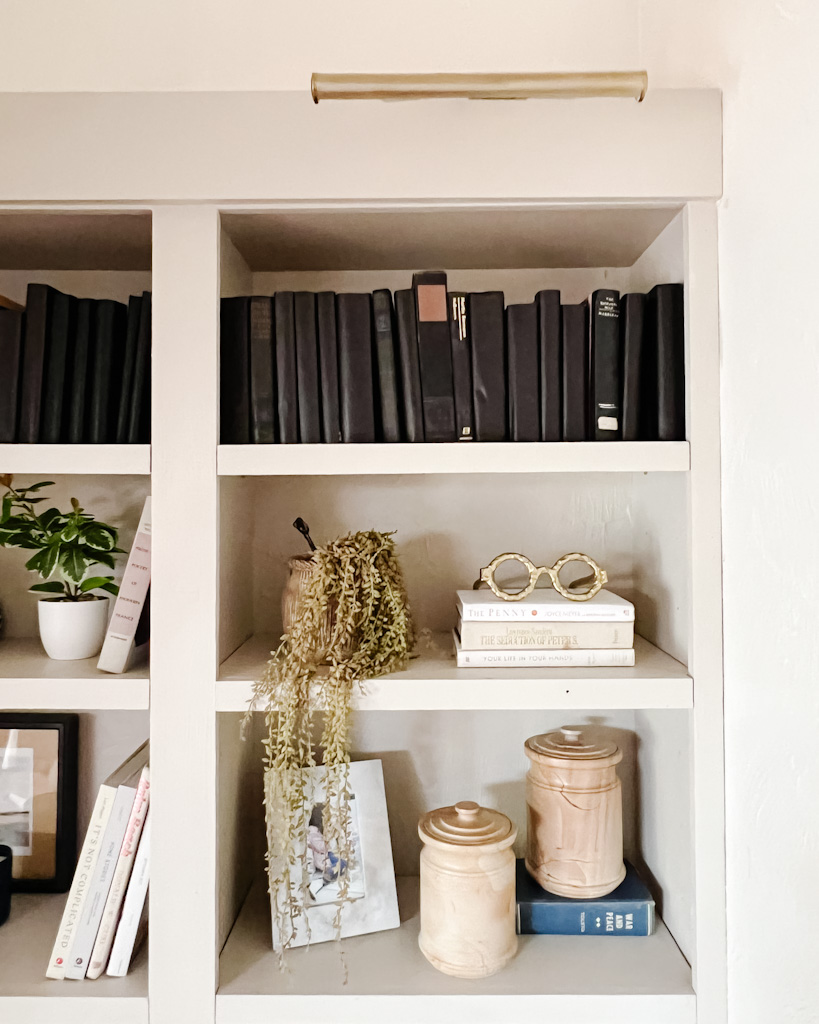
First, I painted the trim on the triangle window above the built ins to match the wall color (Sherwin Williams Alabaster). It makes the space look simpler and so much taller, actually. I primed the built in with Oil Based Stain Blocking Primer. Primer is a NECESSARY step. Especially in this case. The wood was old and had been stained and finished in a glossy finish. To avoid stripping and sanding, I primed and top coated with Sherwin Williams Accessible Beige in an Eggshell finish.
Fun Story, I painted the whole thing in Behr Mesa Taupe and knew immediately after I finished that it was the WRONG color. I even swatched them ahead of time. But the Mesa Taupe pulled pink and purple and that was NOT the look I was going for. I wanted a soft, tone-on-tone vibe.
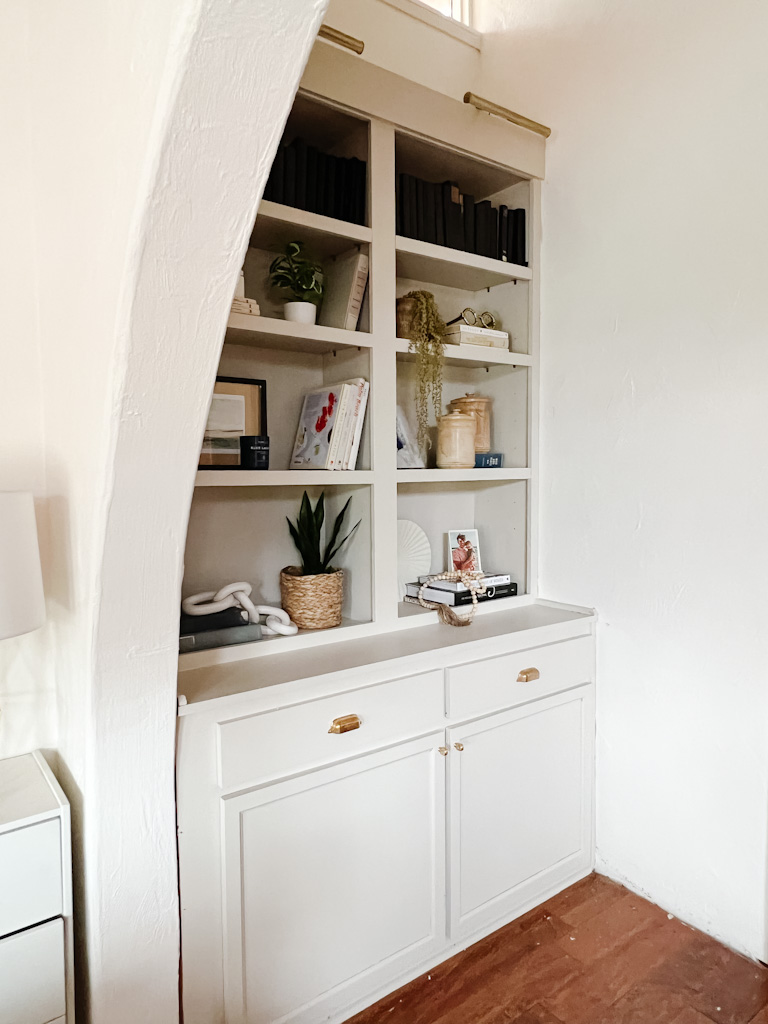
There was a weird, antique sconce mounted just to one side of the built ins. It was actually the ONLY source of light in the entire bedroom. It was controlled with a button instead of by a light switch somewhere in the room. The placement was odd, the wiring was odd. It just needed to come down. Some of my Instagram followers disagreed but, honestly, I’m the one who has to live here, so the call is ultimately mine and I didn’t love it!
I removed it and patched up the wall (after wire nuts and electrical tape – don’t worry). I had another plan for lighting in the space anyway. I grabbed two linear library lights from amazon and some LED light strips. Since there is no way to access power from on top of the shelves, I needed battery operated, remote controlled lights. Unfortunately, I order the wrong ones at first but THESE are on their way and I think they’re going to be perfect. They’re adhesive so I can just stick them inside the light and hide the battery pack behind the header. I’ll share on IG stories whenever those come in and I’m able to install them!
Speaking of the header board, I added that one as well. The original built in was flush at the top with nowhere to mount the light fixtures on the back of it. So I added some leftover 1 x 6 MDF trim board to the top and I think it actually makes the pieces look even more finished.
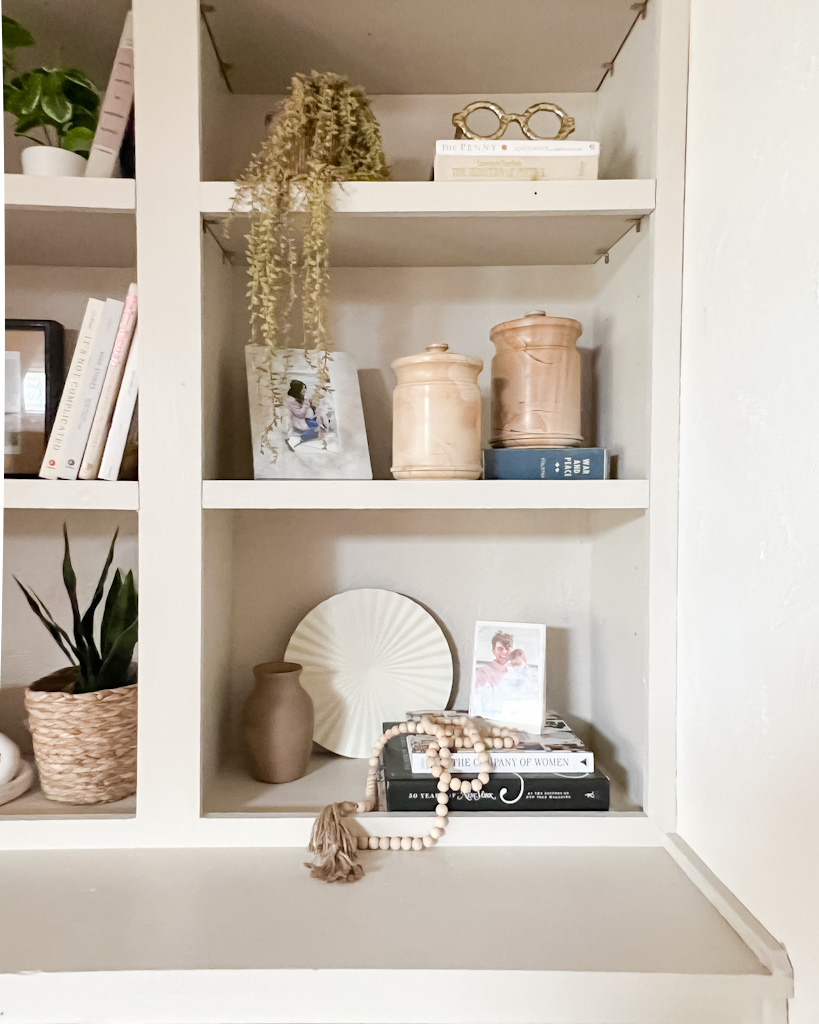
I added new hardware as well. I’ve been obsessed with unlacquered brass these days (the whole world is) and so I ordered these cup bin pulls and these little knobs from amazon. They came in much more orange than I wanted so I aged them using a technique I found on YouTube. A little *like a little* vinegar and some salt in a tupperware. Shake it up once and hour for 3 or more hours until you reach the desired amount of patina! Worked like a charm!
Styling it was the fun part. Unfortunately, almost everything here is older and un-linkable. I’ve gathered things over the years thrifting and shopping. That’s the best way to find fun decor in my opinion. Except these new chain links I got! I love them and they’re from Amazon!
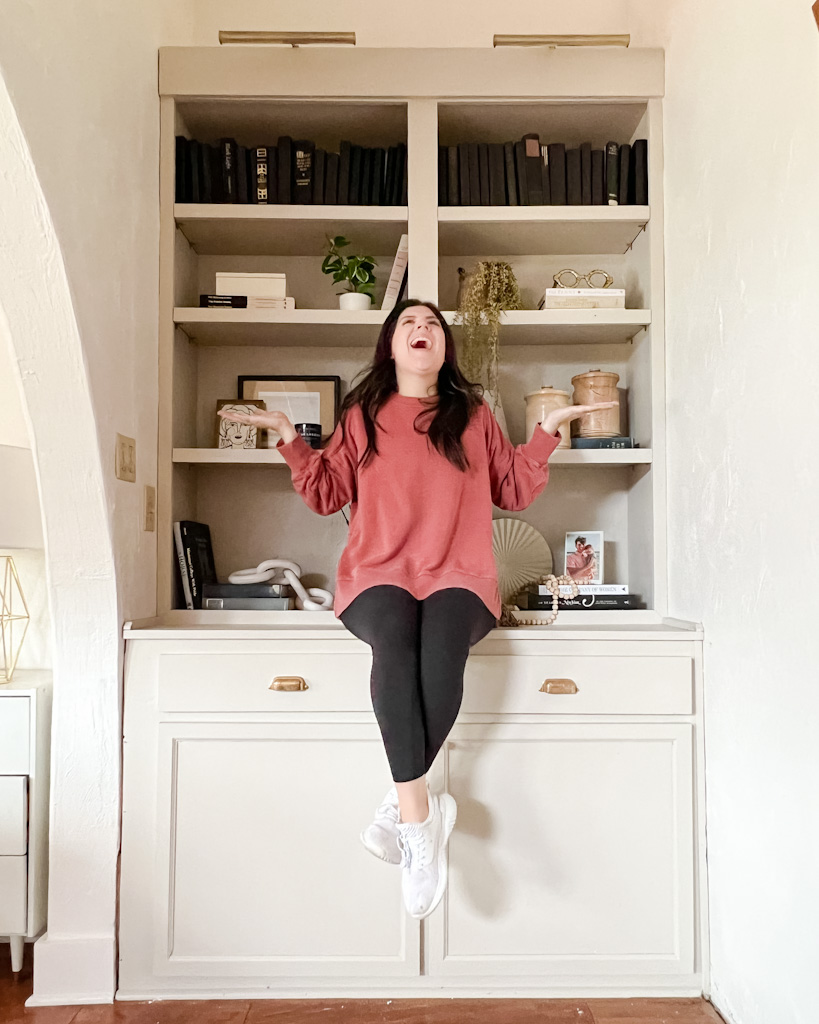
All in all, this project is easily my favorite I’ve ever done. It made all the difference in my space and It feels so fresh and new. I’ll be posting the final touches to this phase of my master bedroom in the next few days so get ready!


Your taste in decor is true to your style (and gift) in the rest of your life: you do bring in the Softer side of life! As I appreciate what you did in this “built-in” I am all the more Grateful To have you and my family!
Thanks, Ms Madolyn!!! Excited for you guys to get to enjoy the guest room!