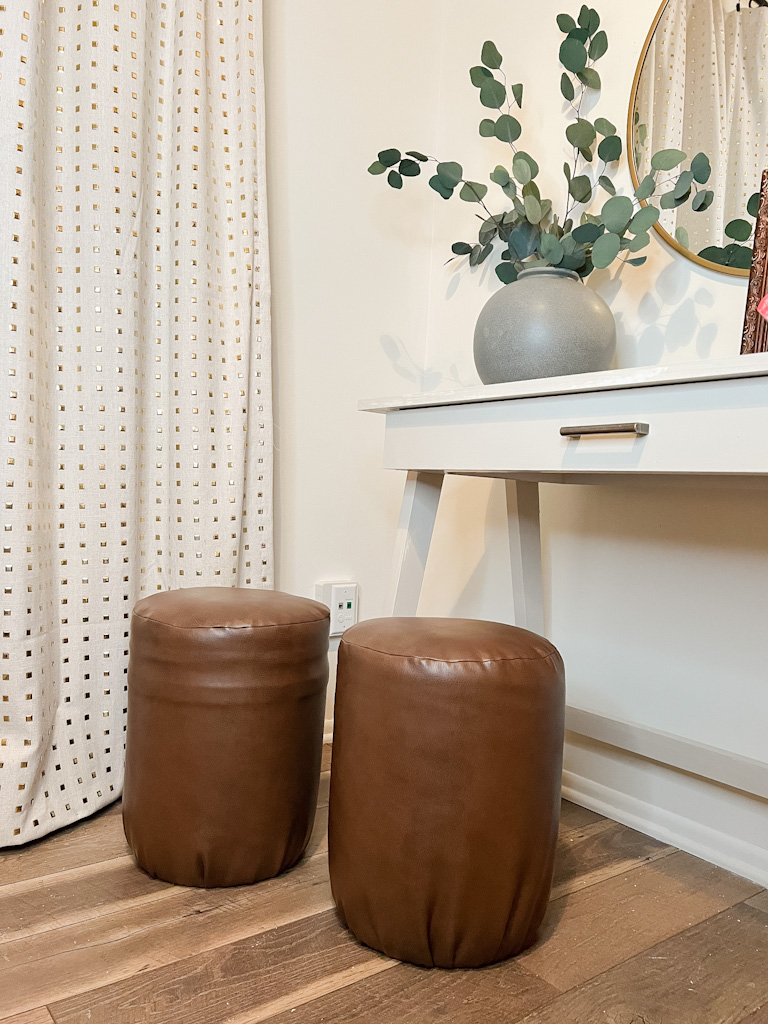
If you’re here for the updated tutorial on these DIY 5-gallon Bucket Ottomans, you’re in the right place! Below you’ll find my step-by-step instructions on how to create the super affordable ottomans for your space. We’ve had ours now for over 4 years and they’ve held up perfectly. The only reason that I even updated them is because I’ve grown tired of the fabric and they’re getting a bit dirty.
The leather look is an UPGRADE for sure! Plus it’s a bit more expensive that a traditional cotton. That being said, I love it! I fixed all of the links and updated them for new, available products! Be sure to tag me on Instagram (@kassyrandazzo) if you try this out!
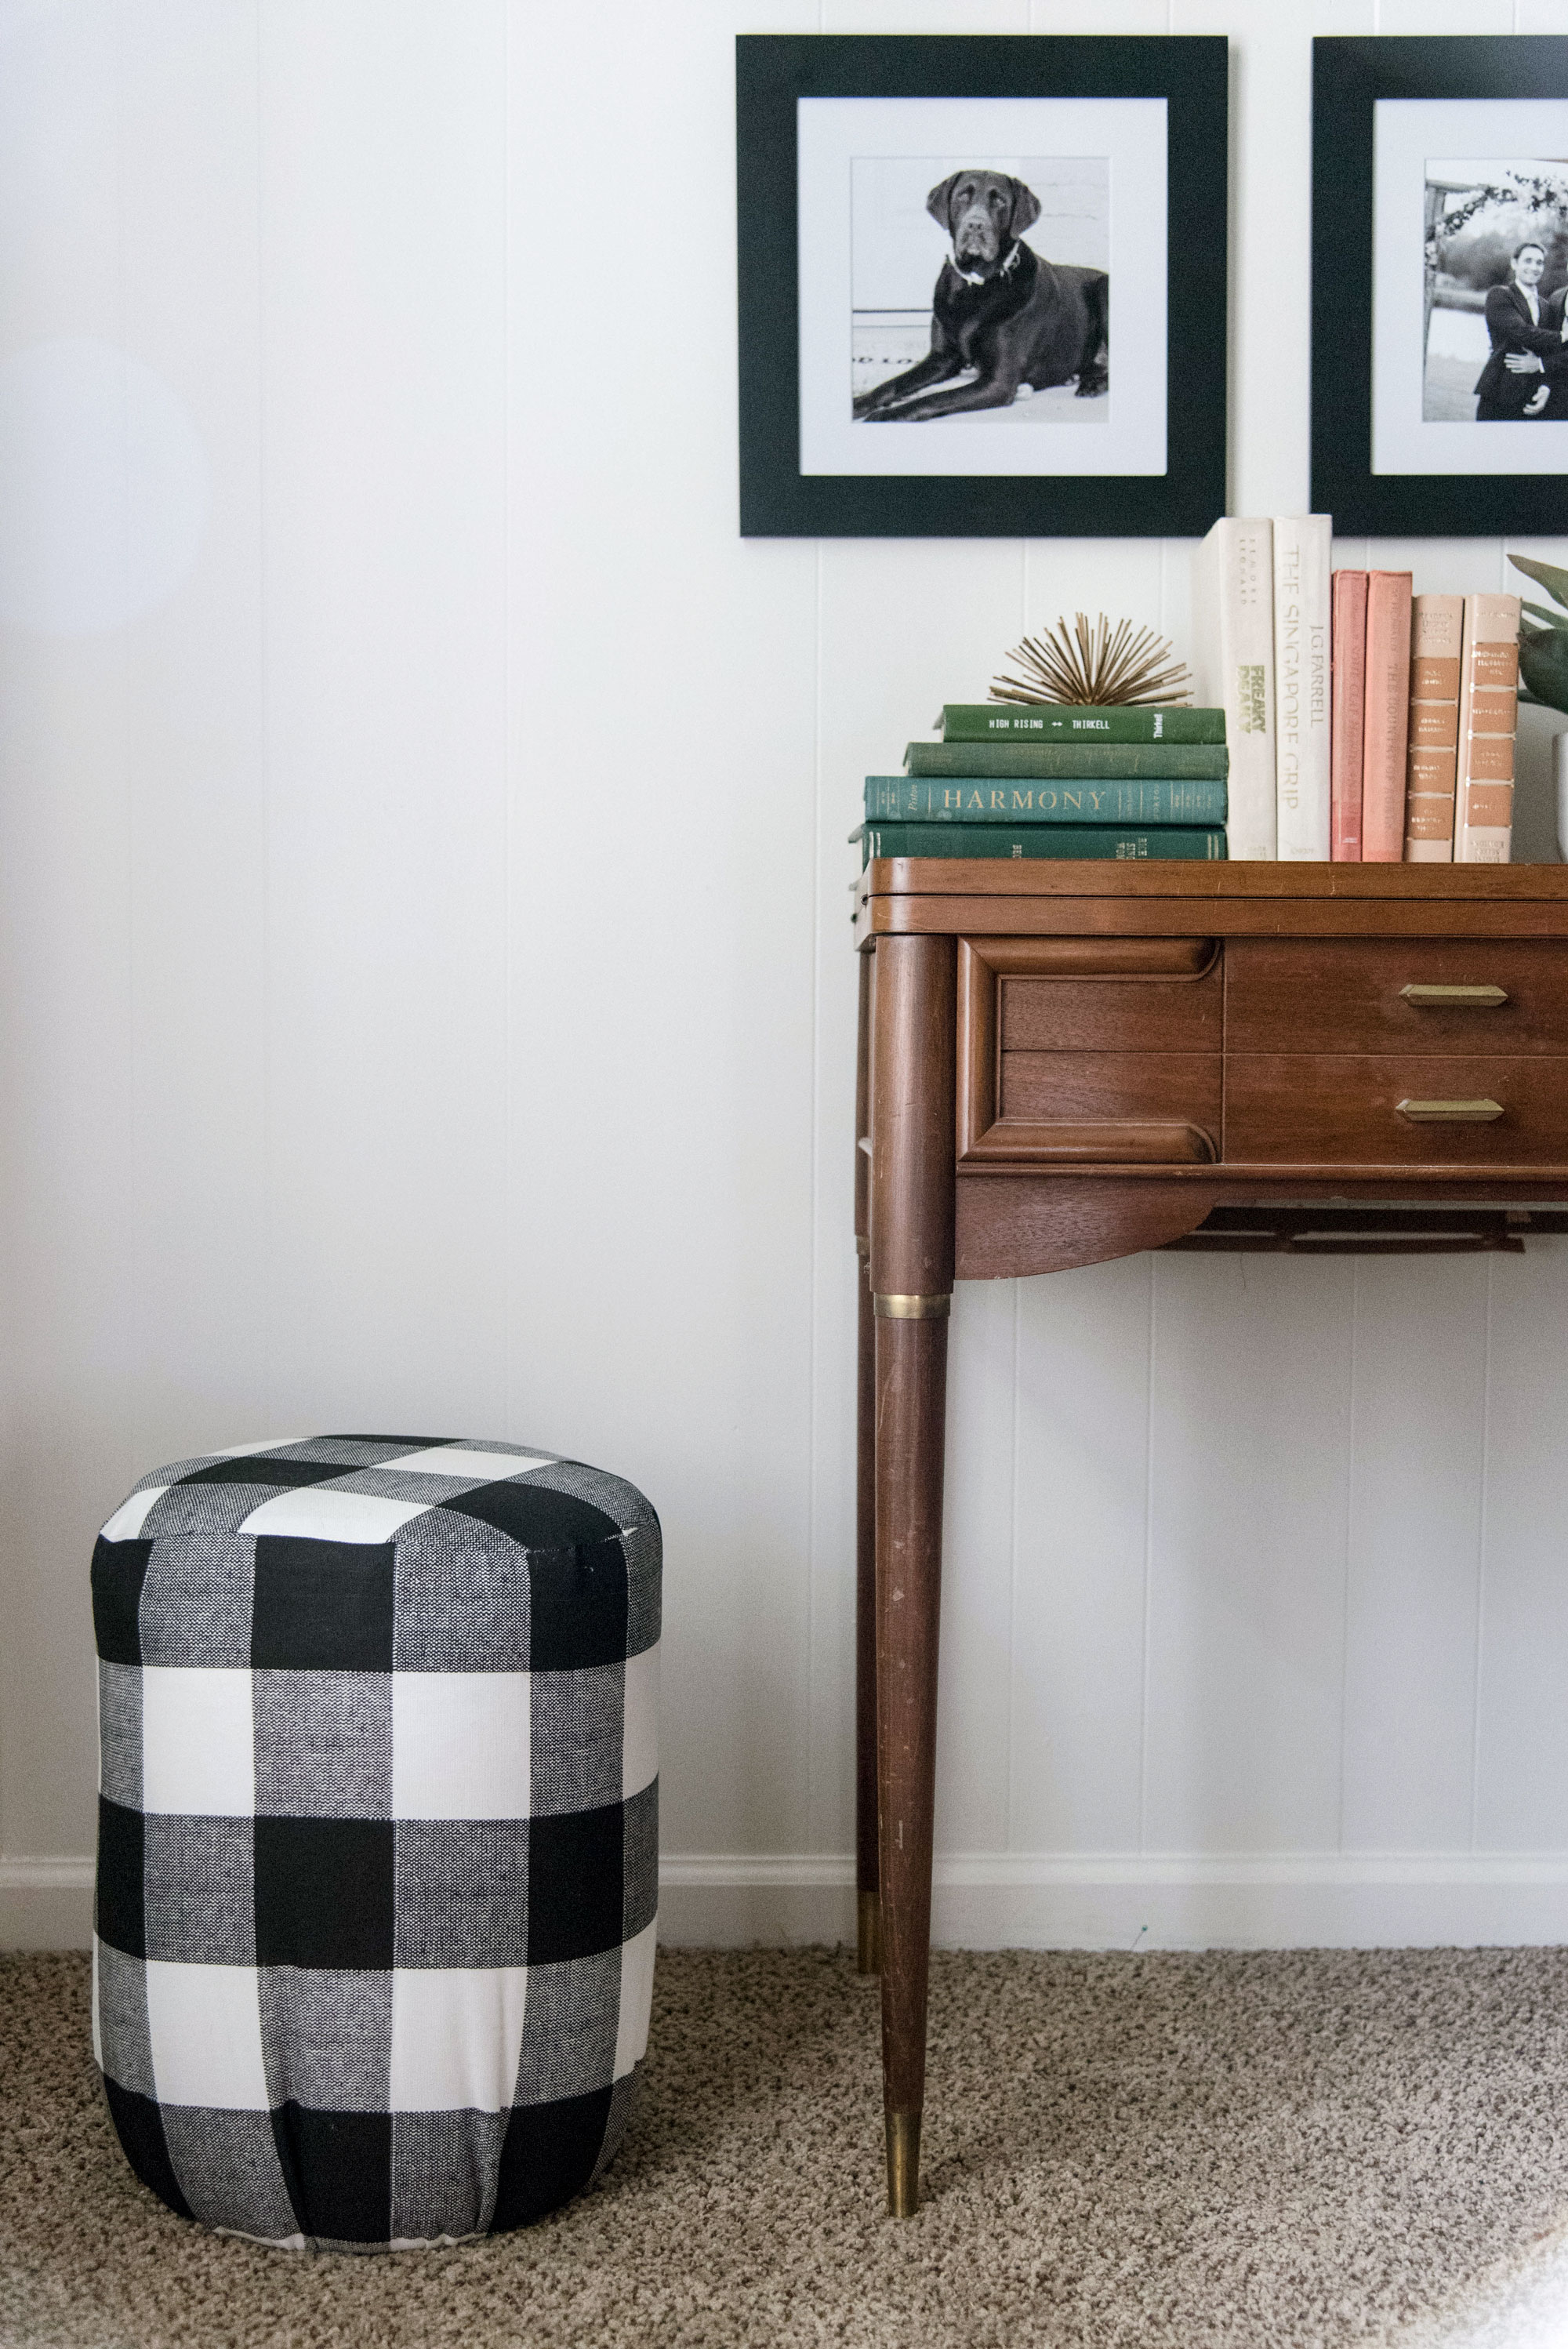
Hey guys! I’m super excited about today’s post. I’ve been meaning to get this up for several weeks and finally had the time and energy to track down all of my pics and get them organized for this DIY. If you checked out my Guest Room Makeover Reveal Post from a few weeks ago, then you probably spotted these adorable buffalo plaid ottoman stools. Well, guess what? They’re a DIY. And a super easy DIY at that. It requires very little skill, but a sewing machine is probably better than doing it by hand. Plus they cost less than $30 each with all of the supplies.
The pictures aren’t the BEST because I took them as I went with my phone, but they work for our purposes. Ok! Are you guys ready? Let’s dive right in!
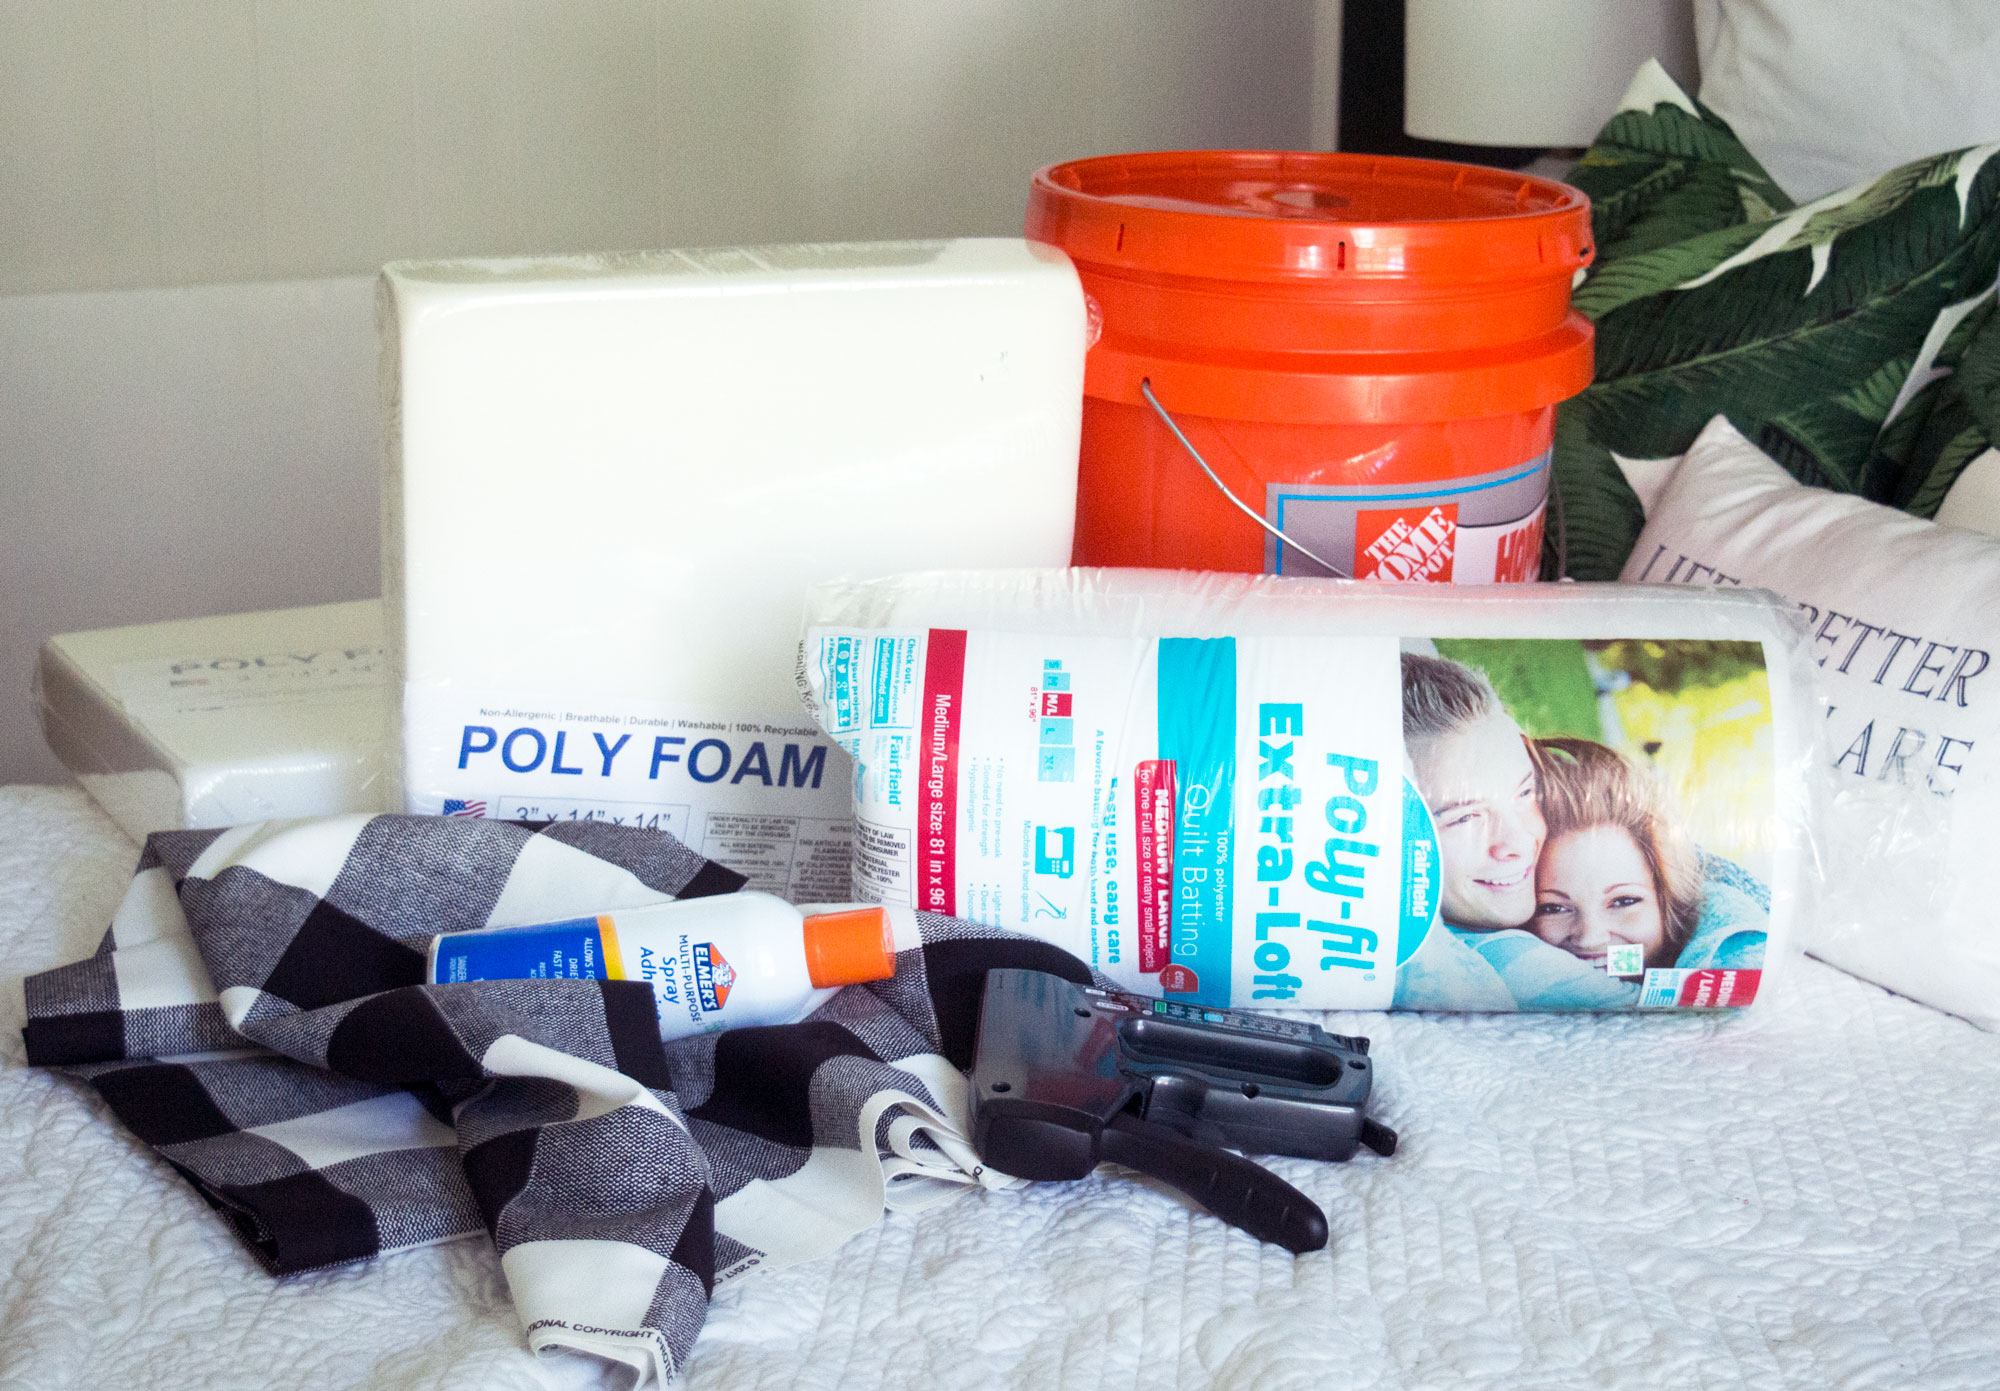
Here is what you’re going to need:
5 gallon bucket with lid (super expensive on amazon but the home depot ones are like $5)
1.5 yards of non-stretchy fabric of your choice
Quilt Batting (I used Poly-fil Extra-Loft)
3″ x 14″ x 14″ poly foam cushion
Sewing Machine (I LOVE MINE)
Marker

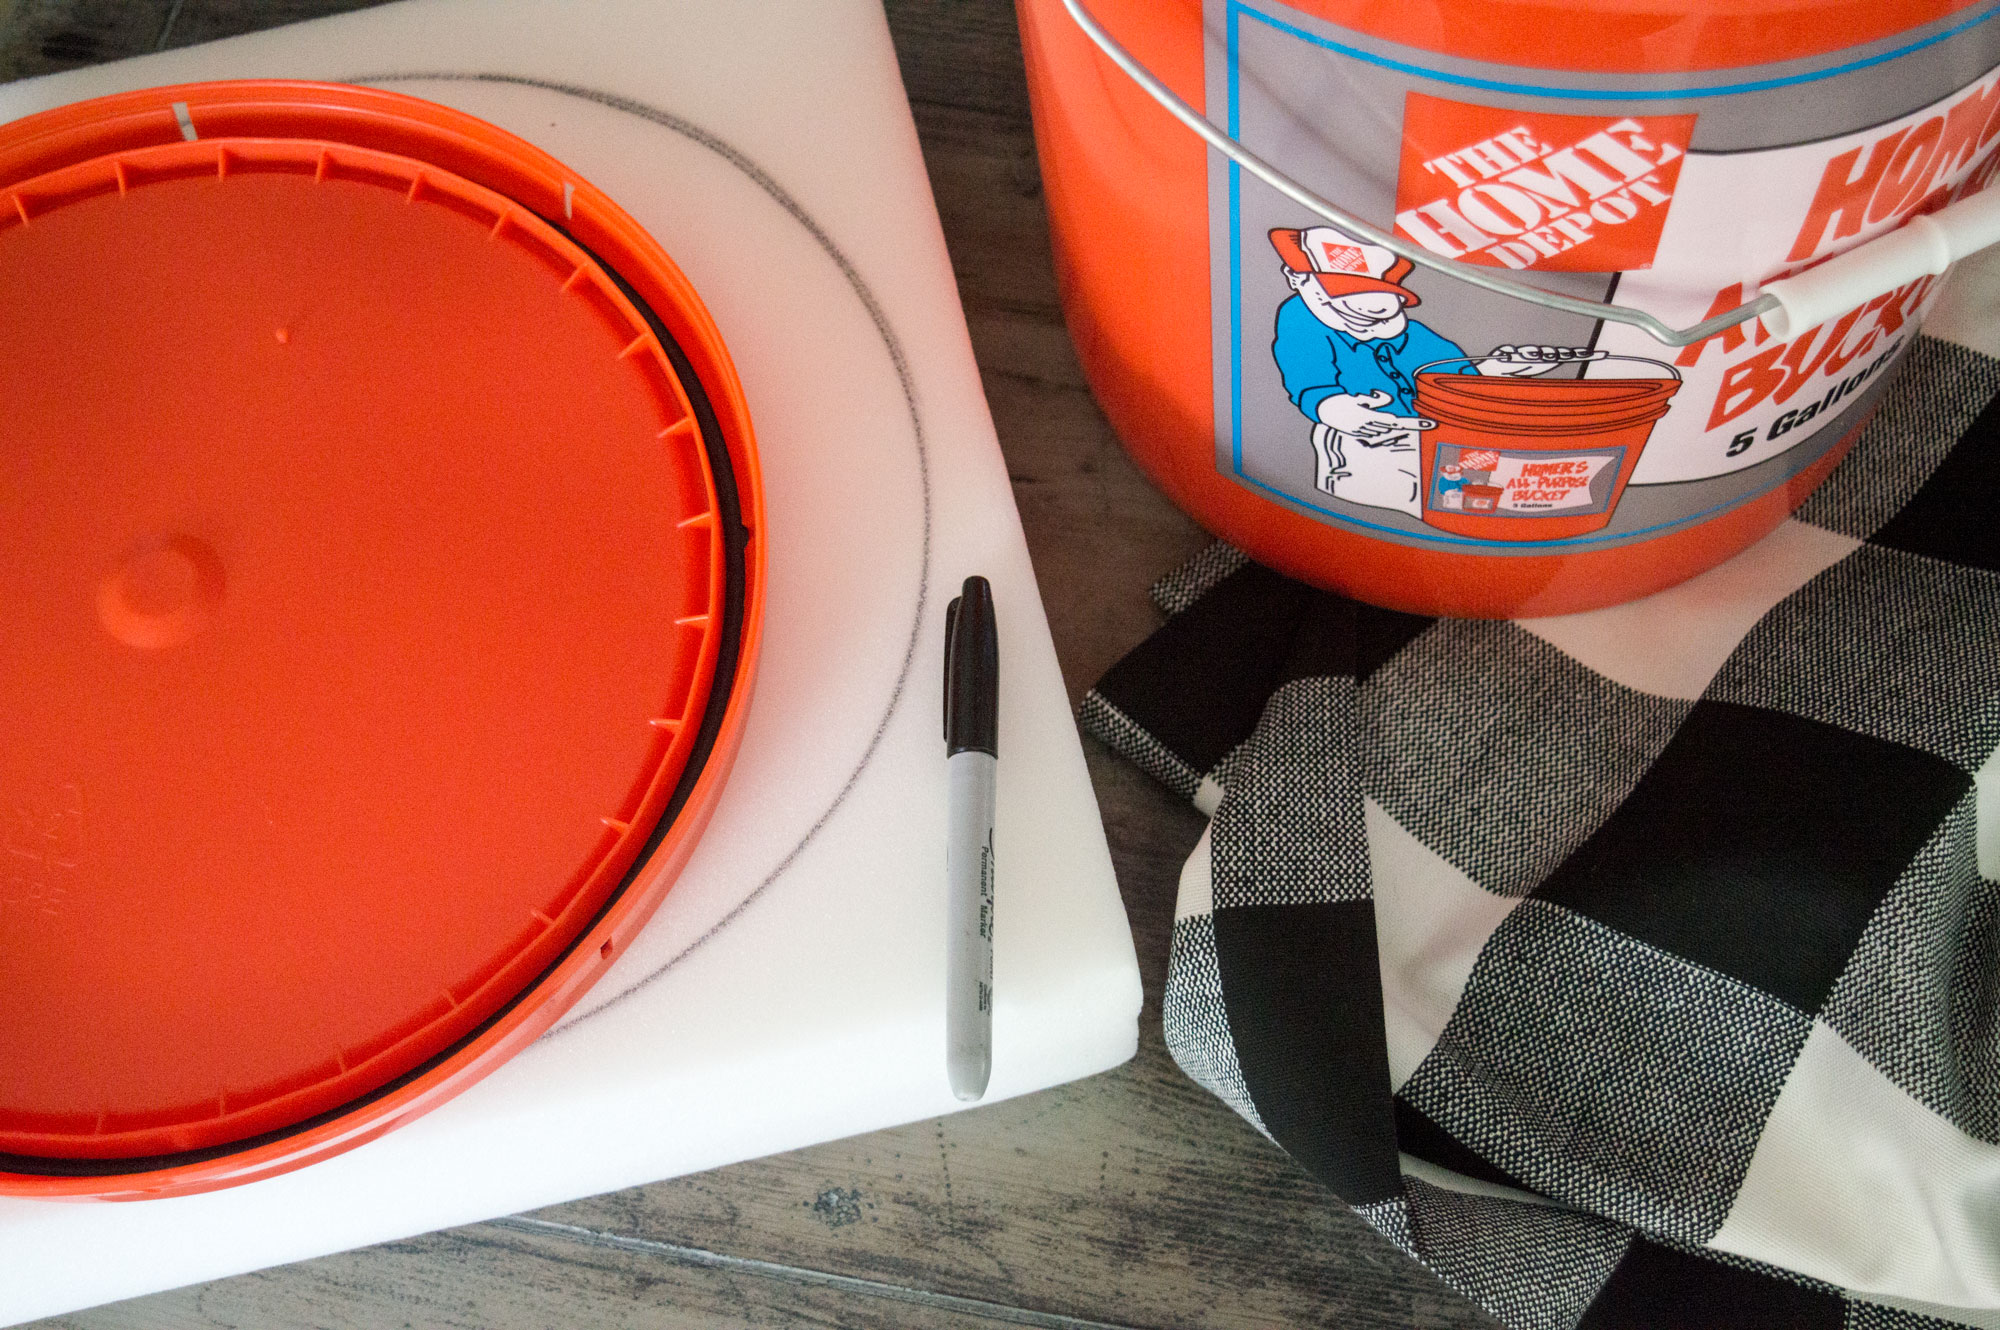
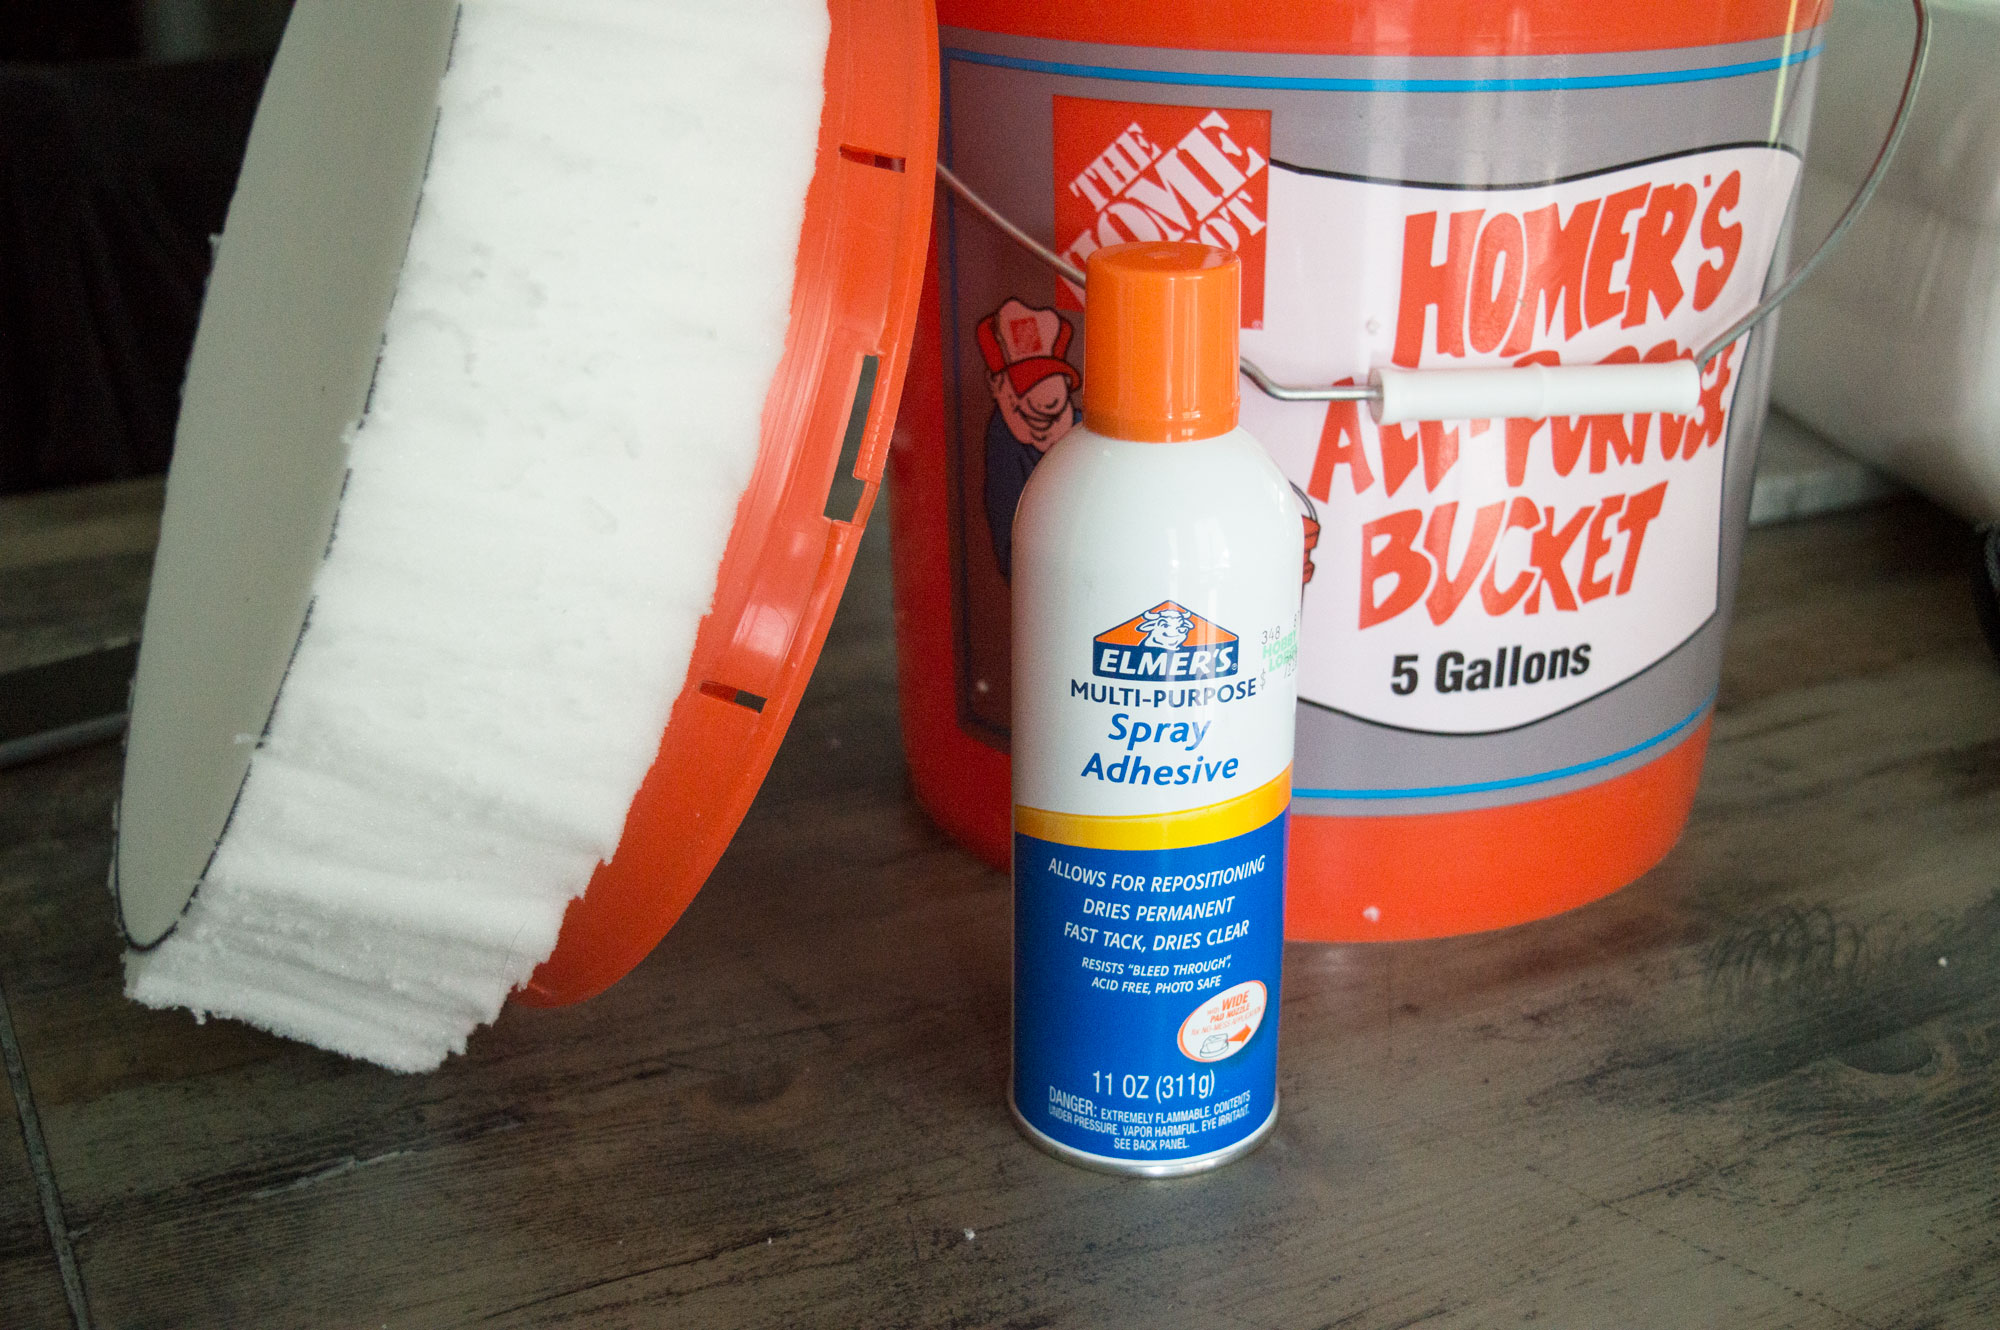
Step 1: Pull out the high density foam pad and the trace the lid of the 5 gallon bucket with a marker. Cut it out with scissors or a knife. Spray the top of the lid with adhesive (you’re going to want to go outside for this) and place the foam pad on it!
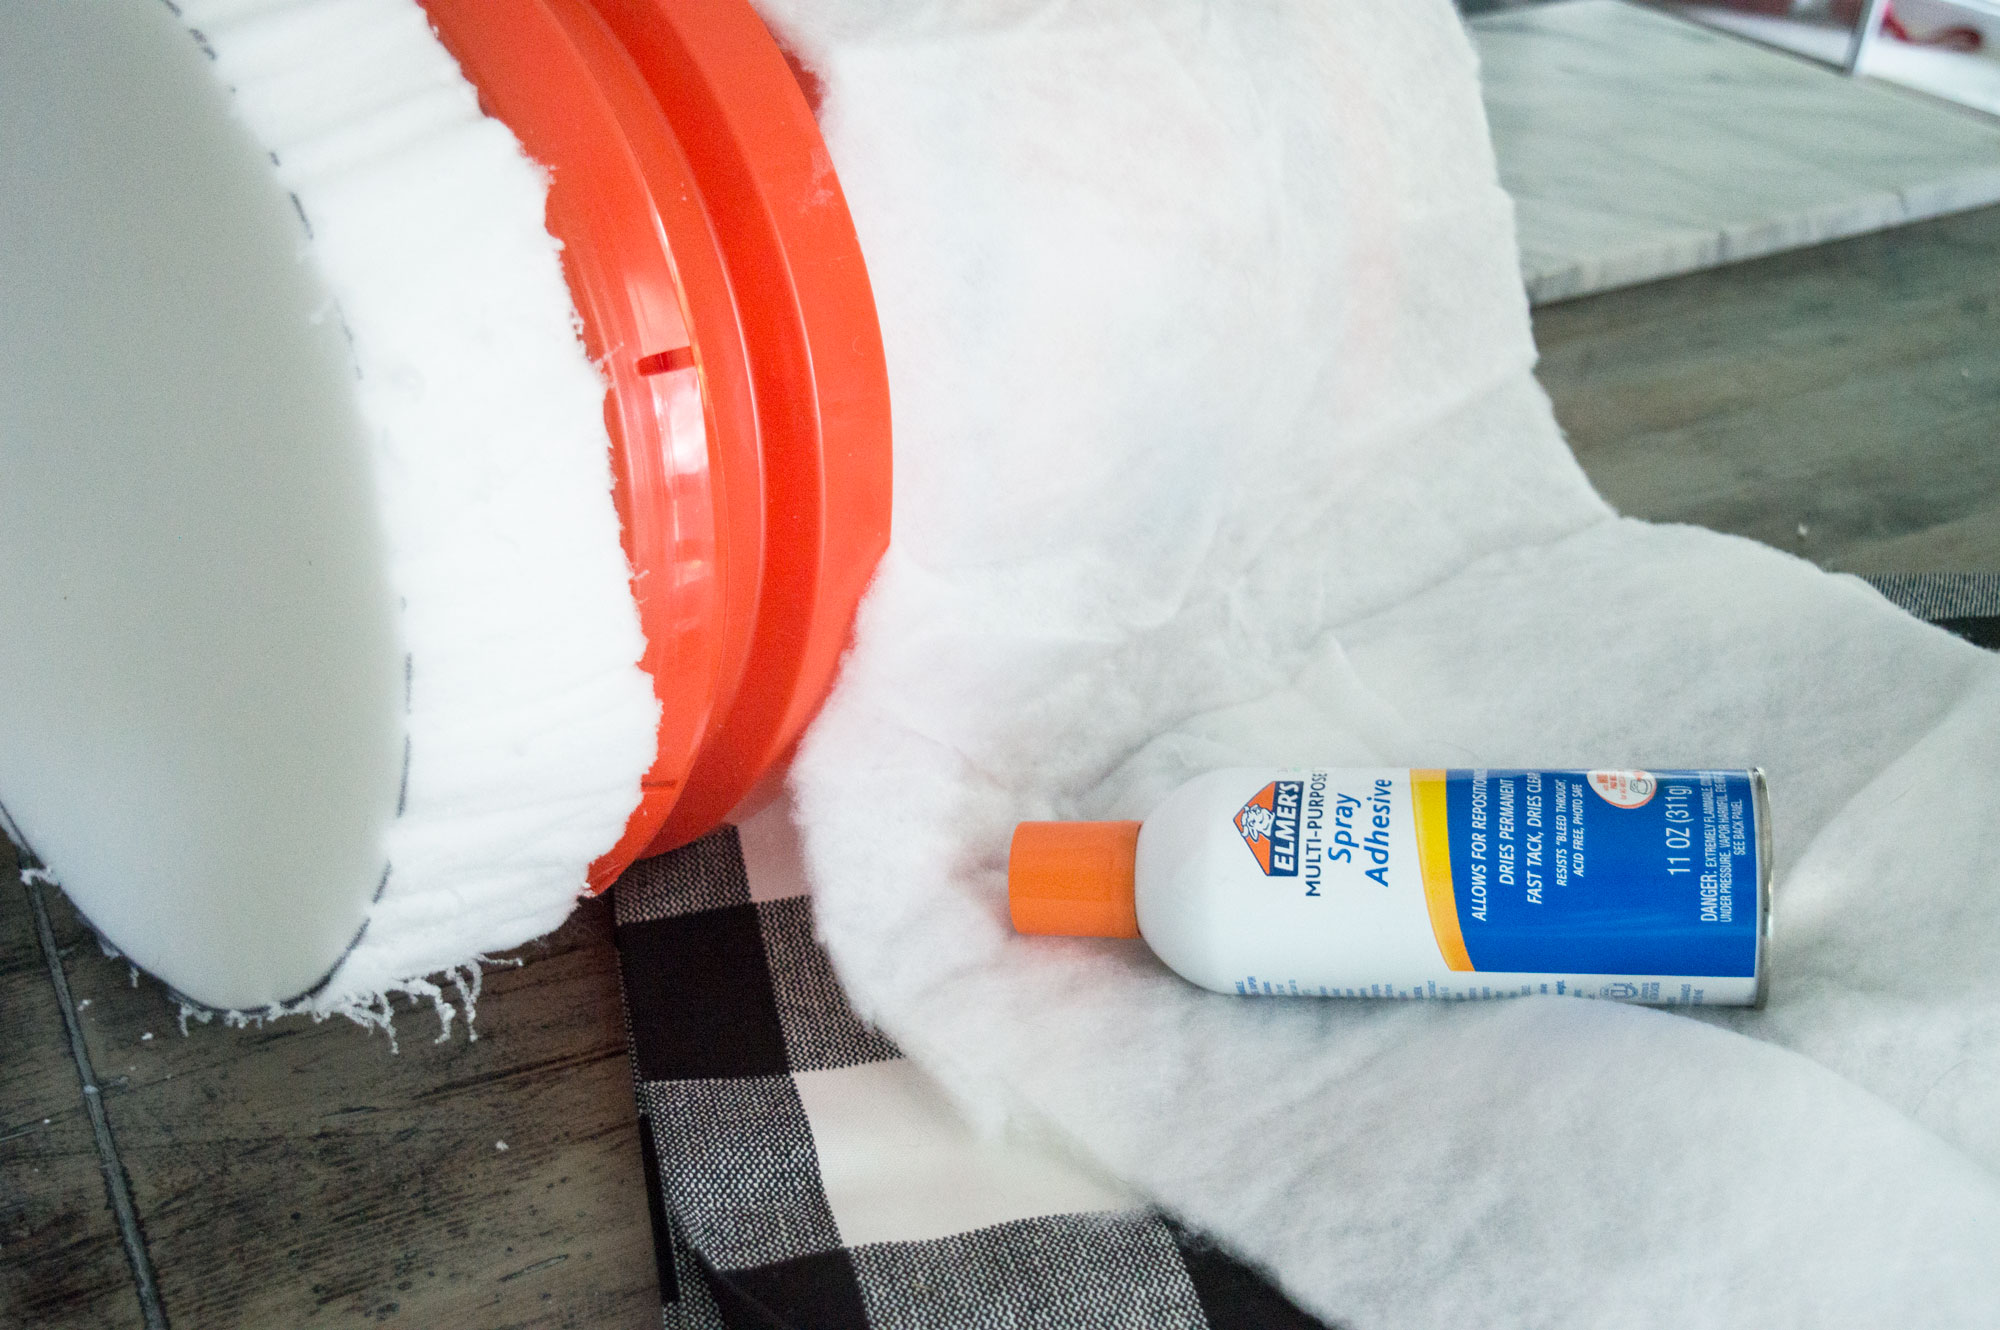
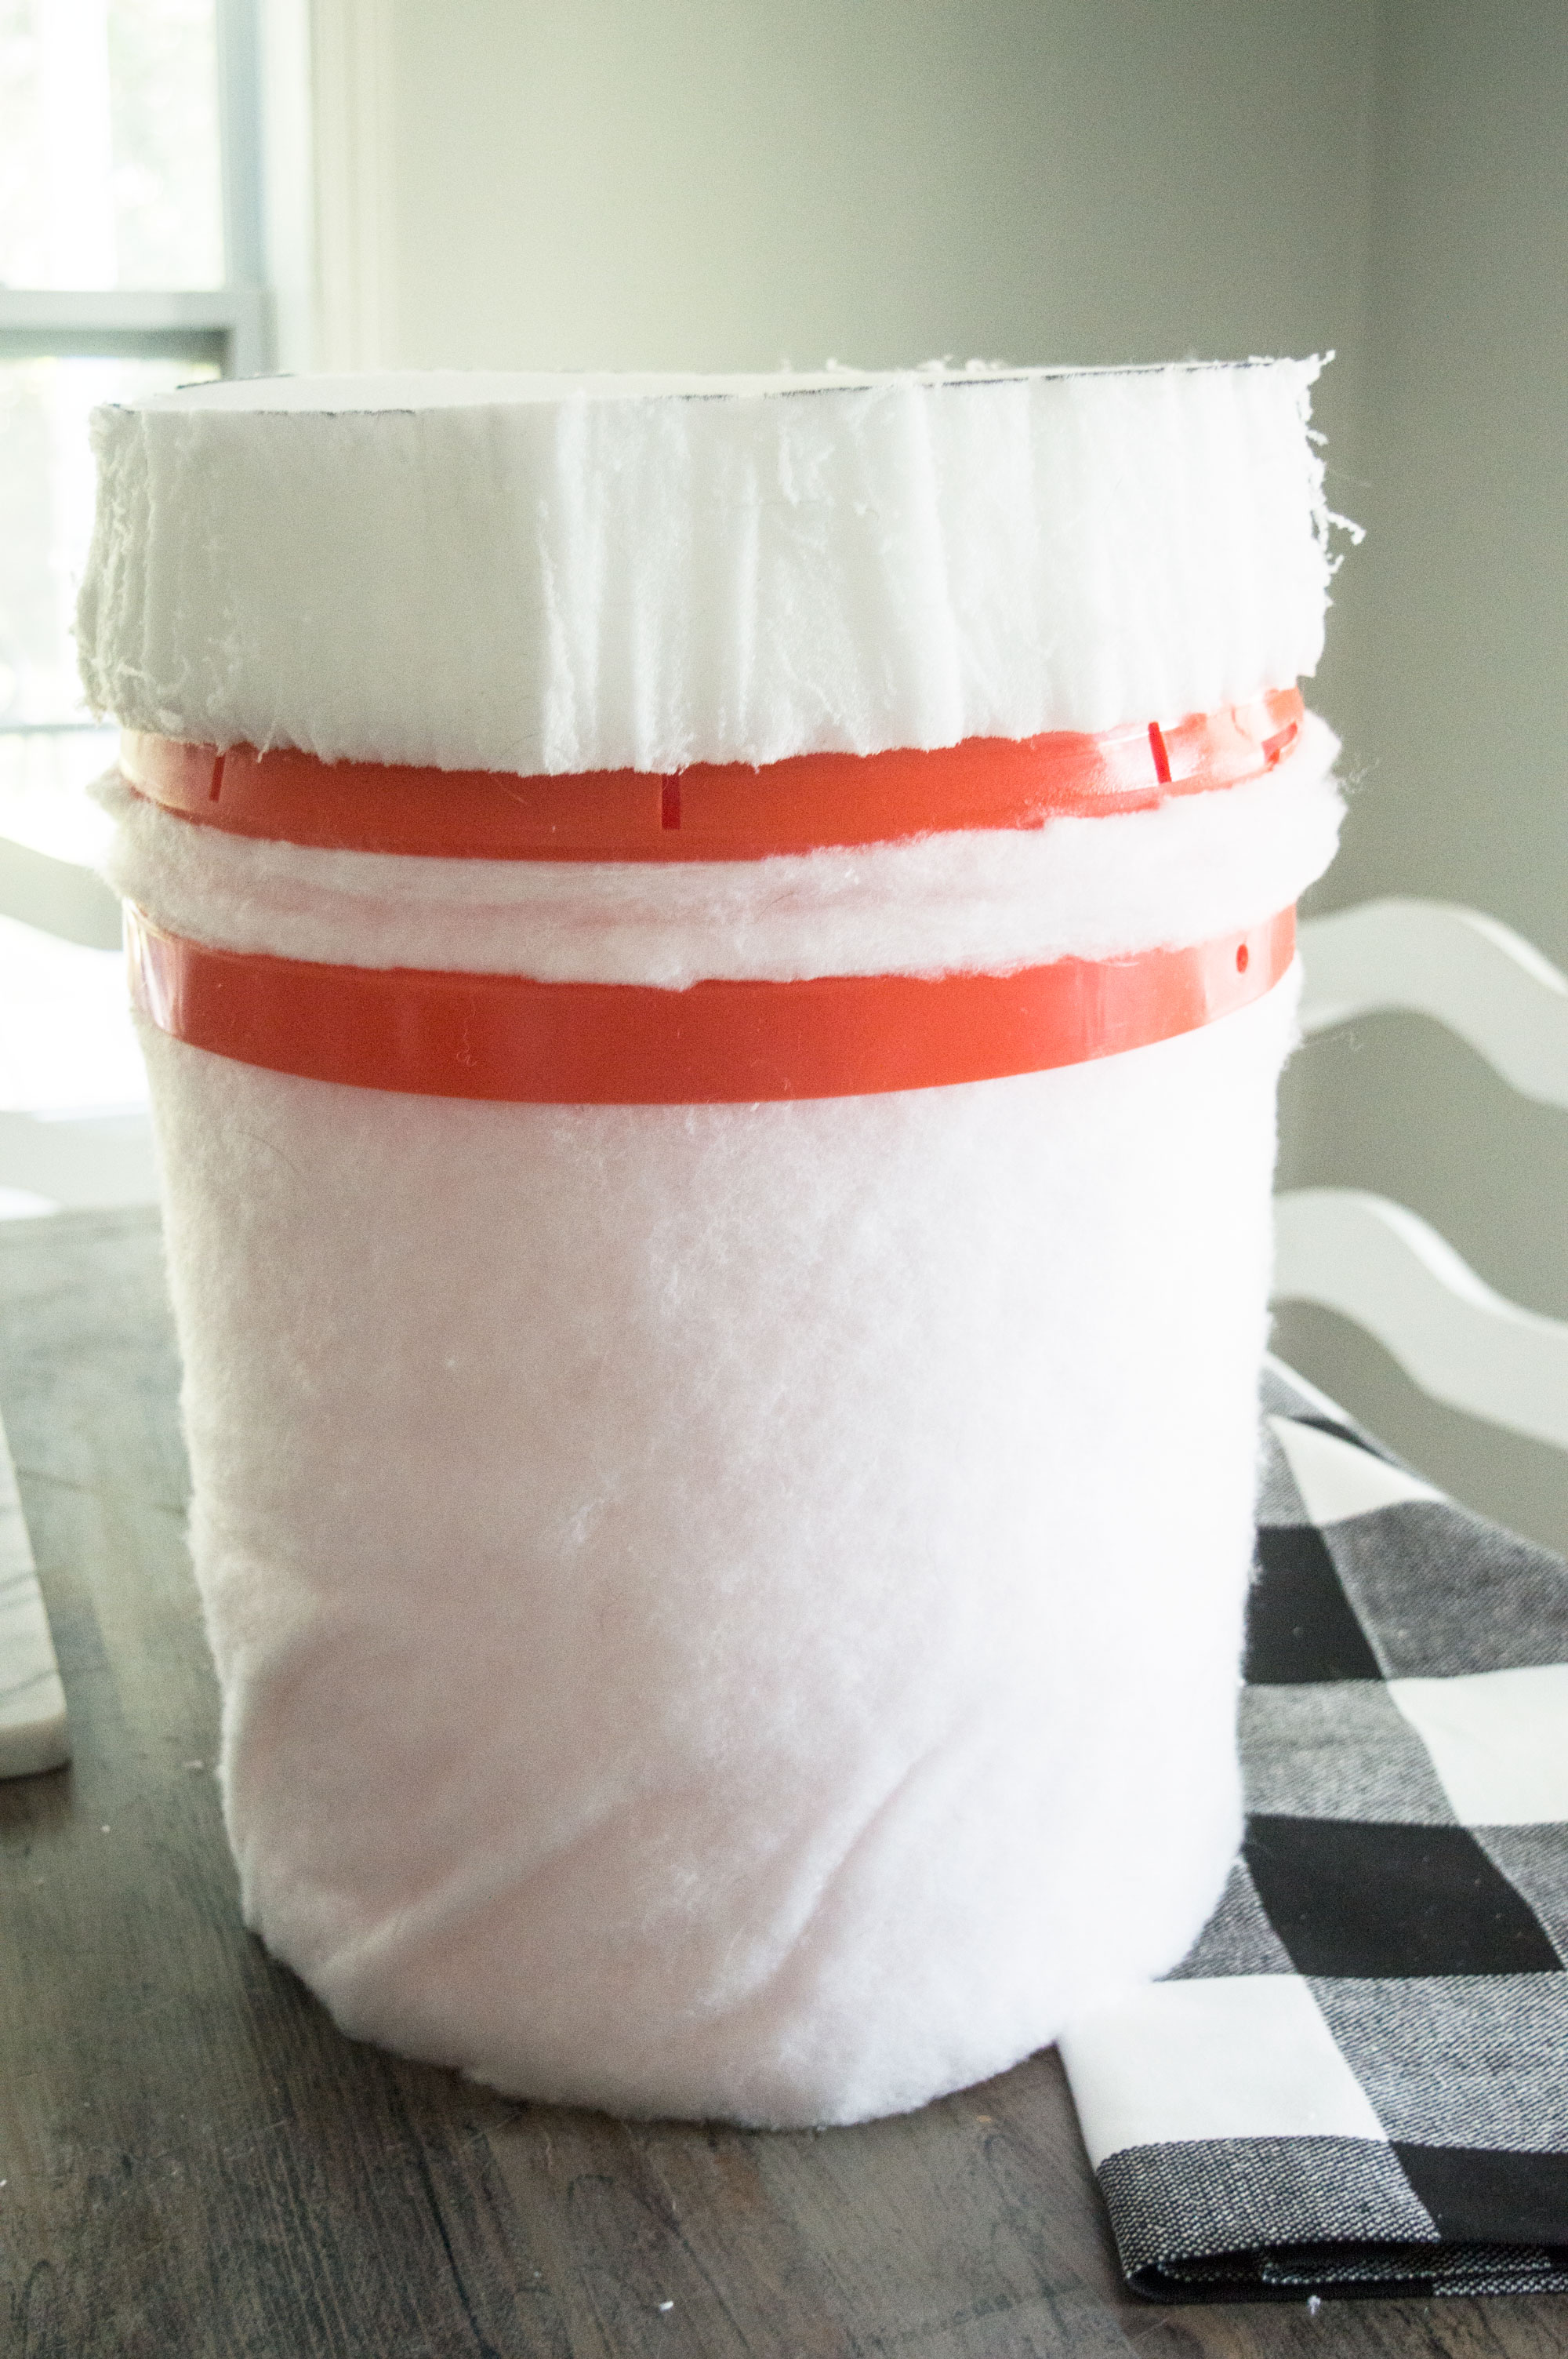
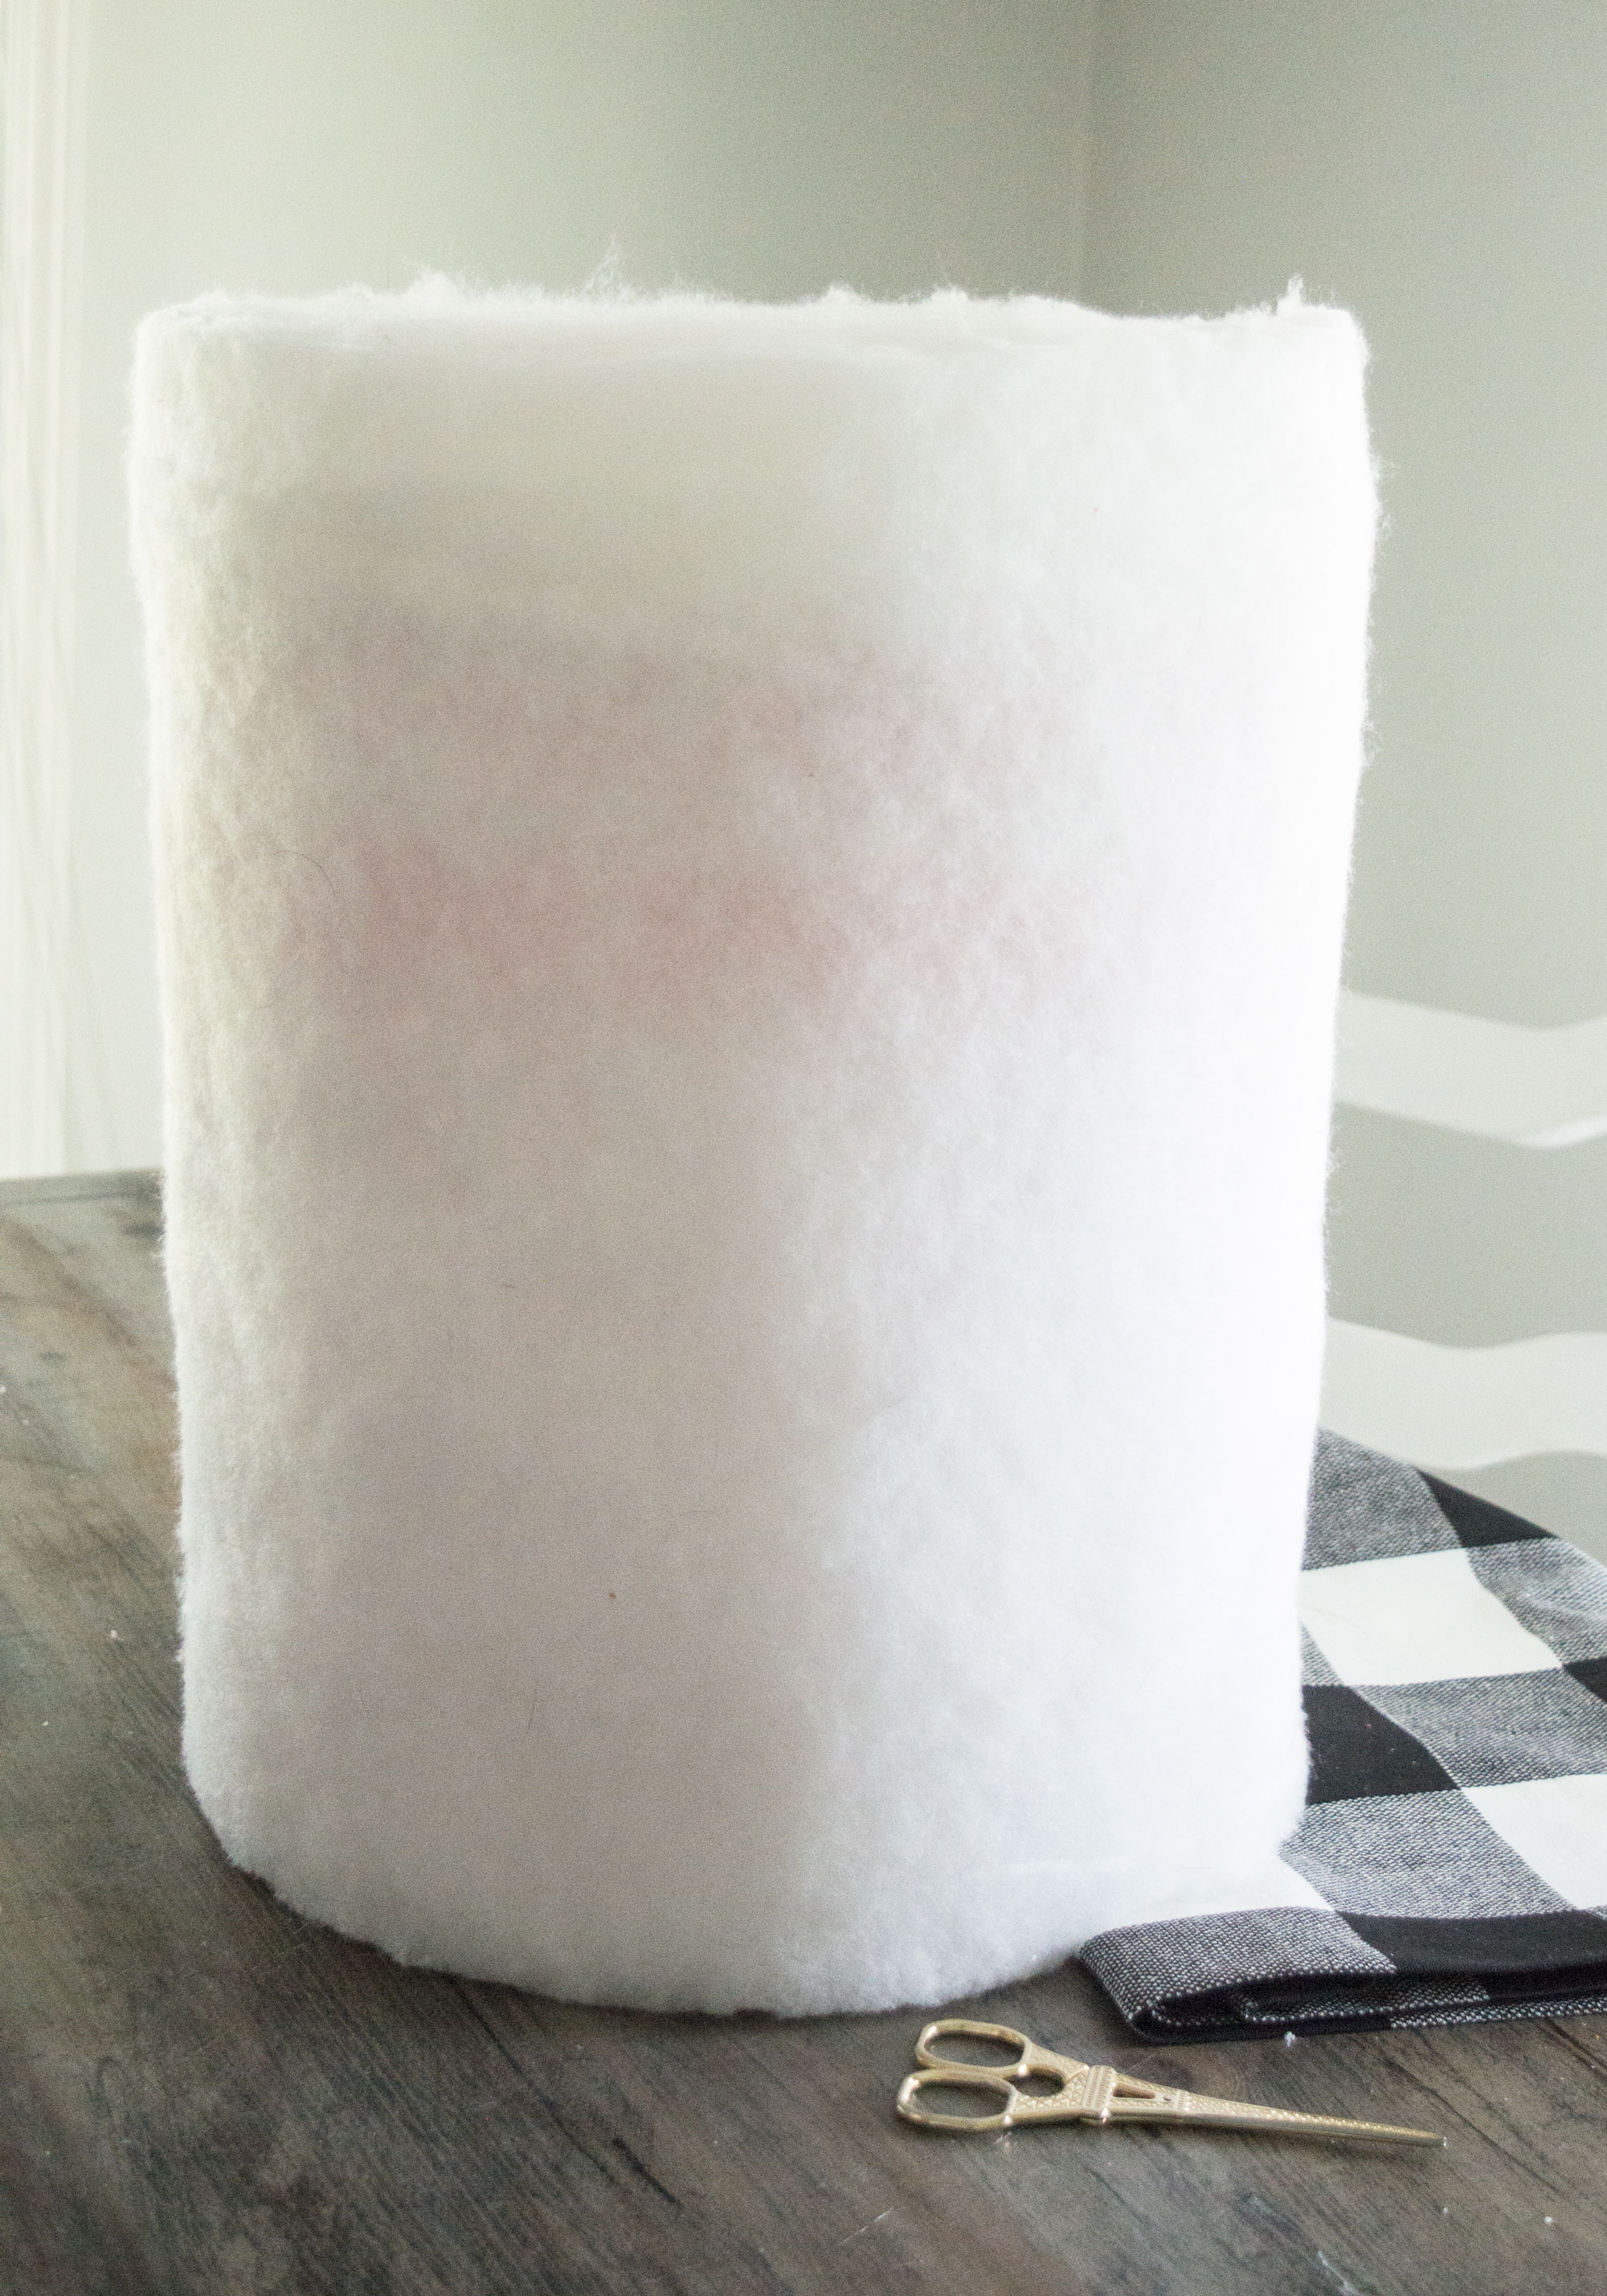
Step 2: Remove the handle and cover the bucket with the quilt batting using the spray adhesive. Since my bucket had a little lip on it, I did two layers underneath to even that out first. Then, snap the lid firmly on your bucket and cover the entire thing with two more layers of quilt batting! Trim the excess.
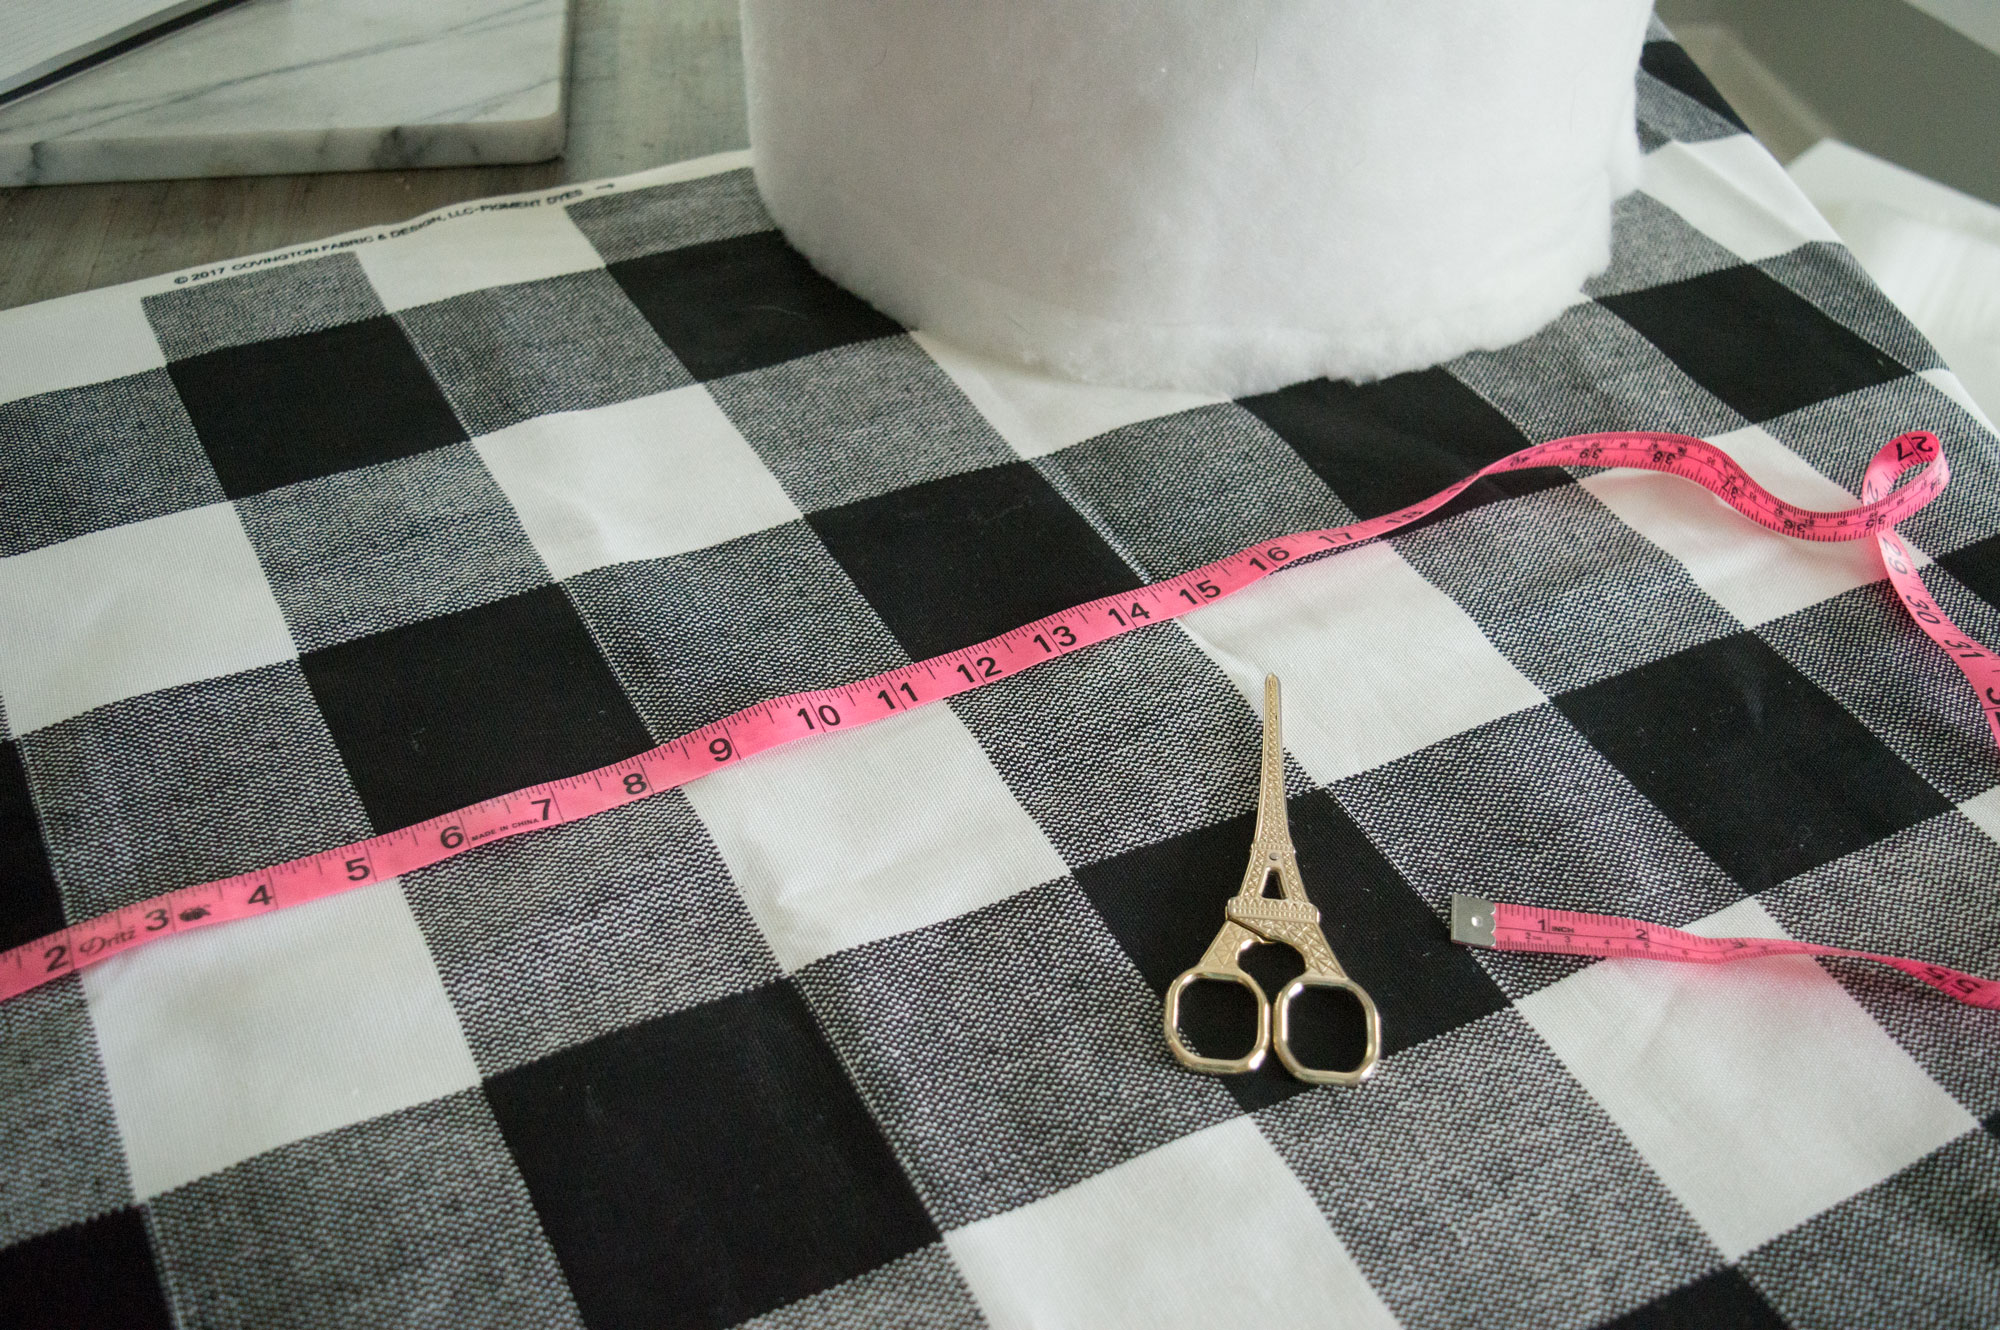
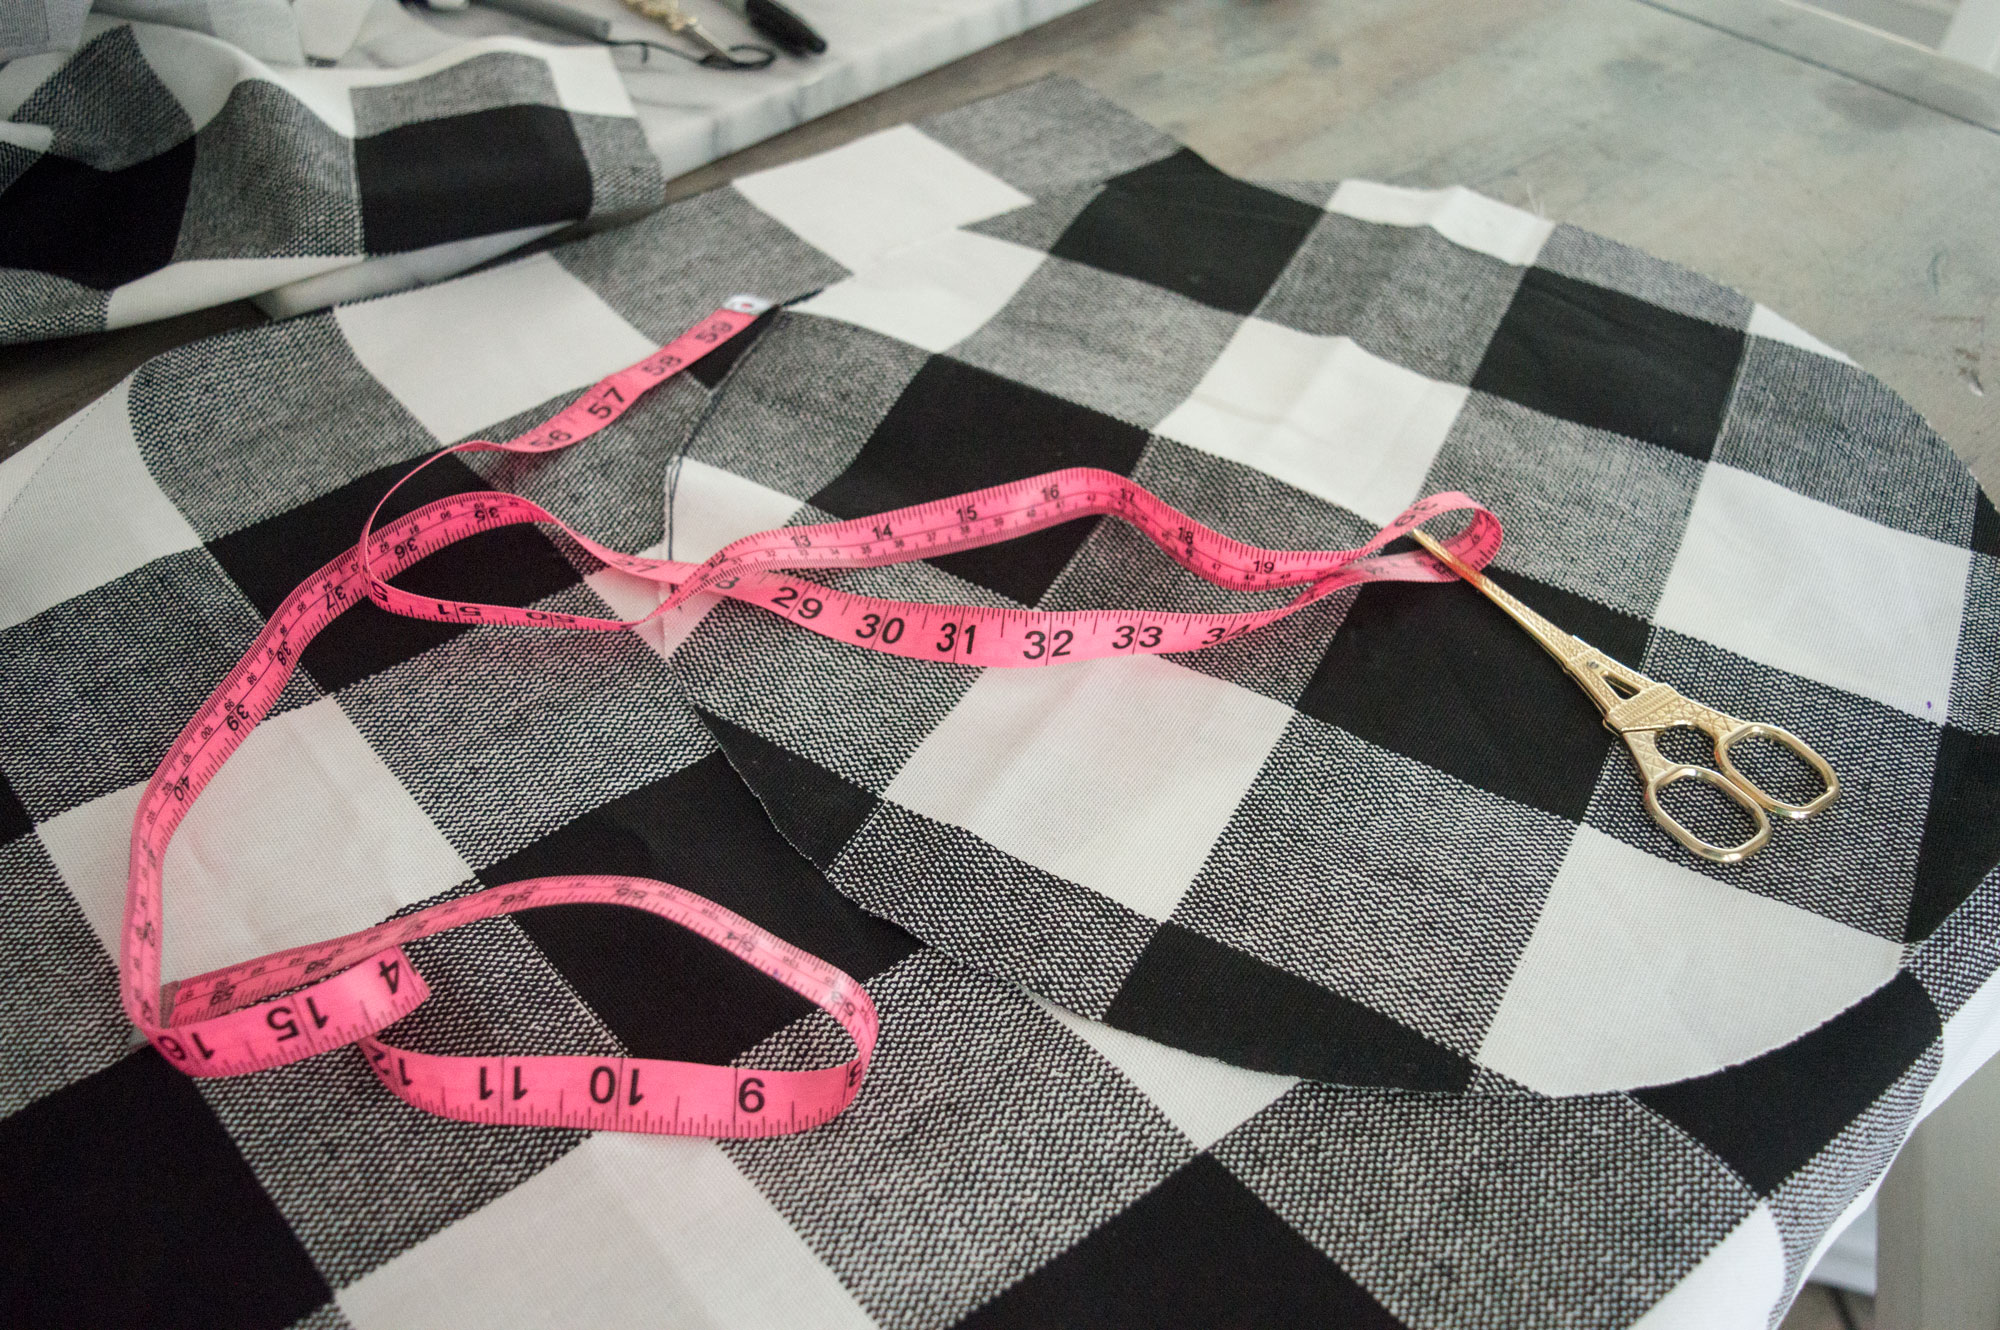
Step 3: Measure your padded bucket. Take the Height and the Circumference of the TOP portion of the bucket. This is important because your bucket might be slightly smaller at the bottom than at the top. We need to to fit all the way down so you want to measure it at its widest. Measure and re-measure. Write it down!
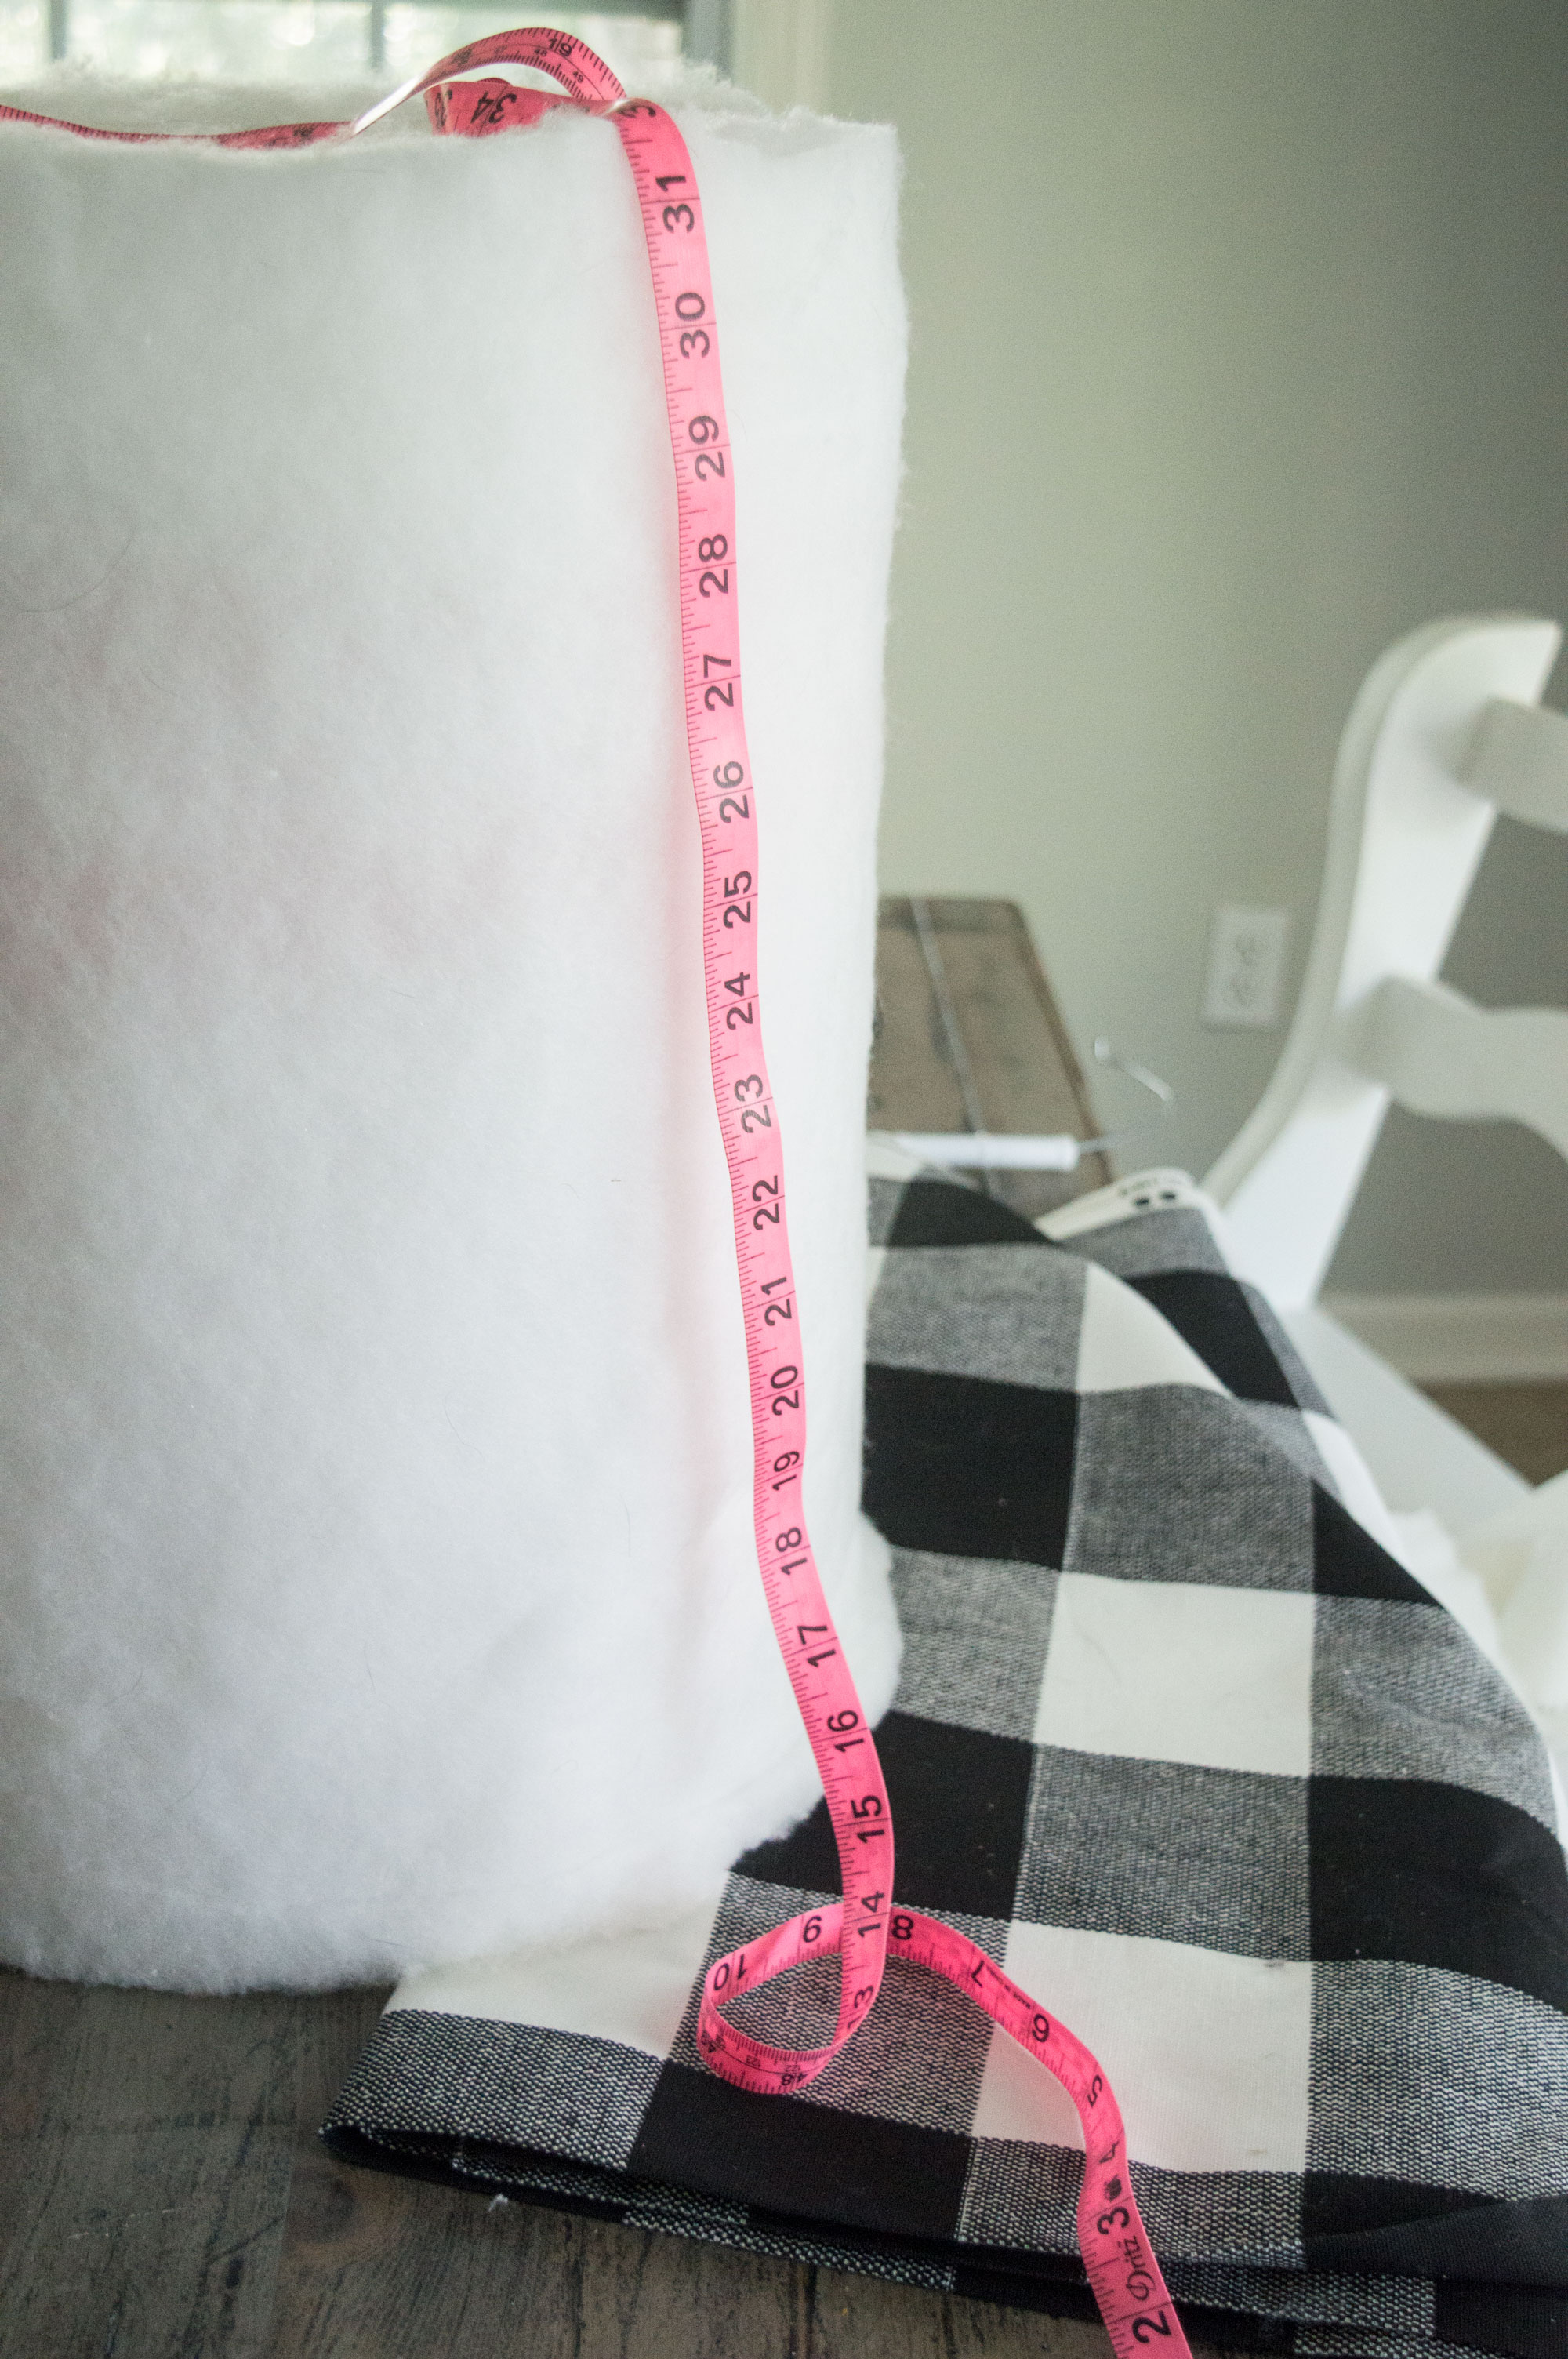
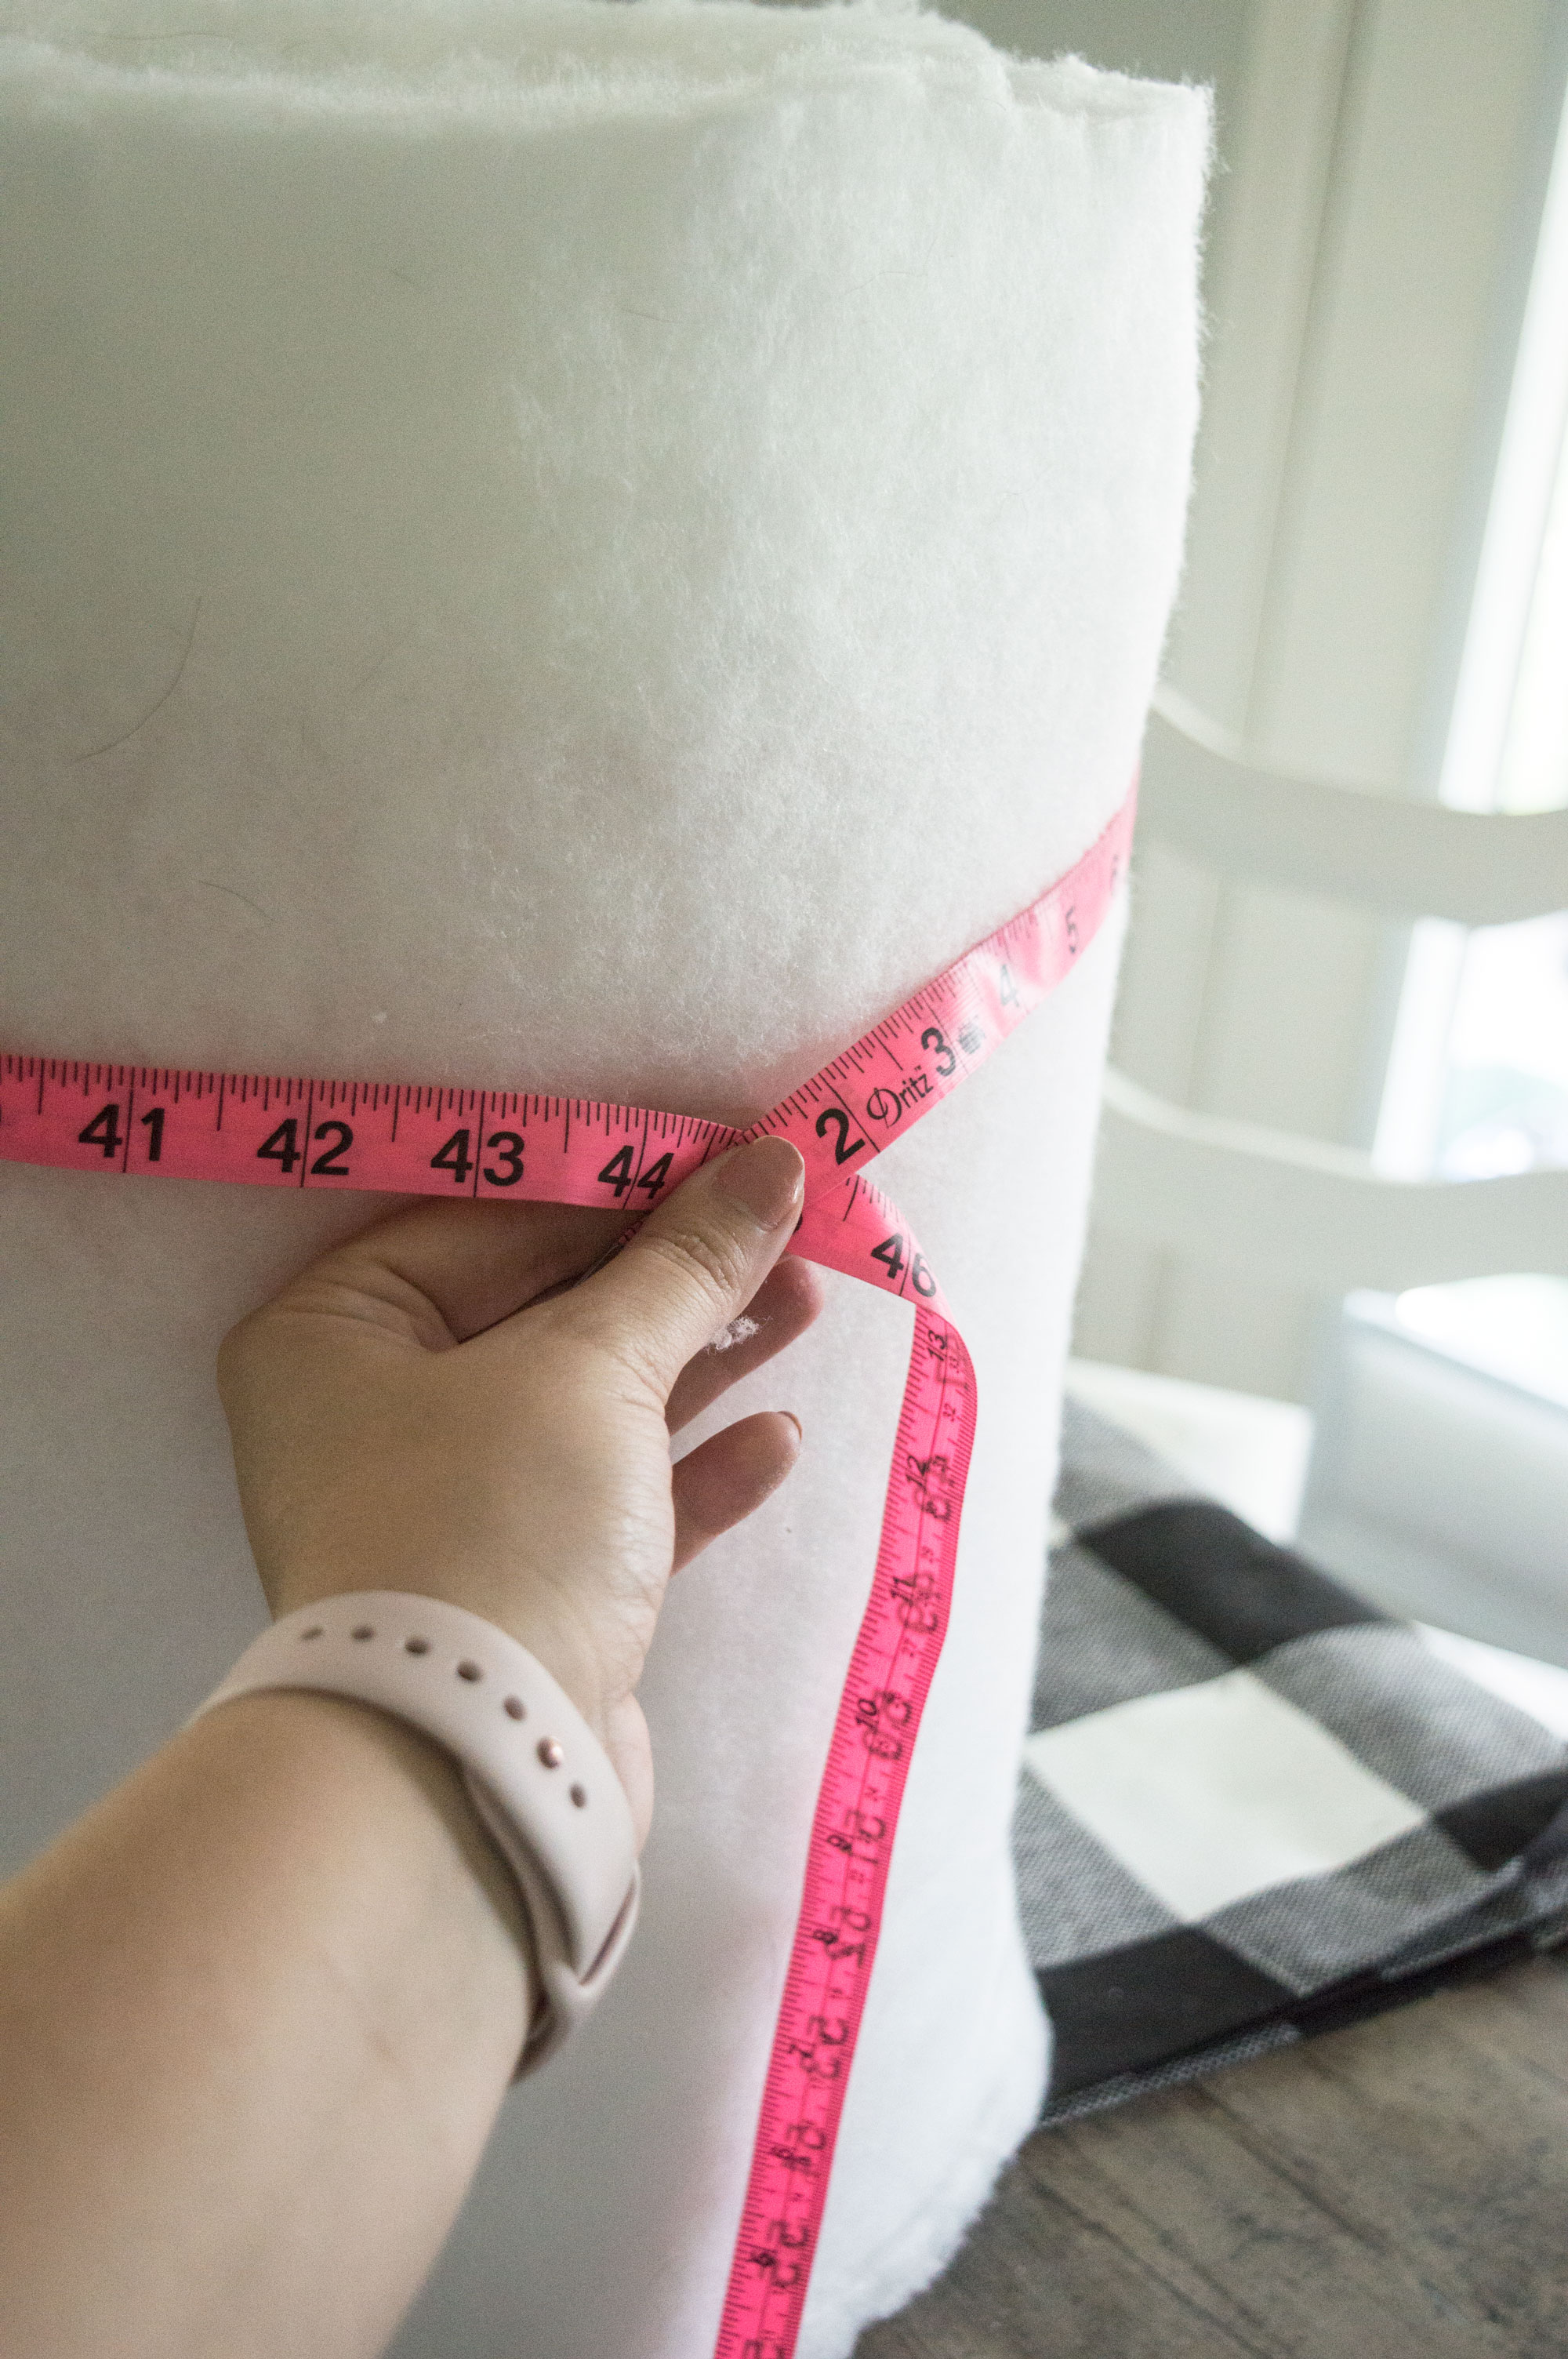
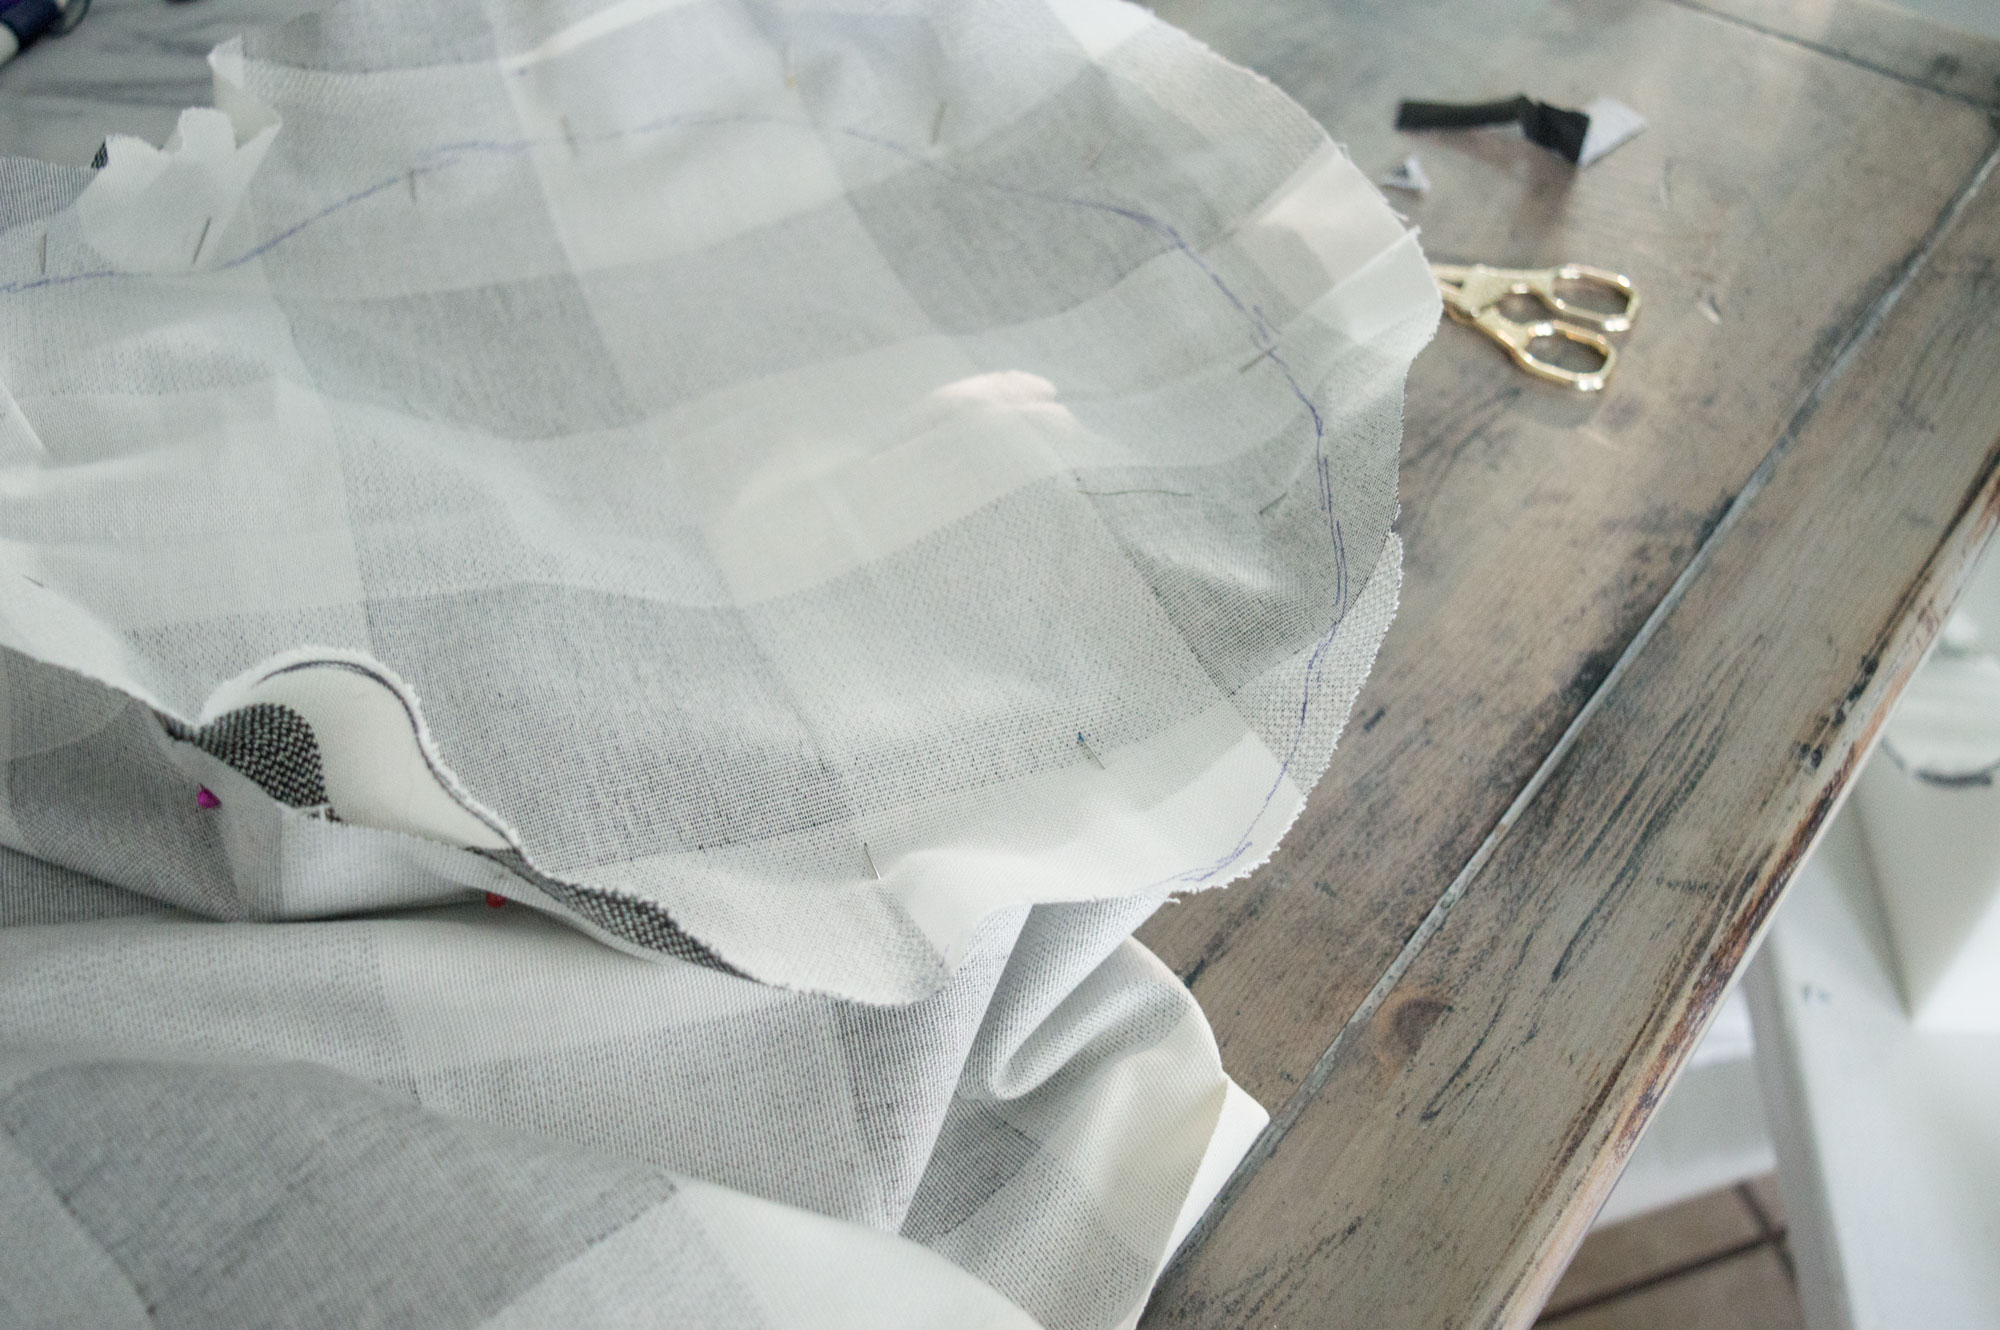
Step 4: Cut your fabric to fit. For the top, the best way to do this is to turn the bucket upside down and trace the top onto the wrong side of the fabric. add 1 inch all the way around and cut that out. Then, measure out your rectangle for the body using the height and circumference. The circumference will be the width (mine was around 44″) and the height will be the height of the fabric. Add 2 inches to the width (1 for each side) and 5 inches to the height.
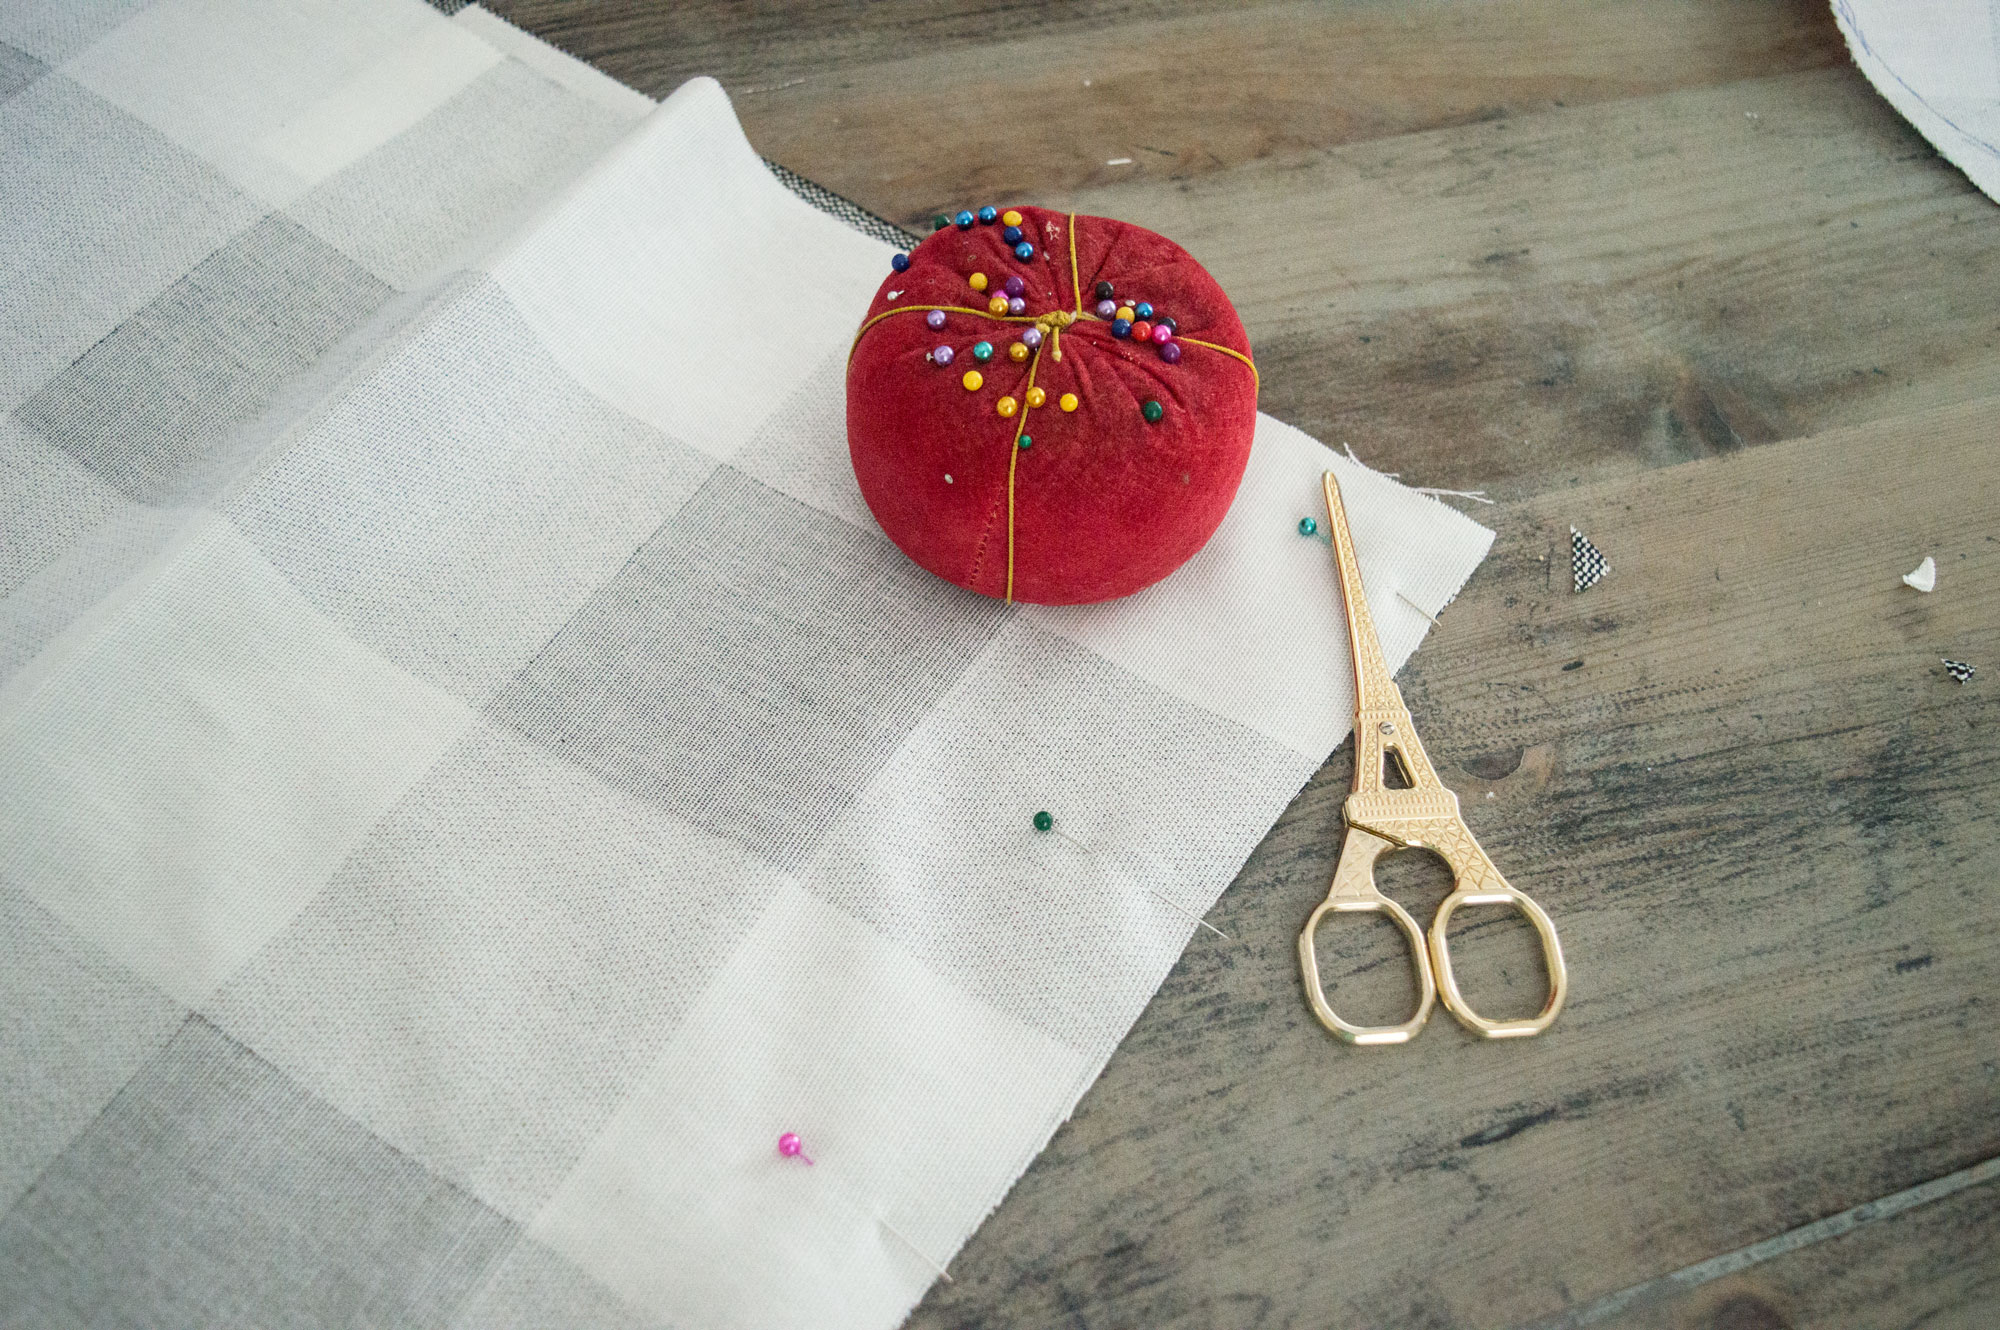
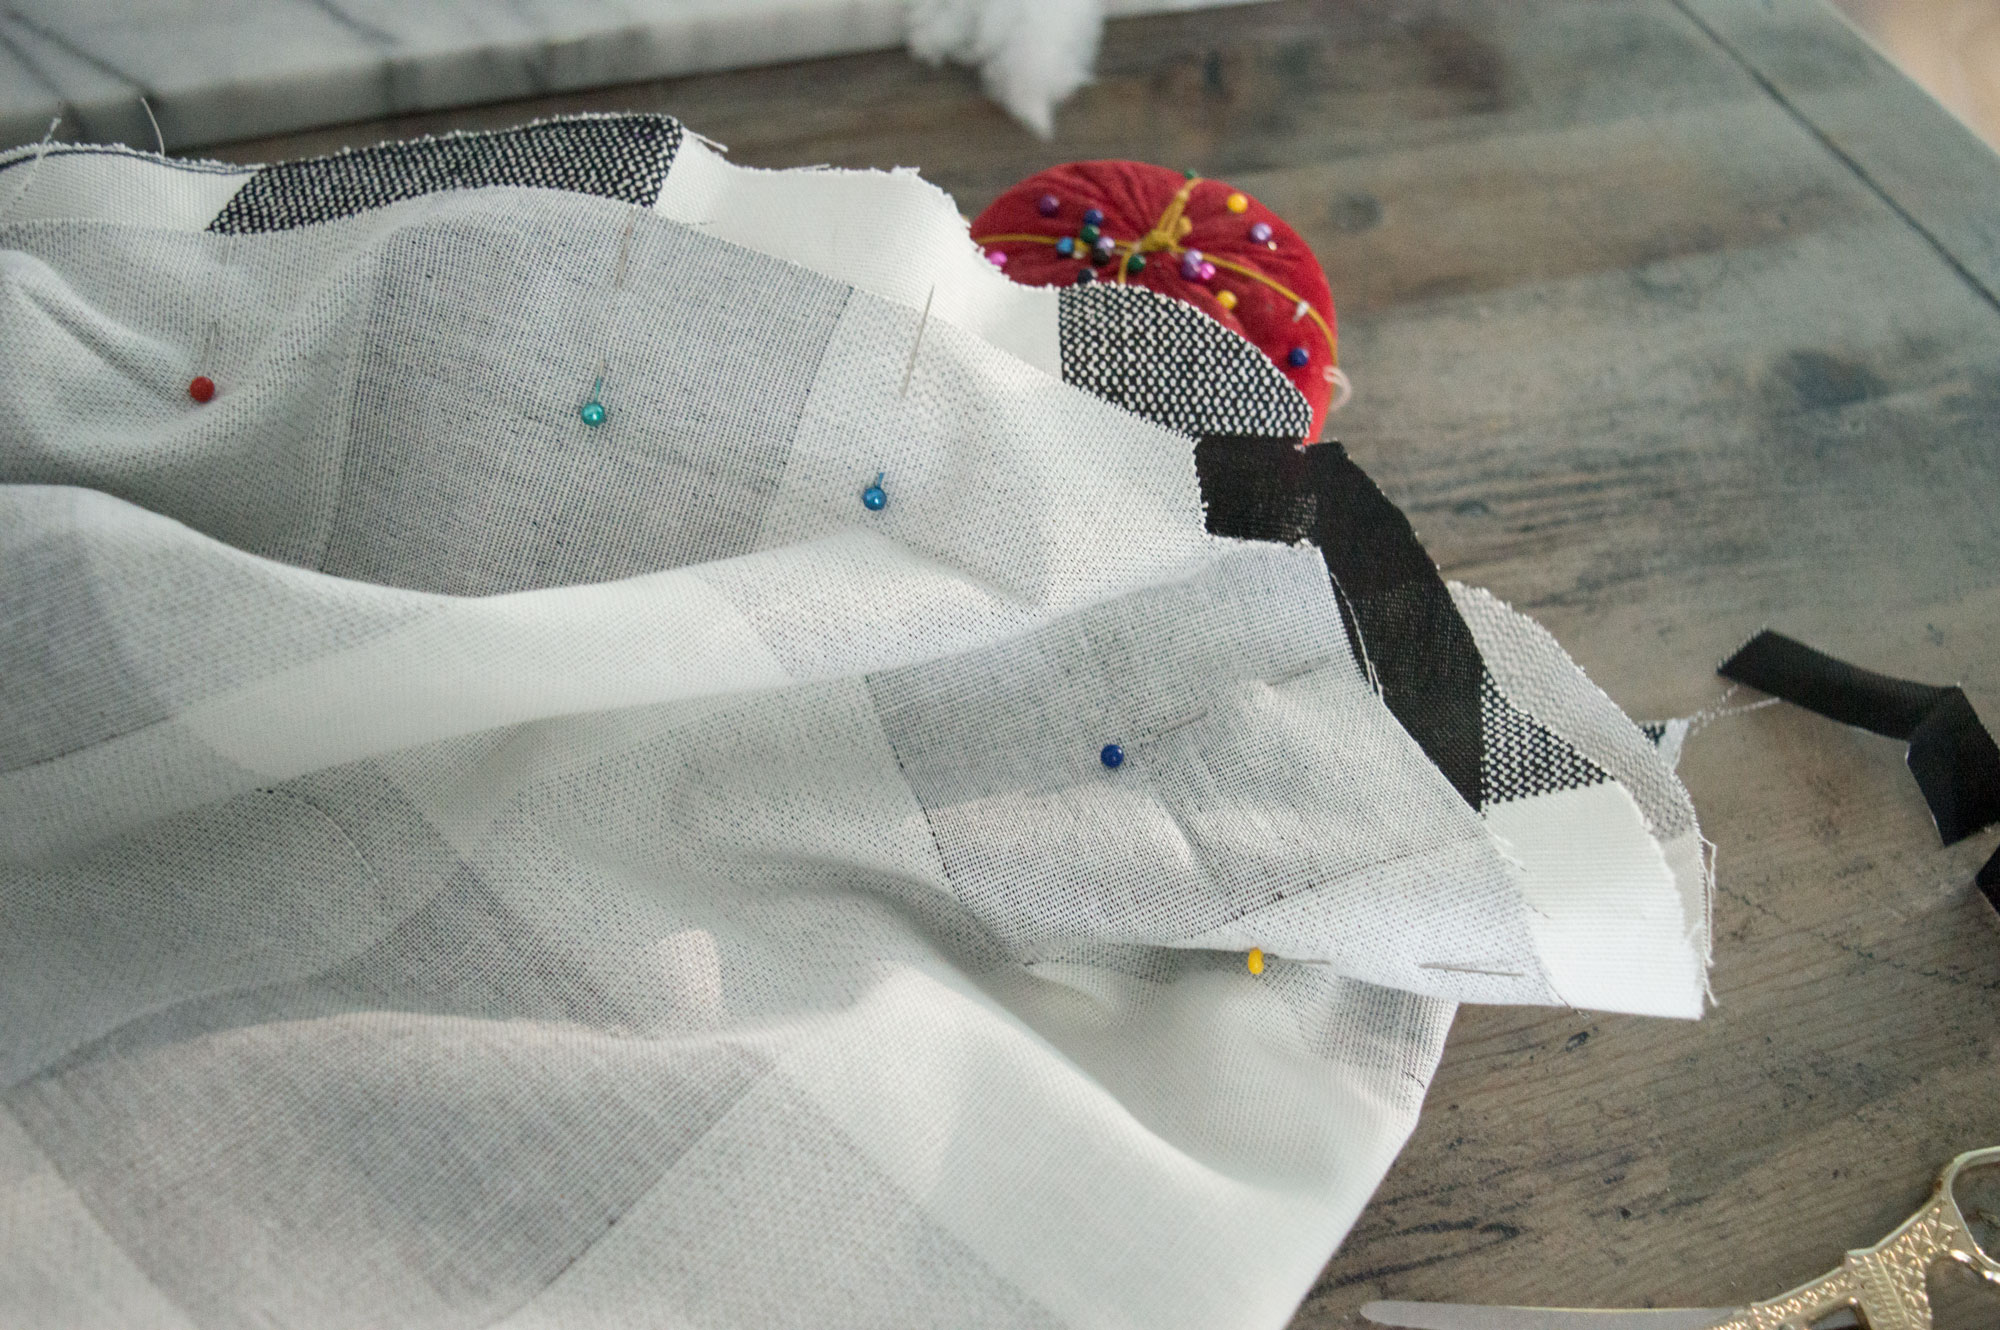
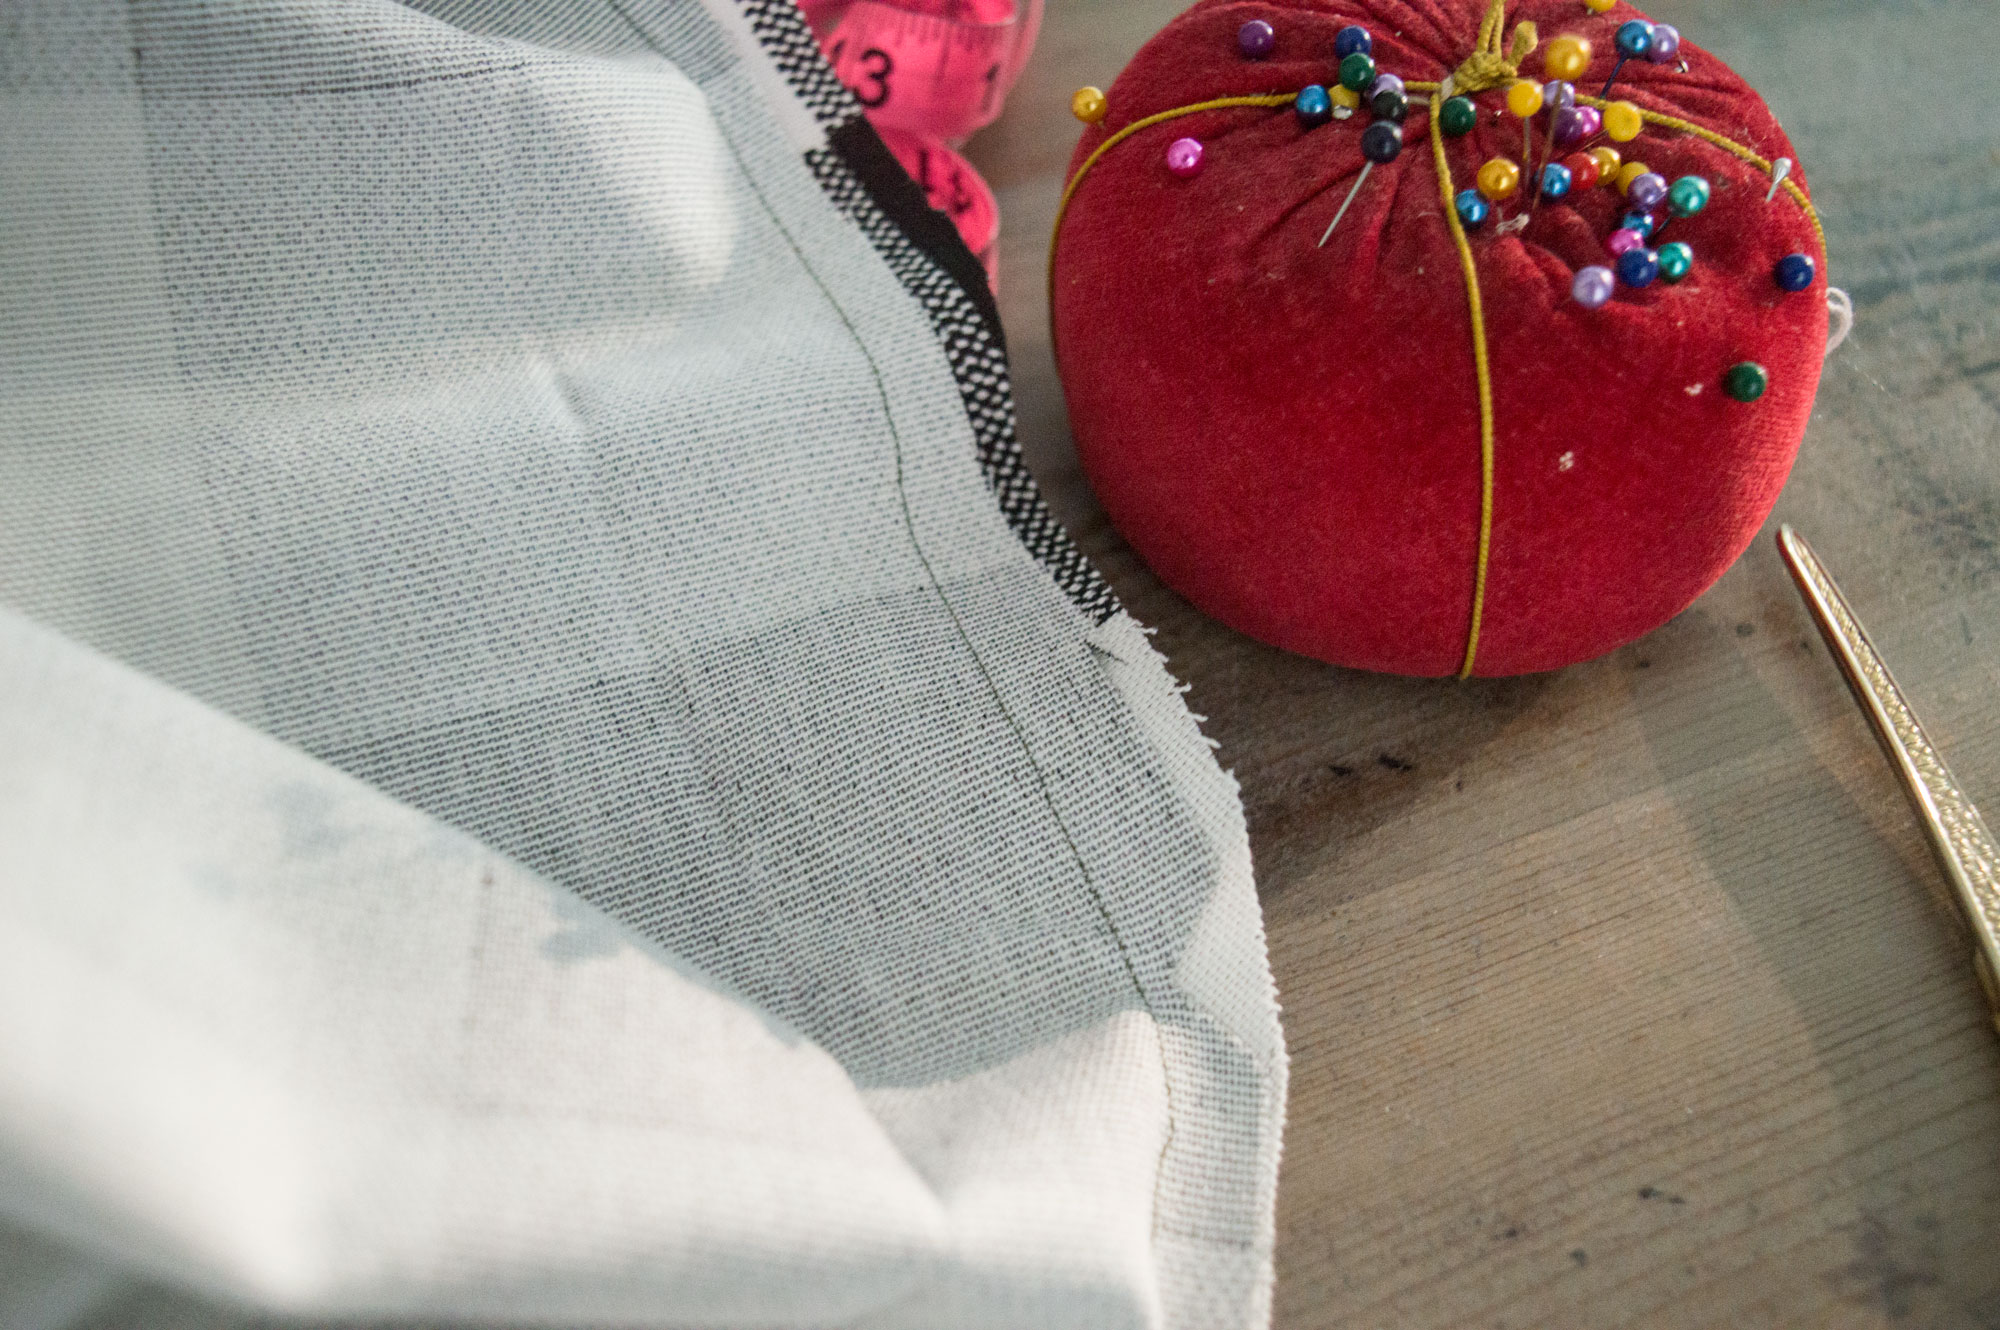
Step 5: Pin and sew the body piece. Fold the rectangle hamburger style with the wrong side of the fabric facing out and pin the two edges together. Then stitch about 1 inch from the edge of the fabric. This will create a round body piece. At this point, I would try the body piece on a make sure it fits snug but that you’re able to get it on.
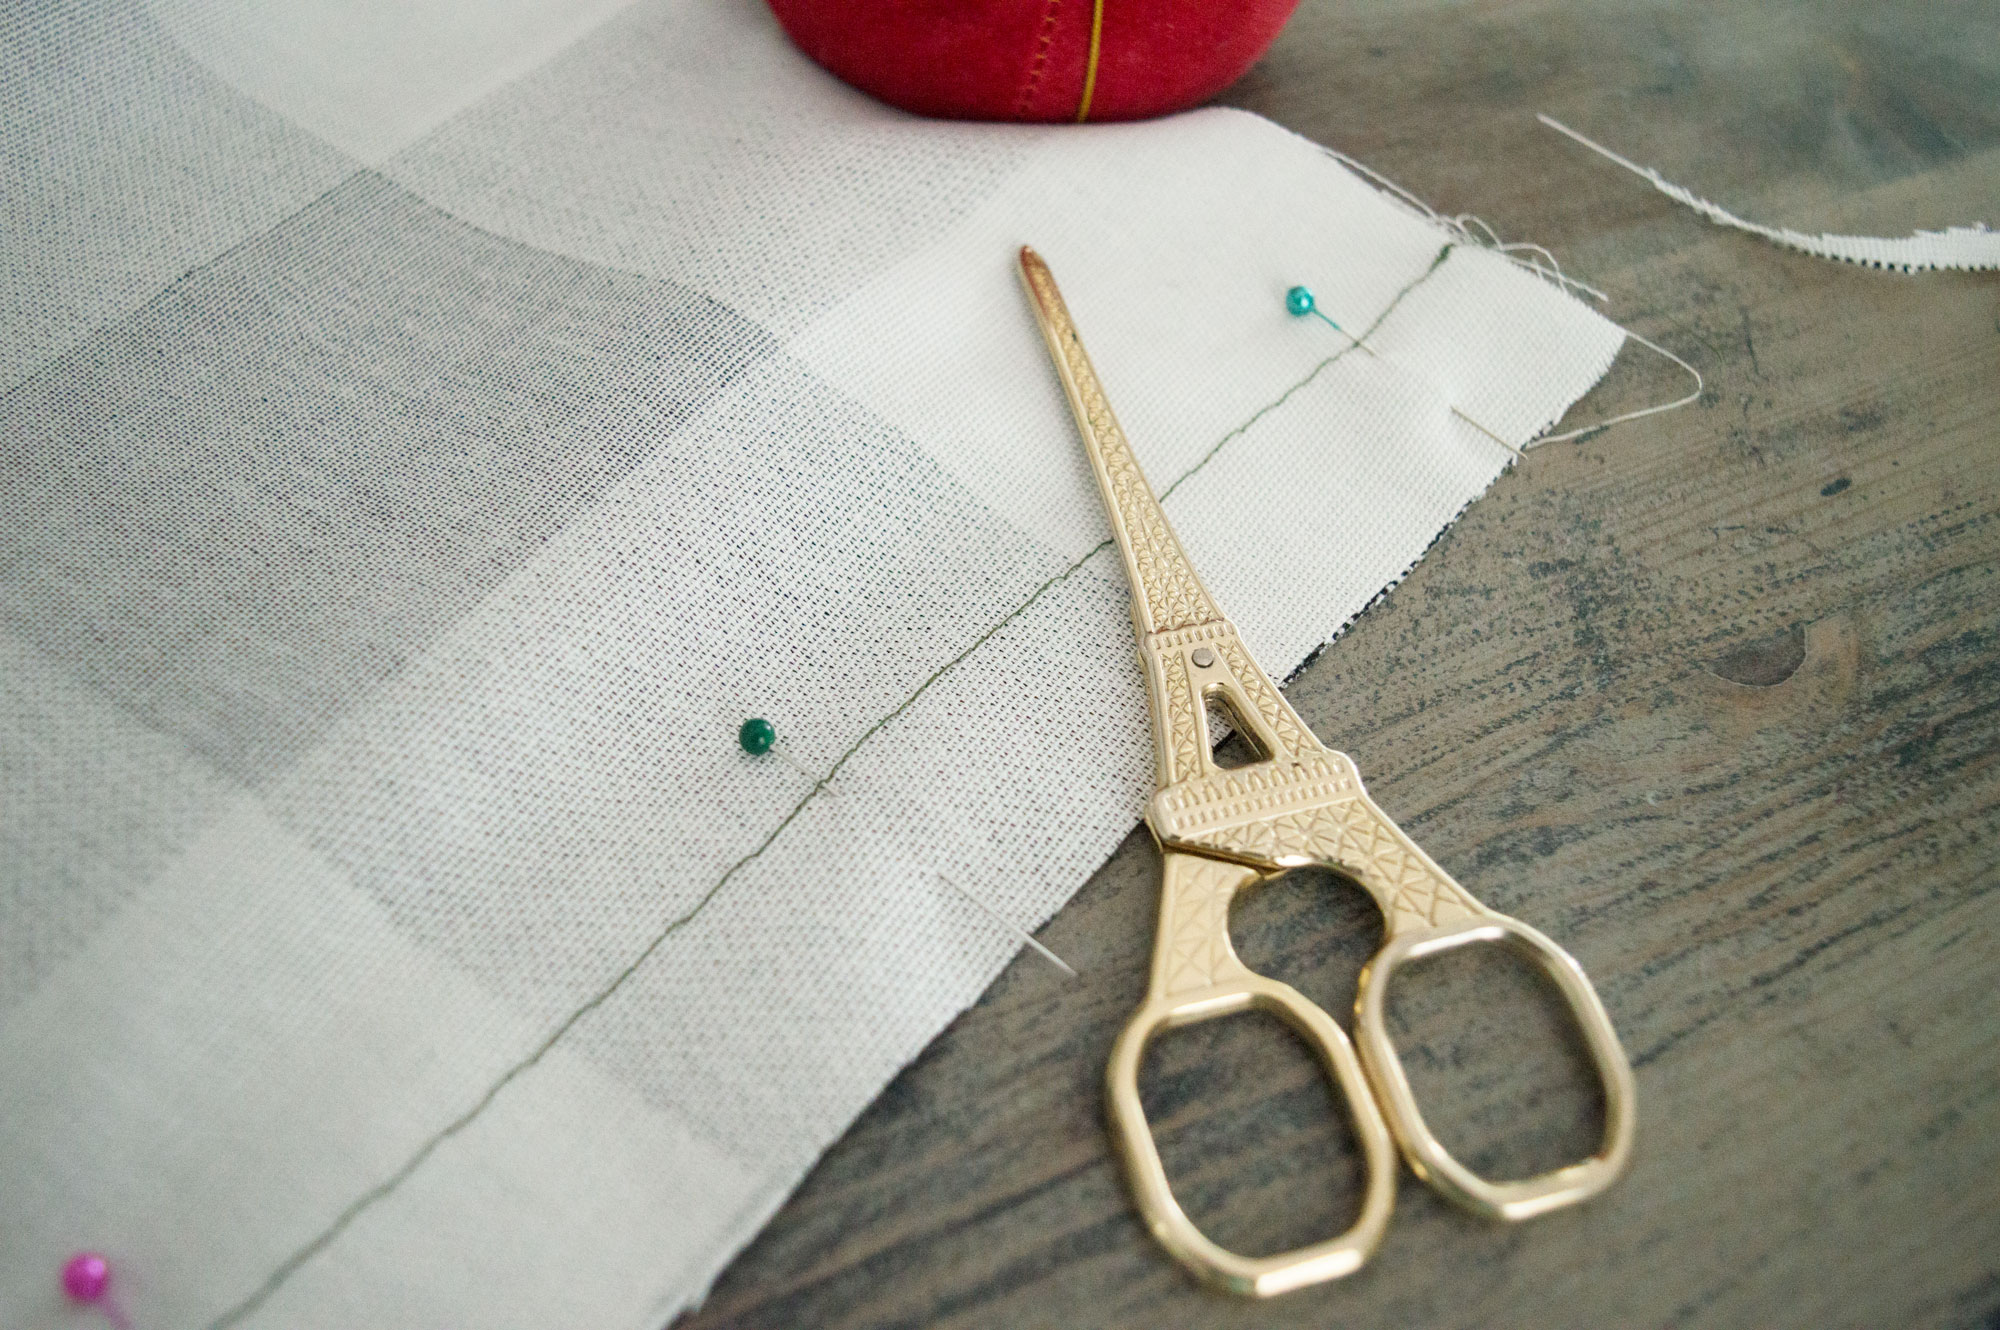
Step 6: Pin and Sew the round top piece onto the body. Pinning this is little tricky, but you can do it. Align the top circle with the top edge of the body piece (the right sides of the fabric will meet meaning the wrong sides are facing out toward you). They should line up pretty easily when you leave 1 inch of fabric past the pin (this is confusing… look at the pics). Then stitch the two 1 inch from the edge.
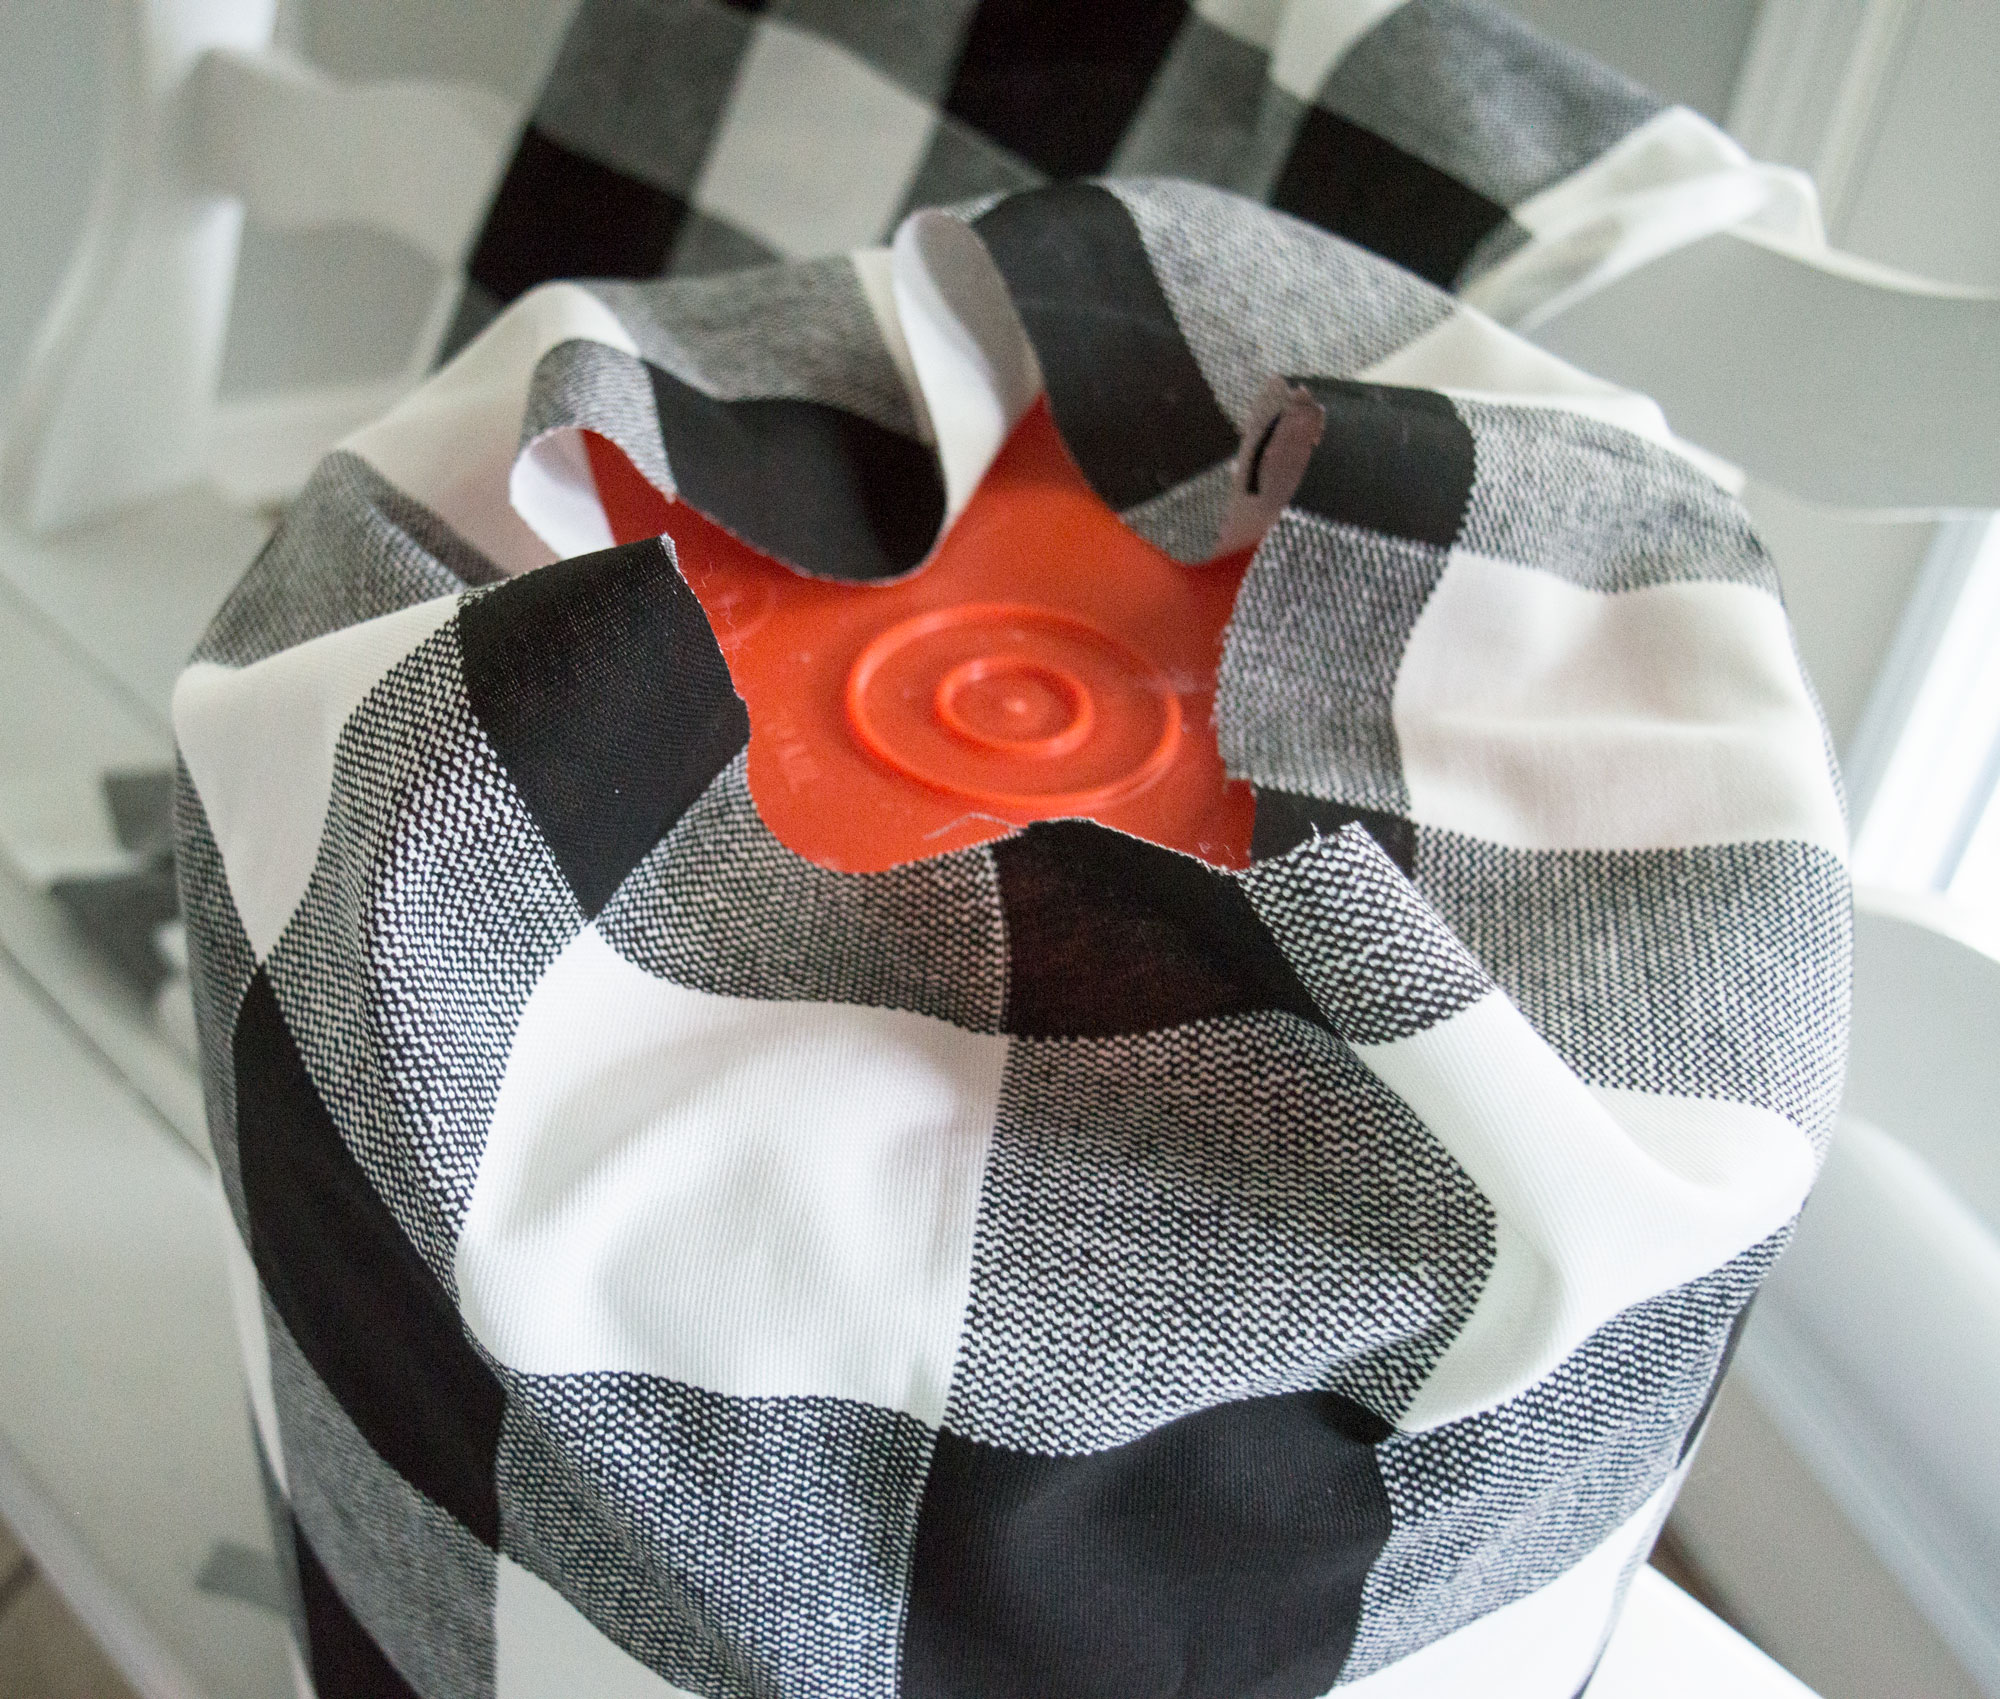
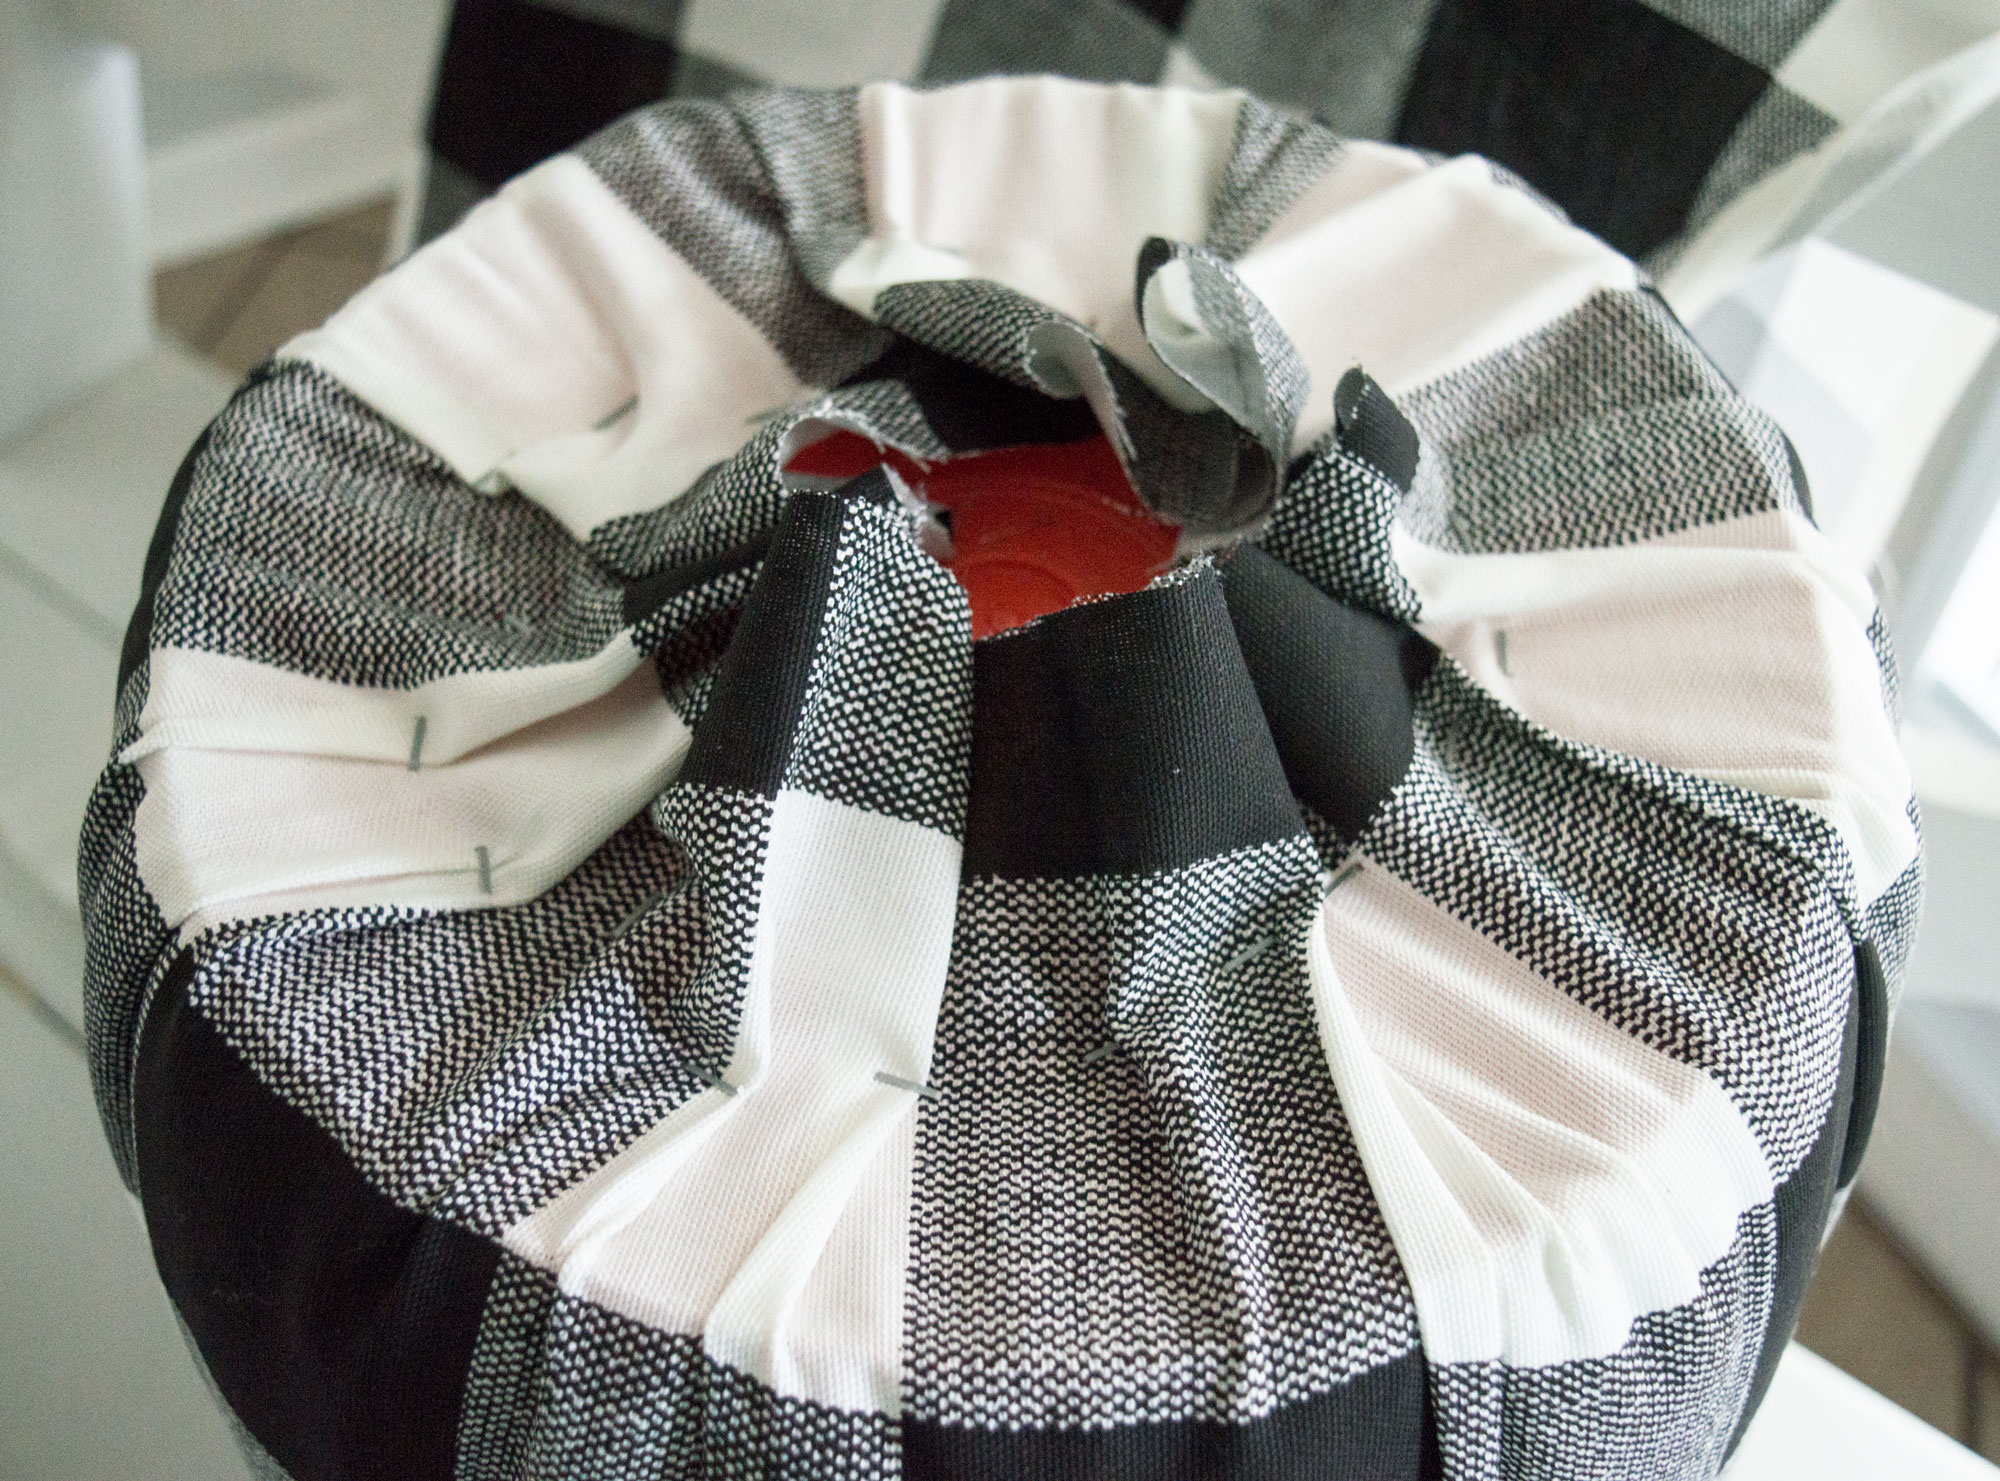
Step 7: Pull the cover onto the padded bucket and make sure it all fits snug. You’ll have a decent amount of excess fabric left at the bottom.
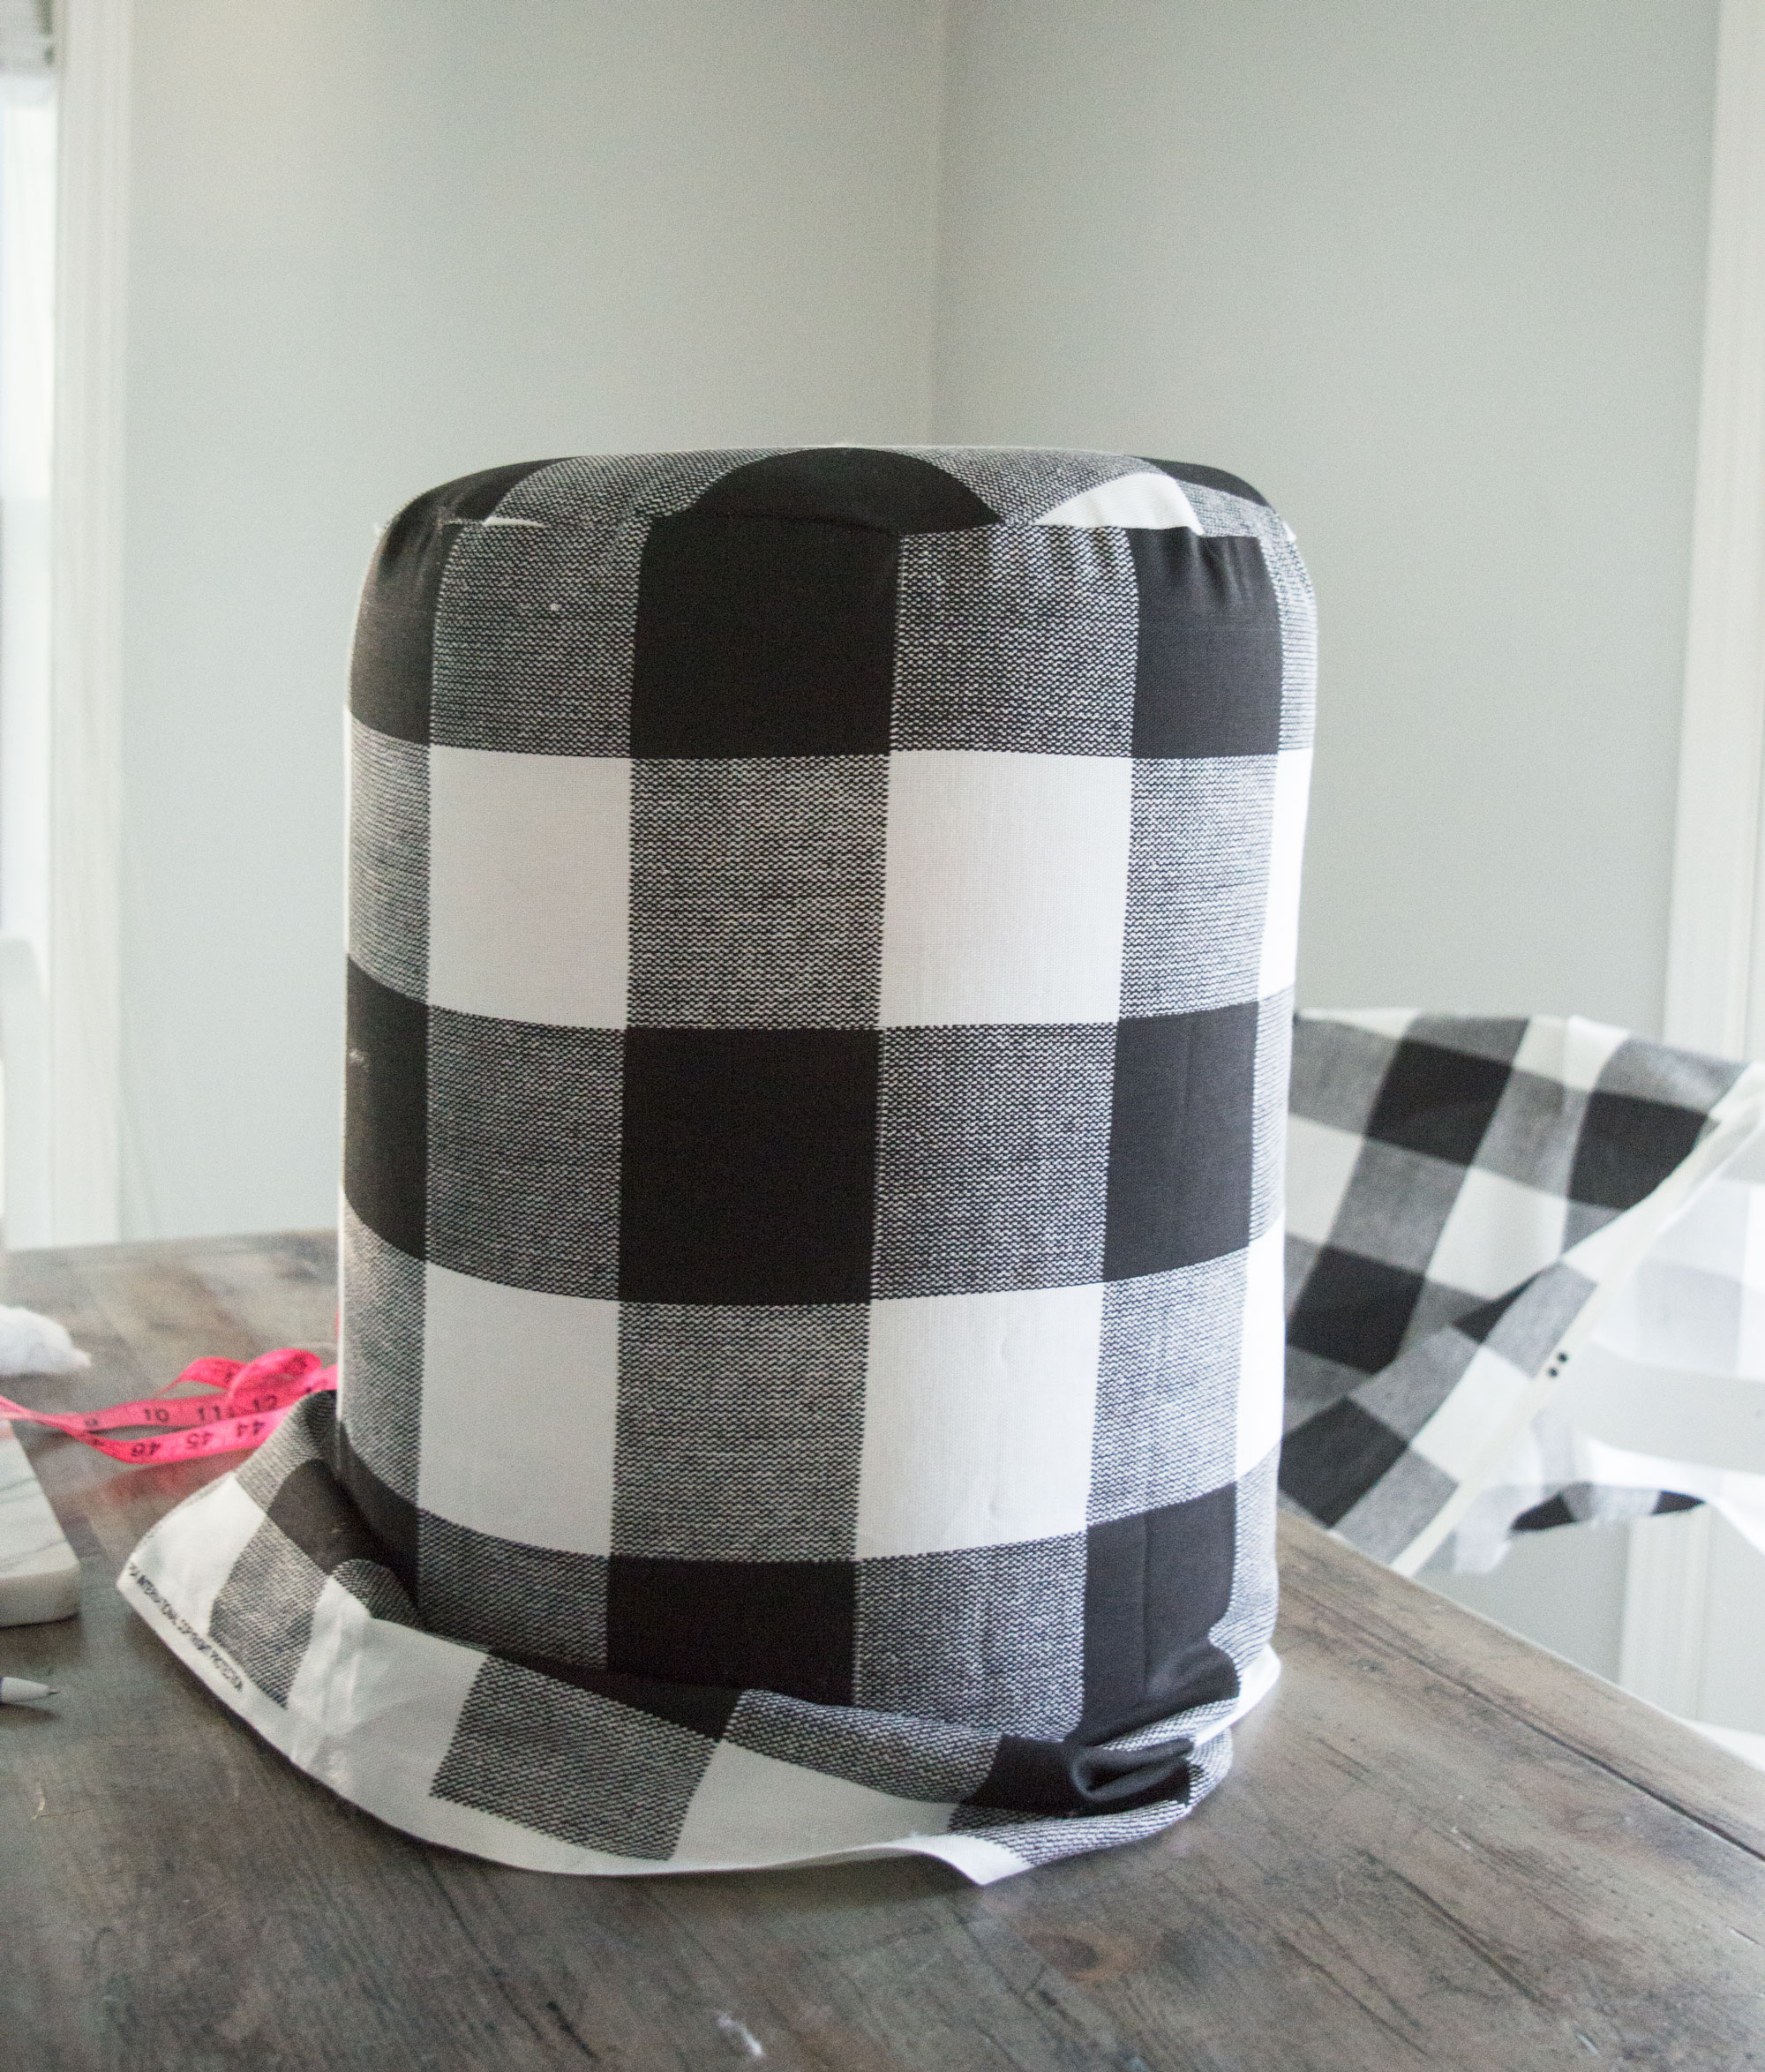
Step 8: Turn the bucket over and use the staple gun to staple the edges. Pull them tight as you go. Cut off any excess you have past the staples. If you think you have enough staples, put a couple more just in case.
AND BAM! You’re done! How fun and easy. I made two for my guest room and I get TONS of compliments on them. They’re also super light weight and great for kids. They can pick them up and move them wherever the need to.
Please let me know if you have any additional questions in the comments below OR if you try this! I’d love to see pics of your finished products.