I decided early this morning to throw this post together for you guys. Tons of you have reached out to me asking me to share more about my selection process. So, I want to be able to share my thought process with you guys. This is, by no means, the ONLY way to go about things. I can’t even say that this is the right way. It’s just how my brain works. And if you’re building or remodeling, it might help you wrap your head around the decisions that you’re making.
If you have any questions, please reach out. If you’d like some help deciding on your finishes, I offer a design consultation package that might be perfect for you. Even I have reached out to my design bestie (SHOUTOUT TO KENDALL) for second opinions. You don’t have to do it alone!
1. Narrow Down Your Inspiration
A entire Pinterest board filled with Bathroom design inspiration is great. UNTIL… you get seriously overwhelmed and over stimulated. So, my first tip is to NARROW IT DOWN. Choose your 3 very favorite images and save them together. Don’t get rid of your others, you may want to revisit them later for the smaller detail decisions. But, we want to focus our attentions on your favorites.
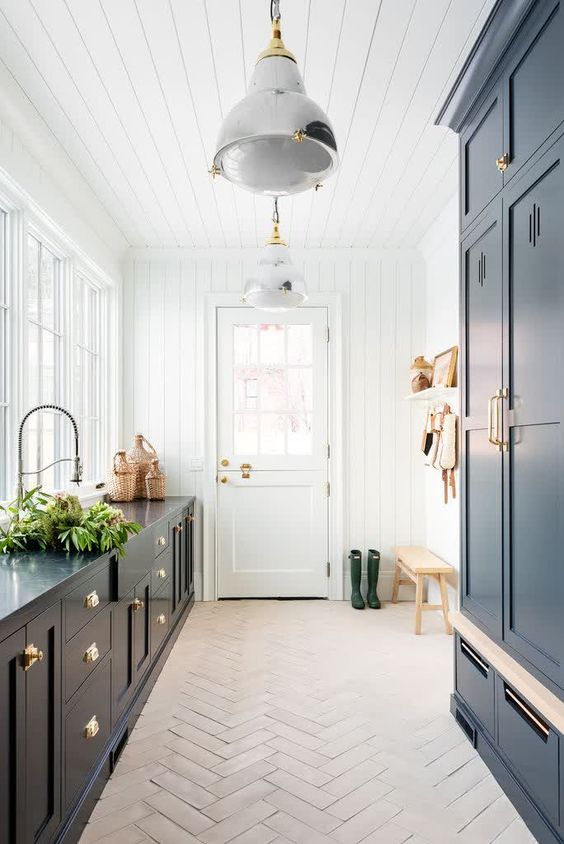
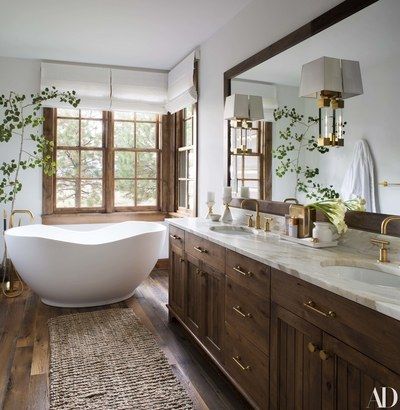
I included my 3 images below. They’re of very different spaces. The first one isn’t even a bathroom. You can draw inspiration from anywhere. I have been feeling very inspired by traditional interiors lately. And I’m so glad that they’re making a comeback. I’m a big believer in design FOR the house and not in spite of it. I live in a rustic, southern, lake house. In order to stay true to that while still allowing my own style to shine through, I’ve decided to stay really warm and cozy with my design choice. I want to stick with the traditional elements in the FIXED items and pair those with more modern, trendy, smaller details. I hope to add lots of texture and pattern while also keeping the palette neutral and simple.
By narrowing down your Inspiration, you should be able to pinpoint what your style is. And if you’re still unsure, it will likely come out in your design choices. Just use your images as a guide for making decisions going forward.
2. Decide on your ONE THING
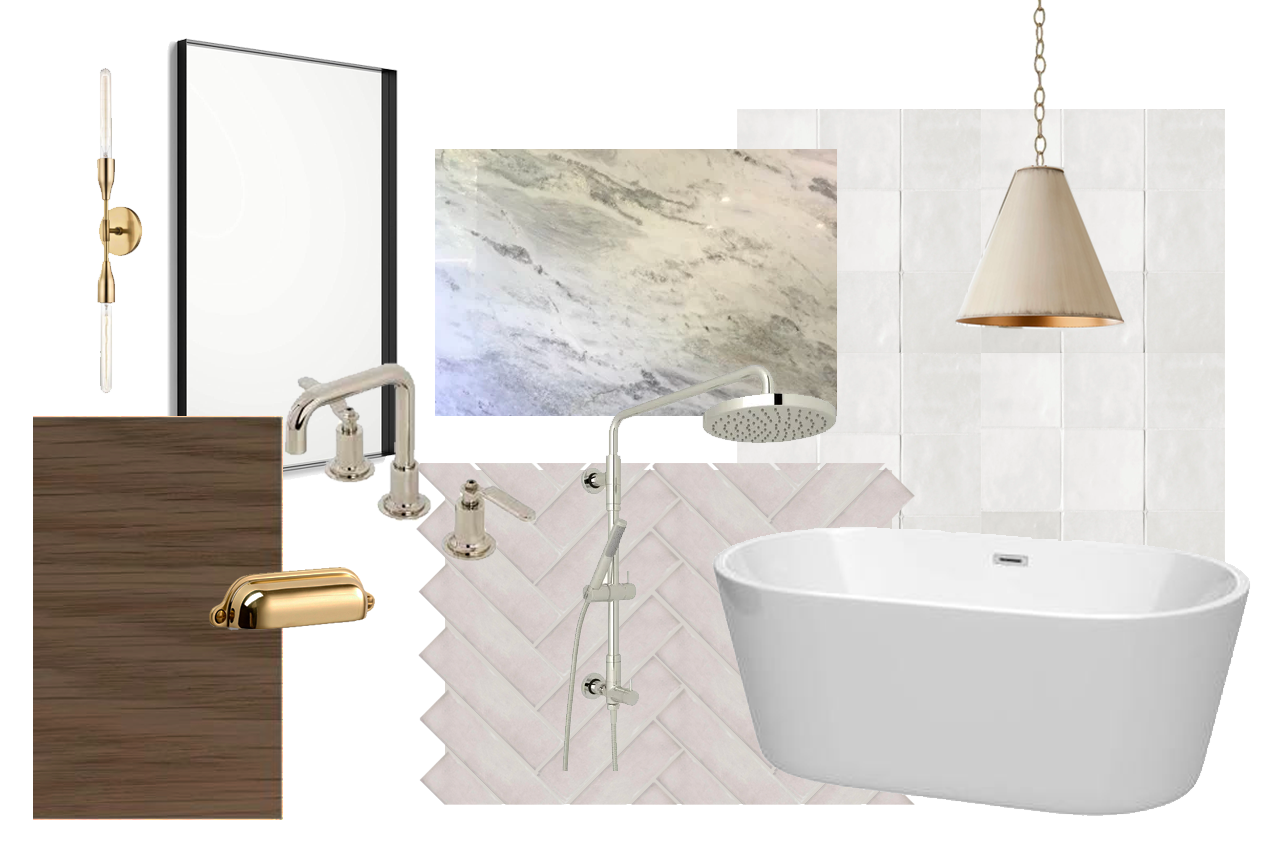
Take a look at your inspiration images and decide whats that ONE THING that you can’t take your eyes off of. Or the thing that jumps out at you that you’re 100% sure you want. Mine was the herringbone taupe floors in the Studio Mcgee image. The moment I saw them, I fell in love. They’re simple, understated, but create so much texture in the space. I also love the warmth of the taupe color.
I ended up finding a faux brick option called Rewind Brick. I love how the brick is such a traditional material. But going with the taupe color and the herringbone pattern is what is going to bring the texture and interest to it. I couldn’t be more excited to get this installed.
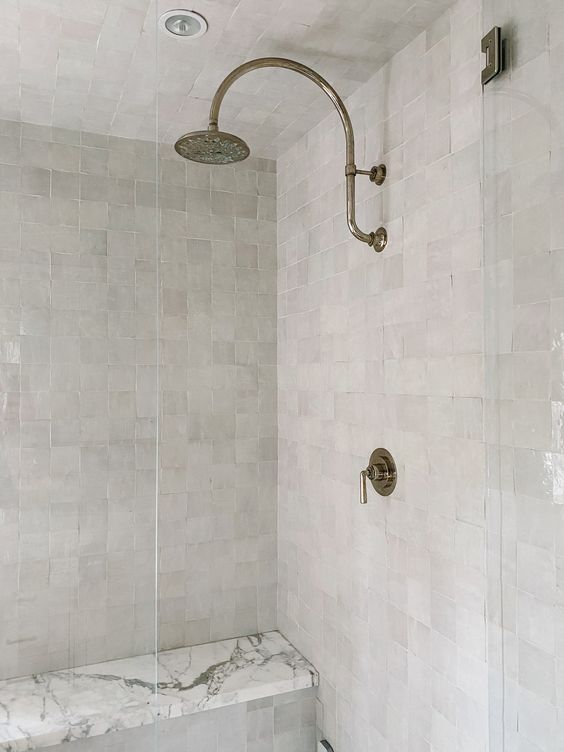
A close second on my list was the fixture in the second image. I love the loose, traditional shape of the shower head and the polished nickel finish. It’s giving me traditional but dramatic vibes and I CANNOT GET ENOUGH. Which leads me to my next step.
3. Choosing a Metal or a Metal Combination
The metal you choose in your space is SO IMPORTANT! In my opinion, a trip quick to home depot is not the answer here. I’m not saying that you have to spend thousands of dollars on fixtures, though. Amazon, Wayfair, and even Home Depot (online) have GREAT options if you know how to look. The metals you’ll likely be choosing from are Chrome, Brass, Antique Brass, Brushed Nickel, Polished Nickel, Oil Rubbed Bronze, Gold, Stainless Steel, and Black. There could very likely be other as well, but those are pretty standard.
First question. Do you want to mix metals? Personally, the answer to this was YES for me. If you’re doing a really small space with only a few fixtures, its much easier to stick with one. But since my closet and bathroom with have LOTS of knobs and pulls and metal fixtures, I wanted to create some dimension by using a mixed metal palette.
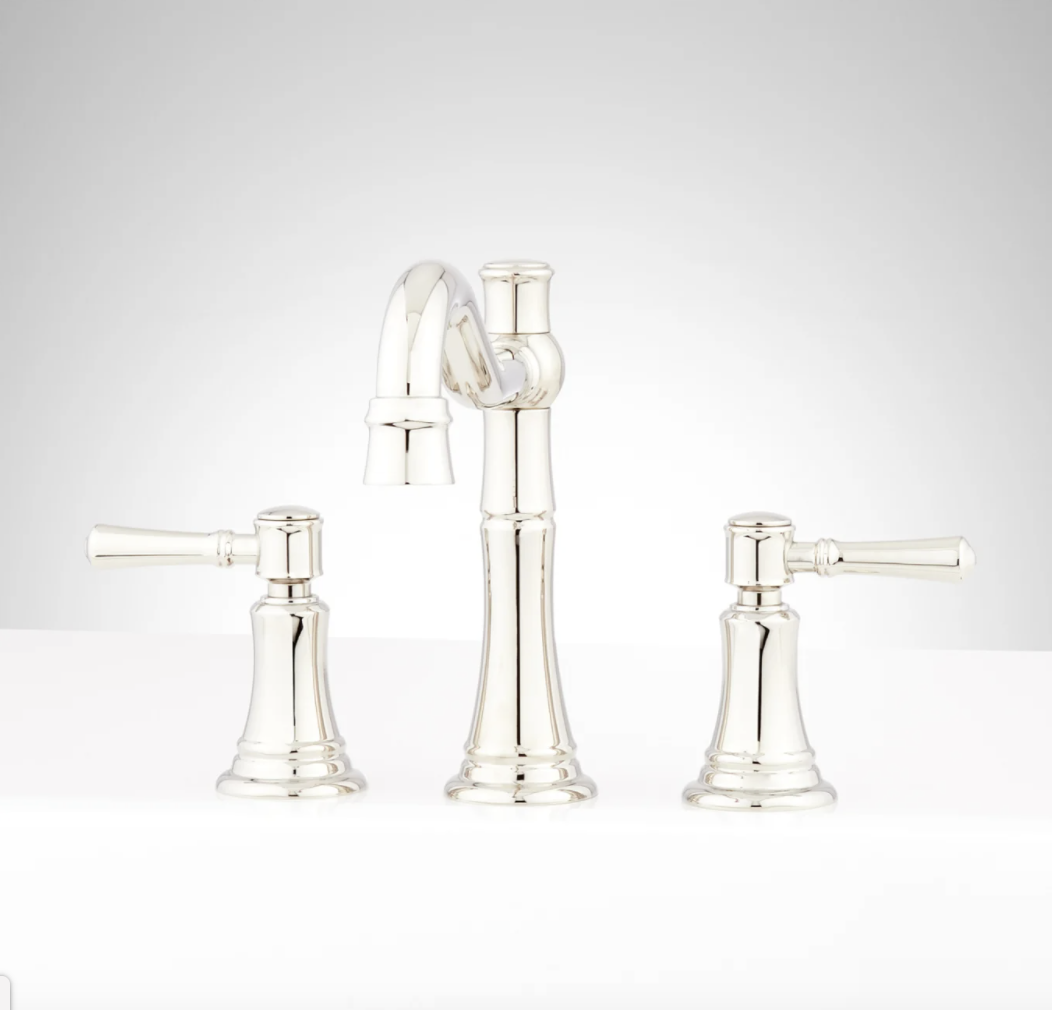
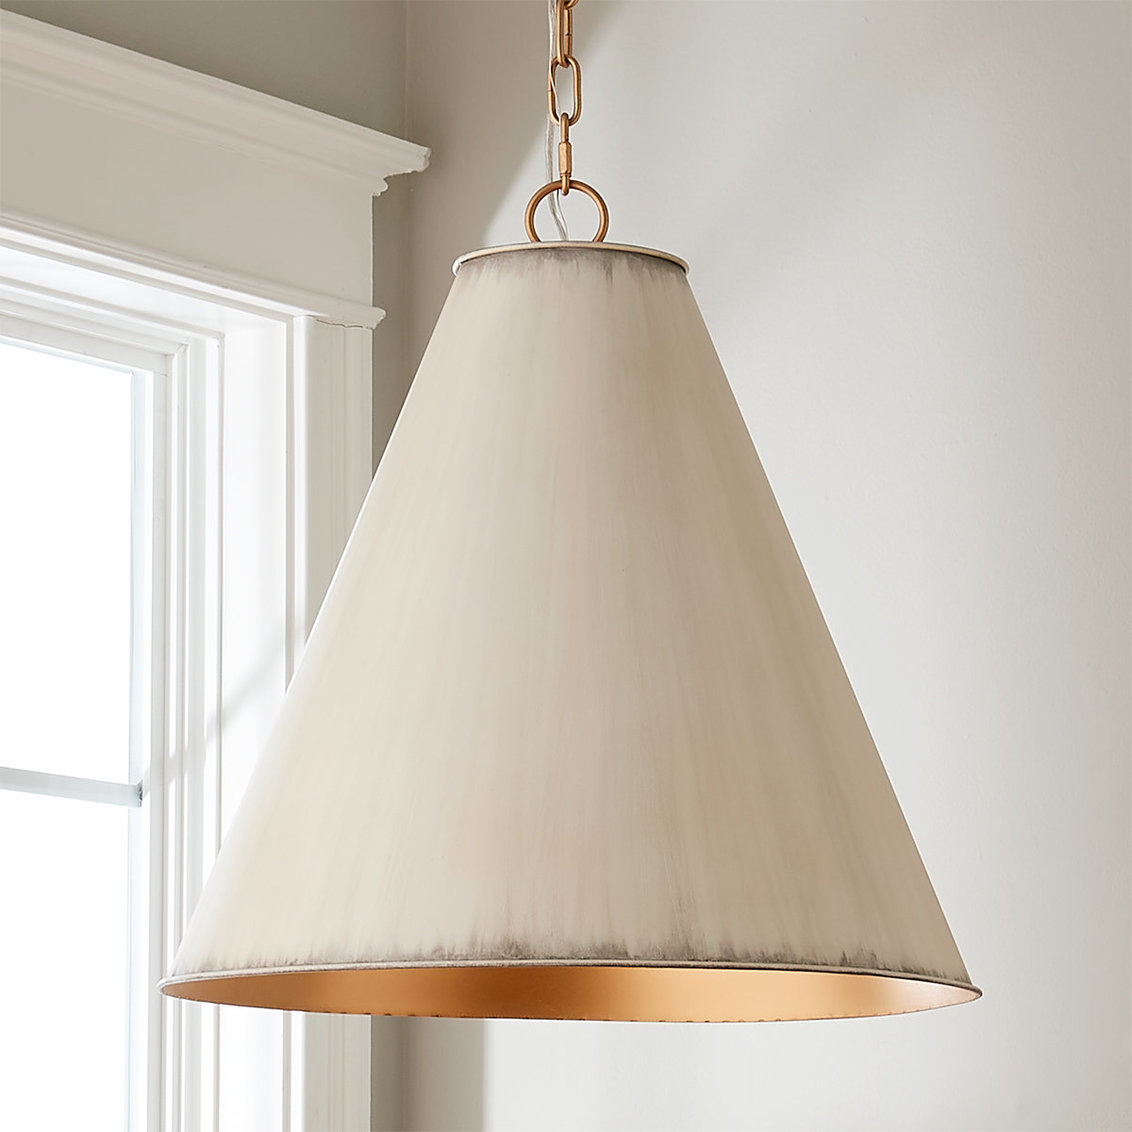
Gold & black metals are all the rage right now. And TRUST ME, I adore them. I plan to use gold or antique brass in the kids bathroom on day, but if you’ll remember my inspiration images, that fixture that I LOVE is polished nickel. Polished Nickel is as timeless as anything. It’s a much warmer silver color than chrome or stainless and the polished finish makes it look so expensive, in my opinion.
I plan to use gold (un-lacquered brass) hardware on my cabinets and possible use some black on the mirrors. My light fixtures are gold as well. But I’m so excited to see the dimensions that comes through as the metals reflect and pull off each other.
Below is my bathtub fixture and one of the light fixtures I chose. Click on the image if you’d like to shop.
4. Warm or Cool
This should be easy to determine based on your metal choices so far and your inspiration images. Cool tones are blues, purples, and greens. A gray that might pull blue would fit on the cool side of the color wheel. Warm tones are the opposite. Red, Orange, Yellow – this is obviously where I’m headed.
5. Tile Selections
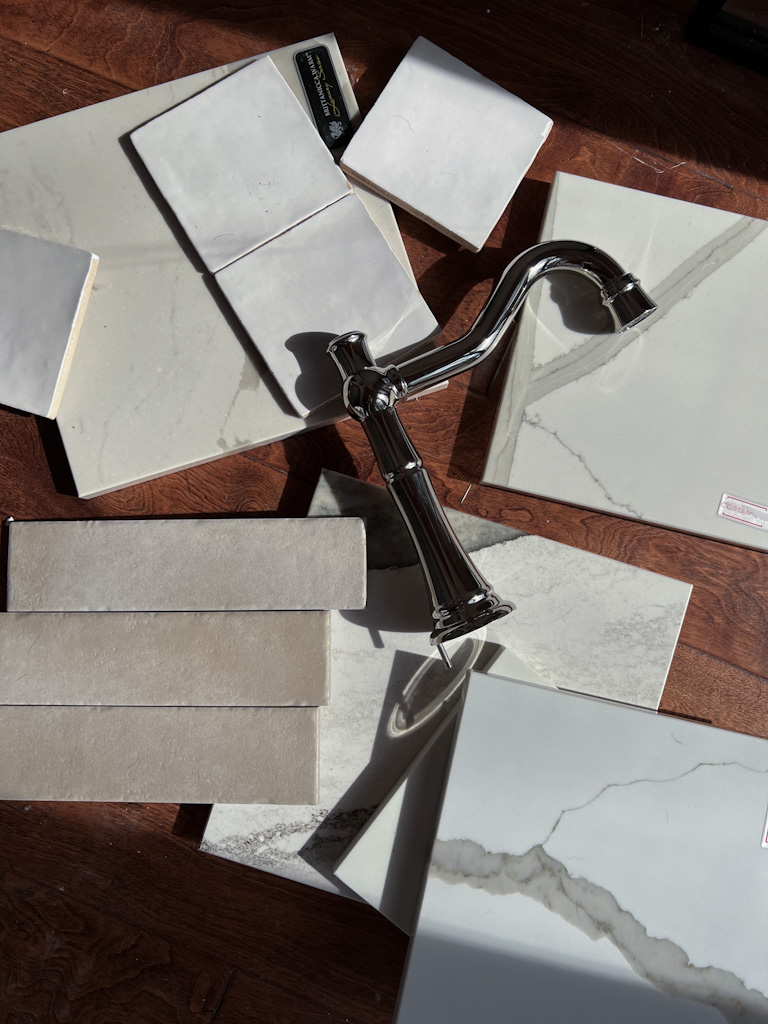
At this point, I’ve already chosen my floor tile. But maybe you haven’t. This is a great time to look back at those images and see if any stick out to you. If they do, great! Mimic that! Go to your local tile supplier (maybe not Home Depot or Lowes – go somewhere REAL) like Prosource or Daltile or Floor & Decor and see something in person. Bring in your inspiration and the associates should be able to push you in the right direction.
If you’re wanting a marble look tile, like so many people do, then I suggest referring to #4 on this list and checking your color tones. Don’t go too cool if you want your space to feel warm. I would look for veining with some taupe and brown in it in addition to the typical gray.
Then look at your shower/bath tile. You’ll want the size, shape, and color to compliment the floor but not be the exact same. If you went with large format (12x 12 or larger) tiles on the floor, choose a smaller size for wall tiles. If you went solid and simple on the floor, think about going a little louder on the walls or visa versa.
Since my floor tile is rectangular and in a herringbone patter, I knew that my shower had to be a basic pattern, so a simple flat lay was the answer. But it also couldn’t be rectangular. So I opted for a square zellige tile. This is another moment where I referenced my inspiration. That image with the rounded fixtures used a small scale zellige tile in whites and pearls. I decided to mimic that as best I could!
6. STONE
This is my favorite step. There is nothing more amazing to me than seeing a LARGE piece of stone that came out of GOD’S earth (I also love the man-made stuff). I knew that because my tiles were both solid colors, I wanted to bring the DRAMA in my stone. I settled on a gorgeous warm marble with dramatic coloring and veining. I could NOT be more excited about this. If you followed along in stories today, you likely saw it all unfold.
Let’s talk types of stone really quick. Here is the condensed version.
Marble – natural, very porous, stains and scratches more easily than it’s counterparts. I typically don’t like to use it in high traffic areas due to upkeep.
Quartz – Man-made and SUPER DURABLE. Usually more expensive but heat and stain resistant. Can be create to minic the look of marble
Quartzite – natural, durable, milkier than marble in most cases, stain and scratch resistant – no cons here, really
Granite – what tons of people have, the most durable but the looks is more grainy and less veiney (if that makes sense)
If you were around for my best friends house build, we went with ‘Mont Blanc’ Quartzite in her house. My mom’s kitchen is also Quartzite but a color called ‘Tahiti’. I’m a quarzite fan. I usually stray from marble because of upkeep. However, I fell deeeeeep for this piece. My bathroom is the least used counter in our house, so I’m confident we can keep it pristine.
I know some of you are like, least used? Where do you get dressed? In my closet. I have a built in Vanity area in my closet where I do my makeup and hair. So I went with a quartz remnant in that space to make sure it was super durable.
I encourage you to go to a stone yard and walk around. Find things you like and don’t be shy about asking for lots of quotes. In the end, it’s your house. YOU have to live with it.
7. Make a Mood Board
I use photoshop to create mine, but Canva is a free software online (canva.com) that will allow you to put all of your images on one sheet. This will help you visualize your choices. Mine is below. It will likely tweak and change as time goes on. But I can’t wait to see it all come together! Hope this helps you make decisions that you LOVE!