Have you ever dreaded entering a space in your home? That’s how I felt about our tool shed. I couldn’t find anything. I kept buying multiples of items I already had just because I couldn’t locate the one I KNEW I had. But now, It’s cuter and more functional than it’s every been! Here is all the info on my DIY Tool Shed Makeover
Don’t have a tool shed to makeover? Check out the 5 Tools I think you need to get started DIYing!

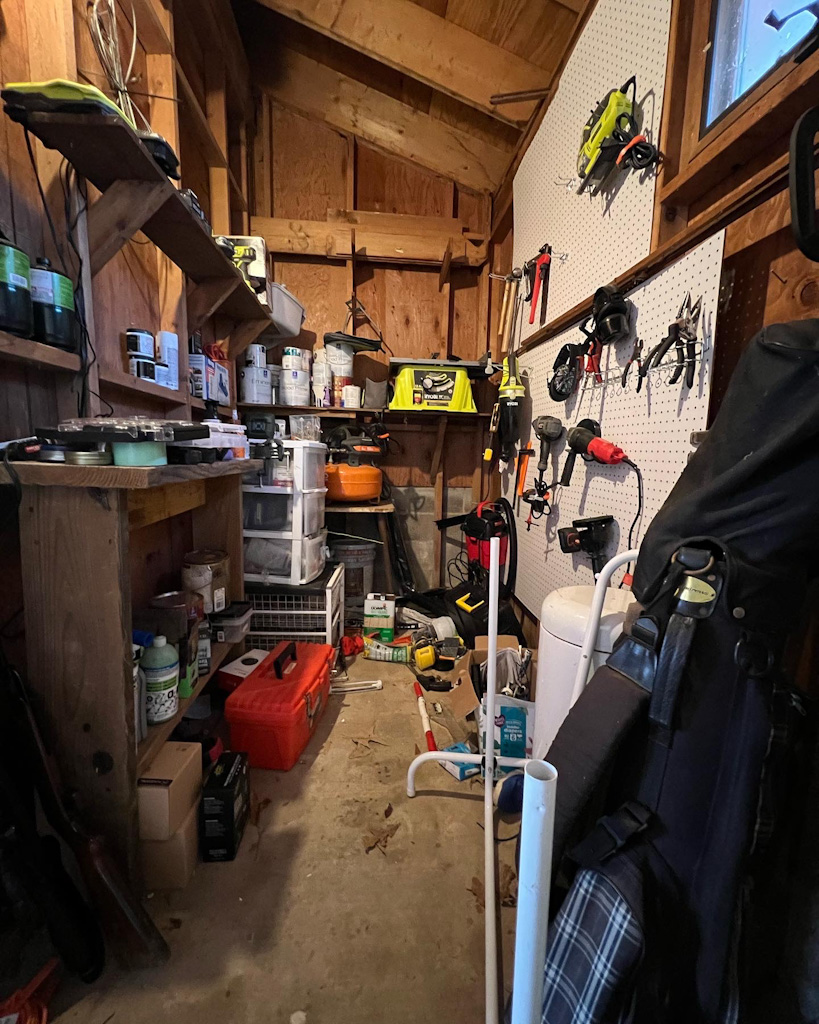
Here is a look at the before. It was crowded and cramped. As a DIY blogger, tools are an everyday necessity and I wasn’t able to find most of mine in the heaps of unorganized chaos. It was an unfinished space, like most sheds. No wall paneling or flooring. The old wood was discolored and the makeshift shelves and tables were created with no real plan in place. I knew it was time to give it a much needed makeover.
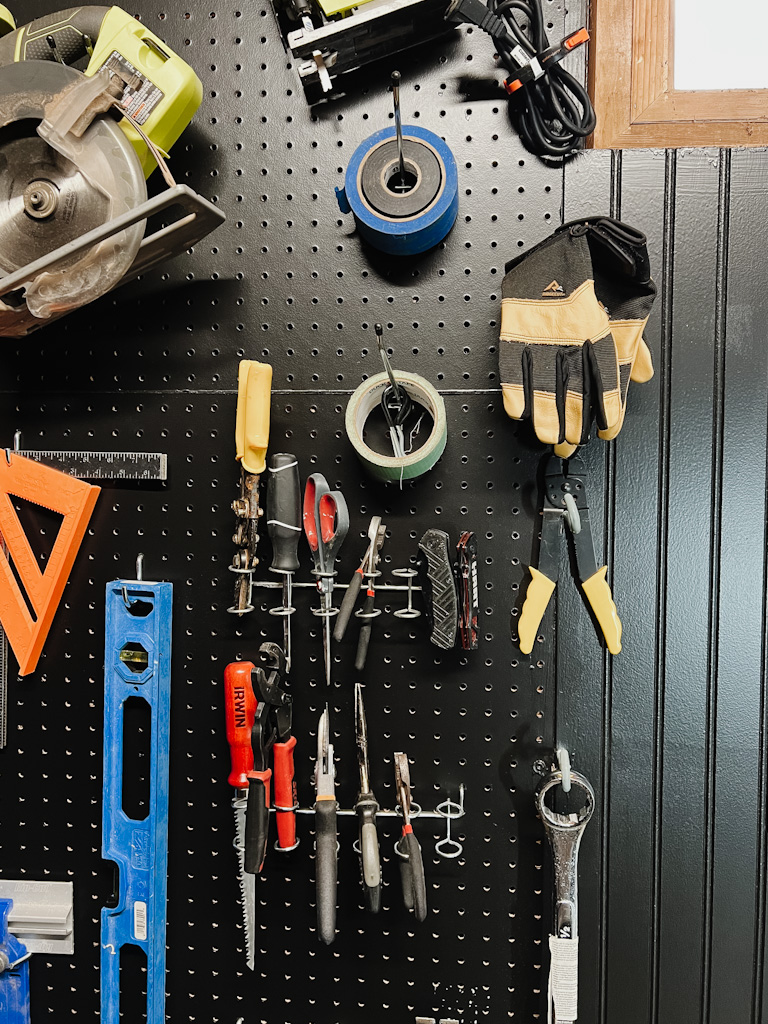
The whole process took about a week. I started by clearing everything out and removing the old shelves and peg boards. I tried to reuse as much of the old wood as possible. I rehung the peg boards in a more symmetrical and space saving way and hung many of my tools on the wall using these peg board hooks. And I purchased several sheets of bead board paneling from the hardware store. After hanging the paneling, I painted it and the peg boards ‘Limousine Leather”by Behr. I bought a simple black metal storage rack and some plastic bins for smaller parts and pieces. I used the reclaimed wood to create some shelving (with these shelf brackets) and screw in wall hooks to hang my larger tools. I tried to label as much as much as possible with this label maker to keep myself organized and I also added a larger, brighter shop light!

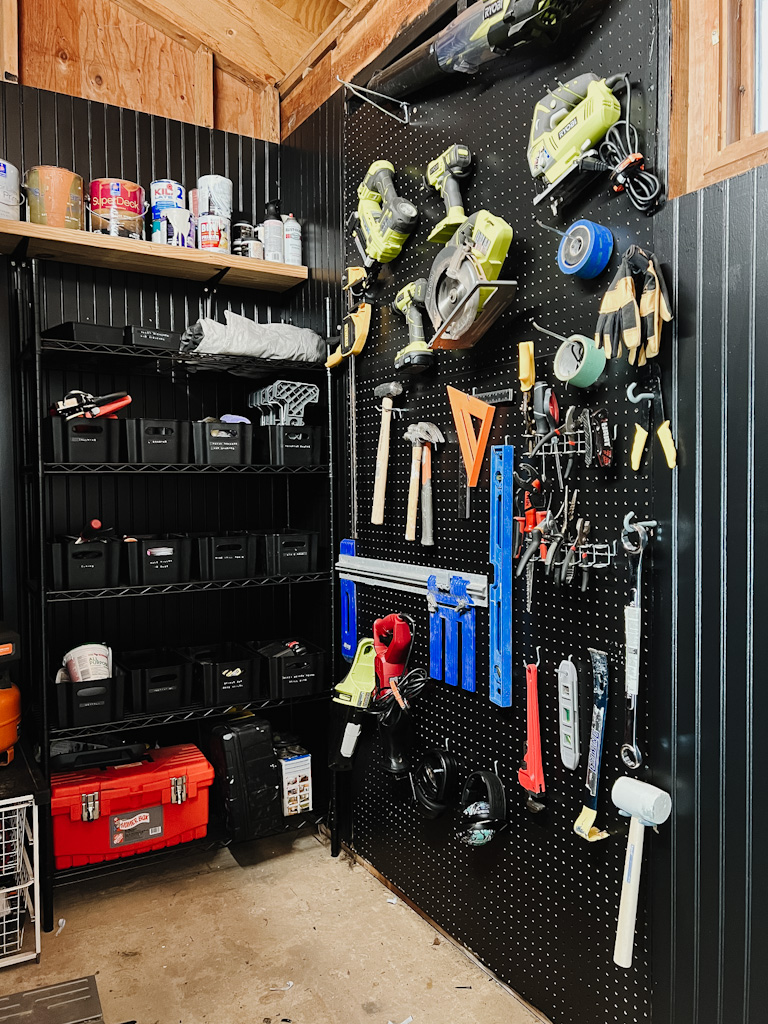
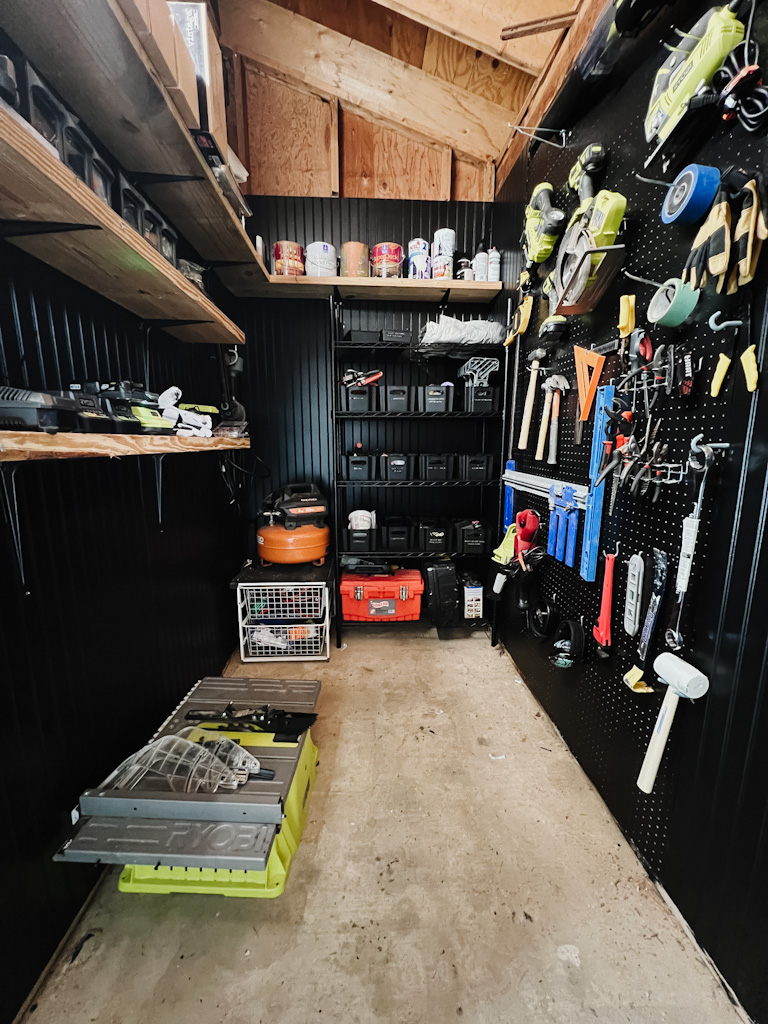
Overall, it’s a space I truly enjoy visiting now! I don’t feel overwhelmed by the mess and I’m able to locate what I need quickly! It’s made my projects so much easier, faster, and simpler! Who knew that in order to DIY the rest of my house, I needed to start with a DIY Tool Shed Makeover.